
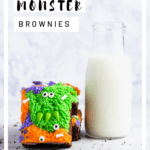
These monstrous Halloween brownies are every bit as easy as they are spooky. And with just a few store bought ingredients, you can whip up this frightful treat in just 20 minutes.
You guys know this girl loves a good Halloween treat. I mean, we haven't even hit the first official day of fall and here I am already adding new Halloween content to the blog.
I can't help myself. It's a problem. #SorryNotSorry
But you know what I love even more than Halloween goodies?
EASY Halloween goodies!
And these monster brownies are the best of both worlds: Spooky Halloween treat on the outside, store bought time-saving sweetness on the inside.
Don't worry, if you're all about homemade treats, I've got you covered with some delicious options below. But if you're not, this tutorial has some easy store bought options to save you time.
How to make these Halloween brownies
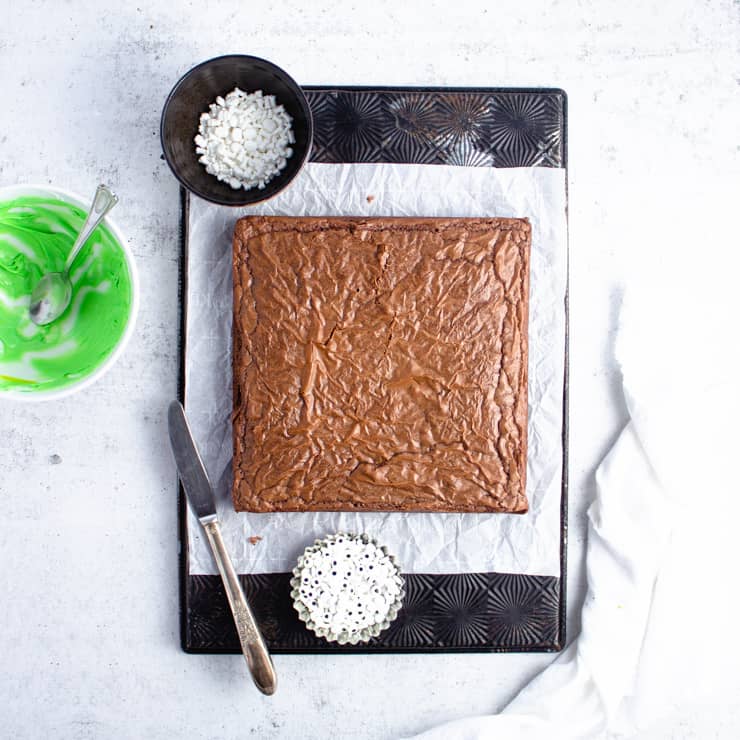
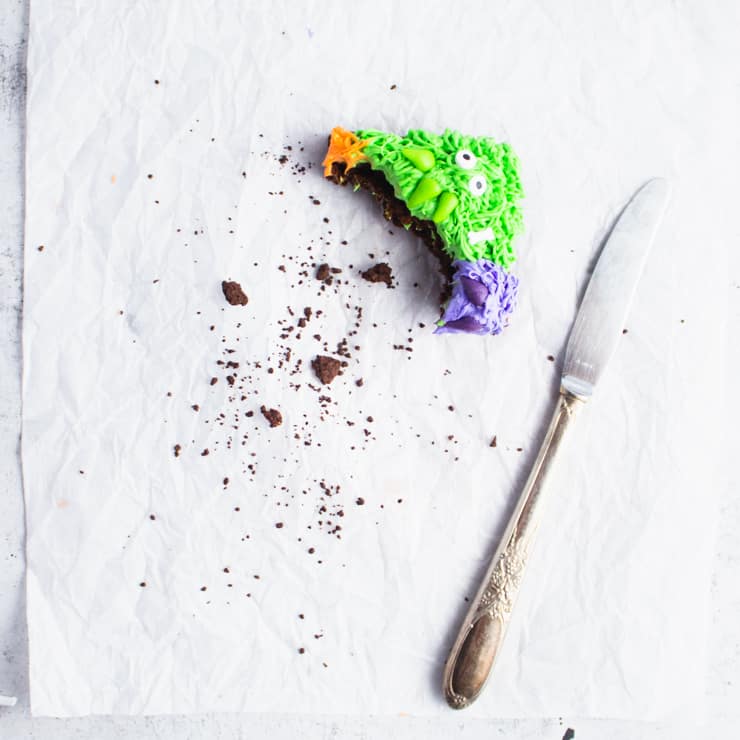
First, make your brownies.
If you want to make your own, I highly recommend the brownie recipe from these s'more brownies. They're extra thick, chewy and fudgy.
You can also opt for a store bought brownie mix or even buy the brownies, already baked, from your local bakery. Let's be honest, you're going to cover them in frosting so no one will be the wiser.
Whatever you decide, the rest of this recipe is formulated around a 9"x 9" square of brownies, so that's something to keep in mind.
Second, make your frosting.
You'll need roughly 1 ½ lb of frosting for this recipe. If you're looking for a traditional buttercream, this is my favorite recipe for Italian meringue buttercream, although it does take about 20 minutes to make.
For something a little easier but still homemade, I highly recommend this marshmallow buttercream recipe.
But if you're looking to save time, store bough works just as well. For store bought, you'll need about 1 ½ jar of frosting, and I recommend a fluffy frosting over a creamy frosting as the fluffy kind makes for a "hairier" look.
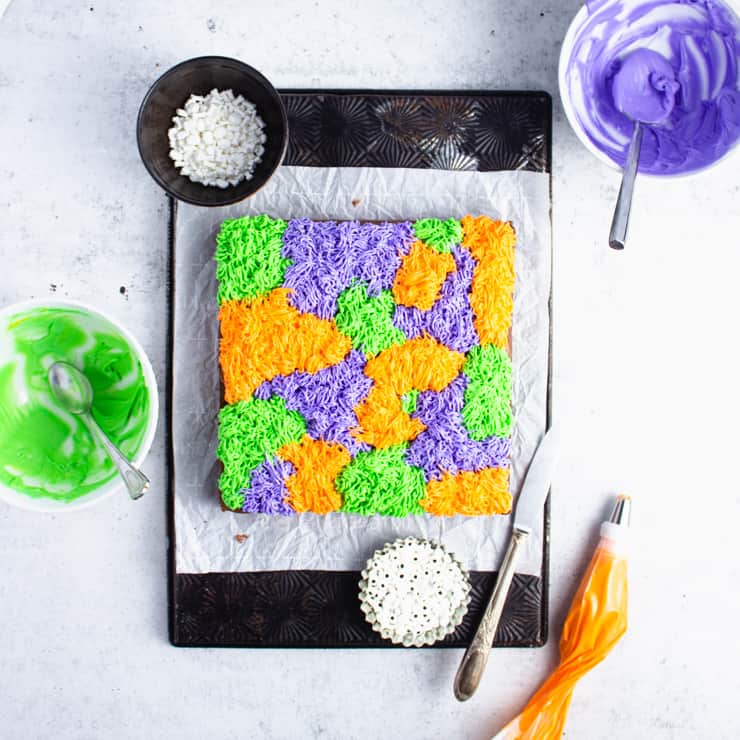
Third, frost your brownies.
Separate your frosting evenly between three bowls. Use food gel coloring to tint one green, one orange and one purple, adding food coloring until you reach the shade you want.
Spoon the frosting into three separate piping bags with a Wilton tip 233 on the end.
Pipe the frosting onto the top of your brownies, releasing as you pull the bag up and away to create the "hair." Continue adding frosting until the entire top of the brownie is covered.
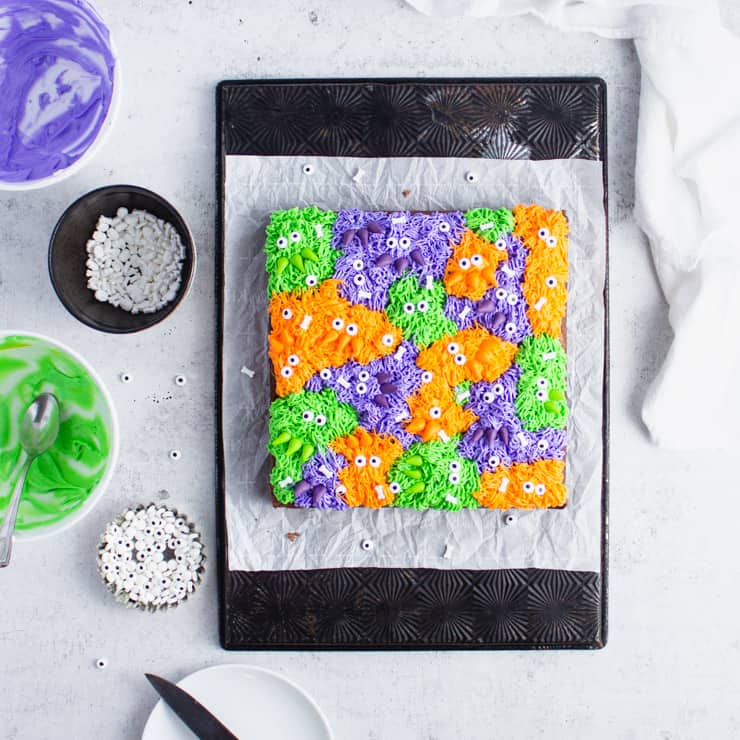
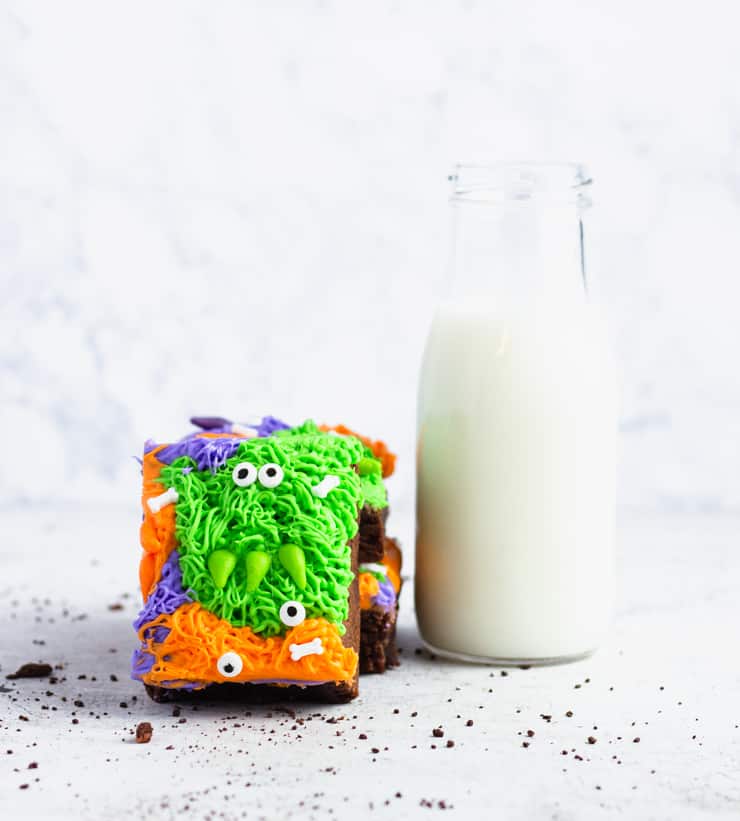
Finally, add the finishing touches.
To finish off the brownies, add royal icing eyes, bone shaped sprinkles and colored pieces of fondant or candies.

Tips for making these brownies
- Working ahead: If you want to save some time by making your brownies in advance, they can be kept for 3-4 days at room temperature in an air tight container or plastic wrap.
- Store bough frosting: I recommend a fluffy frosting over a creamy frosting as the fluffy kind makes for a "hairier" look. A creamy, stiffer frosting is more likely to simply stand straight up.
- Food coloring: Be sure to use a gel food coloring when tinting your frosting as a liquid food coloring will change the consistency of the frosting. If you're going for a really pigmented color, the liquid food coloring will make the frosting too runny.
- Fill that piping bag like a pro: Spoon your frosting onto a large piece of plastic wrap, roll and twist the ends. Trim one end so there’s about ½” in length, drop your frosting into the piping bag (short end first) with the tip already on and pipe!
- Piping with just one tip: If you're working with just one 233 tip, I recommend piping just one color at a time and using piping couplers to make it easy to remove the tip. Be sure to rinse out the tip between each color.
- Storing frosted brownies: While the finished brownies don't store well because you can't cover the frosting without ruining the design, you can place them in an air tight container that can be closed without touching the frosting. These brownies will keep for 3-4 days from the day they were baked.
Did you make this recipe? I’d love to hear how it went in the comments below. Better still, snap a photo and tag it on Instagram with #thesimplesweetlife. I love seeing your creations!
PrintRecipe
Monster Brownies
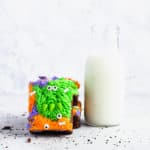
These monstrous Halloween brownies are every bit as easy as they are spooky. And with just a few store bought ingredients, you can whip up this frightful treat in just 20 minutes.
- Prep Time: 20 minutes
- Total Time: 20 minutes
- Yield: 12 slices
- Category: Dessert
- Cuisine: American
Ingredients
- One 9"x 9" square of brownies
- 1 ½ lb frosting
- Food gel coloring in green, orange and purple
- Royal icing eyes
- Optional: sprinkles and fondant for decorating
Instructions
- Start with a 9"x 9" square brownie. You can buy these at the store, as a box mix or use this recipe to make your own.
- Make 1 ½lb of frosting using this recipe for Italian meringue buttercream, marshmallow buttercream or by buying it at the store.
- Separate your frosting evenly between three bowls.
- Use food gel coloring to tint one green, one orange and one purple, adding food coloring until you reach the shade you want.
- Spoon the frosting into three separate piping bags with a Wilton tip 233 on the end.
- Pipe the frosting onto the top of your brownies, releasing as you pull the bag up and away to create the "hair."
- Continue adding frosting until the entire top of the brownie is covered.
- To finish off the brownies, add royal icing eyes, bone shaped sprinkles and colored pieces of fondant or candies.
Notes
- Working ahead: If you want to save some time by making your brownies in advance, they can be kept for 3-4 days at room temperature in an air tight container or plastic wrap.
- Store bough frosting: I recommend a fluffy frosting over a creamy frosting as the fluffy kind makes for a "hairier" look. A creamy, stiffer frosting is more likely to simply stand straight up.
- Food coloring: Be sure to use a gel food coloring when tinting your frosting as a liquid food coloring will change the consistency of the frosting. If you're going for a really pigmented color, the liquid food coloring will make the frosting too runny.
- Fill that piping bag like a pro: Spoon your frosting onto a large piece of plastic wrap, roll and twist the ends. Trim one end so there’s about ½” in length, drop your frosting into the piping bag (short end first) with the tip already on and pipe!
- Piping with just one tip: If you're working with just one 233 tip, I recommend piping just one color at a time and using piping couplers to make it easy to remove the tip. Be sure to rinse out the tip between each color.
- Storing frosted brownies: While the finished brownies don't store well because you can't cover the frosting without ruining the design, you can place them in an air tight container that can be closed without touching the frosting. These brownies will keep for 3-4 days from the day they were baked.
Nutrition
- Serving Size: 1 slice
If you liked this recipe, you might also like...
Neli says
These brownies look adorable! What a fun and delicious treat for Halloween or (any other kids' party)! Thank you for the tips you included with the recipe, they really help! I might give this recipe a try with natural food coloring.
Jess says
Oh my gosh! These are adorable! As a teacher, I now know what i am making for my students for Halloween! Thanks so much for sharing this!
Sue says
I agree, these are really adorable and fun! What child wouldn't love to eat these or even help with the baking 🙂 I know someone who would!!
Michelle says
I have to say...these monster brownies are brilliant! I always struggle with Halloween themed treats because I'm not into the gruesome looking ones and my head hurts just thinking about what to make.... But these are so colorful, easy and fun. I LOVE them! Thank you!
Amanda says
What fun brownies for Halloween! I can't wait to make these, and I love those vibrant colors.
Sophie says
My kiddos will love this so so much. Thanks a lot.
Sharon says
These Monster Brownies would be a hit at Halloween parties for sure! I bet kiddos love them.
Anne Lawton says
These brownies are so cute! I'm going to a Halloween party, I think I will make these to bring along with me!
SHANIKA says
OMG! These Brownies look so cute! I love how easy it is! I definitely need to try this with my little as a fun way to incorporate Halloween!
Rebecca Blackwell says
OMG these are sooooo cute! I just love this idea! I have a couple of nieces who are obsessed with monster everything. I am totally going to invite them over so we can make these together. Thanks so much for such an adorable idea!
Eden | Sweet Tea and Thyme says
These brownies are so much fun! I know my son and his friends will absolutely love these for their Halloween party at school.
Anna says
OMG, they're really soooo cute! They're colorful and bright. And I bet they're also pretty delicious. Sure, kids will love it!
Thank you for this recipe, Claire. You're so creative!