
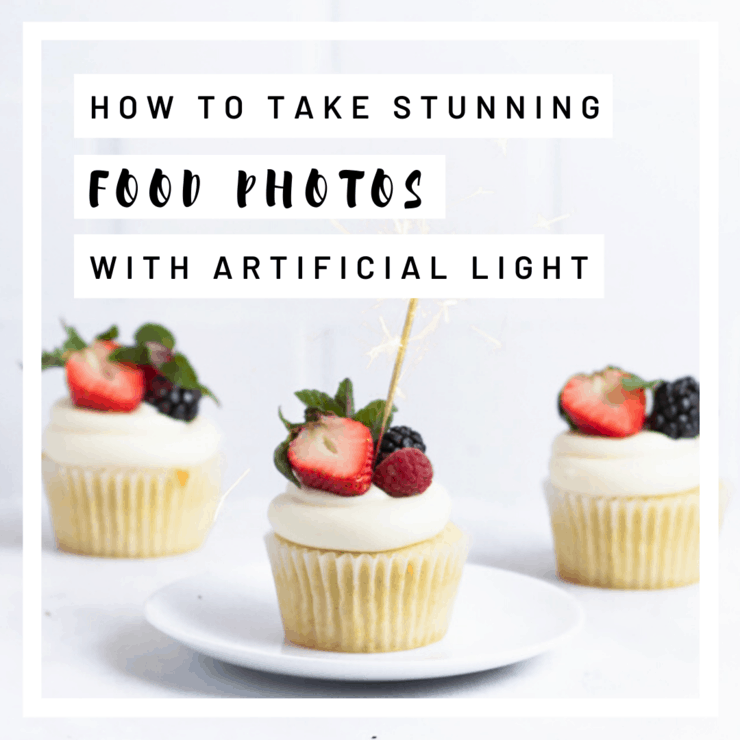
If you want to explore artificial light for photography, specifically as it relates to food photography, this post will teach you everything you need to know to create a basic artificial light set up. Start taking beautiful photos on YOUR schedule, no natural light necessary.
Disclaimer: Please note that some of the links below are affiliate links and I will earn a commission if you purchase through those links. I use all of the products included in this post and recommend them because they are products I personally love and trust.
When I first started my food photography journey, I truly thought the only way to get stunningly-lit photos was with natural light.
And don’t get me wrong, natural light is GORGEOUS. But sometimes, we just don’t have access to it. Maybe you work a full time job and the only time you have to shoot photos is well past dark. Or maybe you live in a part of the world where winter comes with 30 days of little to no light.
The good news: You don’t have to have natural light to still get gorgeous light. That’s right, you can create beautiful artificial light in the comfort of your own home. What you DO need is a little artificial light know-how and that’s exactly what I’m serving up today!
Advantages and disadvantages of artificial light
Now, before we dive into my setup, I want to be totally frank about the advantages and disadvantages of artificial light.
To me, the single greatest advantage is being able to shoot on MY schedule and not the sun’s. Like many of you, I work a full-time job in addition to blogging, so being able to shoot in the evenings means that I don’t have to dedicate my entire weekend to shooting photos. Major plus.
Another advantage to shooting with artificial light is that it doesn’t vary in the same way that natural light does depending on the time of year/day, location or weather. What you add in terms of learning how to work with different kinds of gear, you make up for in not having to deal with multiple kinds of light across a single shoot.
However, artificial light has a key disadvantage compared to natural light: the need for additional equipment. If you want to create stunning light with an artificial setup, you’re going to need some basic equipment to do it. Now, that’s not to say that it has to break the bank: My first setup cost about $100 and my current setup is around $160.
My food photography lighting setup
So lets talk about what you'll need for this set up, how to put it all together and how to tackle basic camera and flash settings to get stunning photos.
Basic gear
Below are the basic pieces of equipment you'll need for an artificial light photography set up.
Speedlite/external flash
For lighting my images, I use the Yongnuo YN560-IV Speedlite. Keep in mind that not all speedlites work with all brands of camera, so be sure to check the specs before making your purchase. These external flashes cost about $50 and are a great place to start if you’re new to working with speedlites.
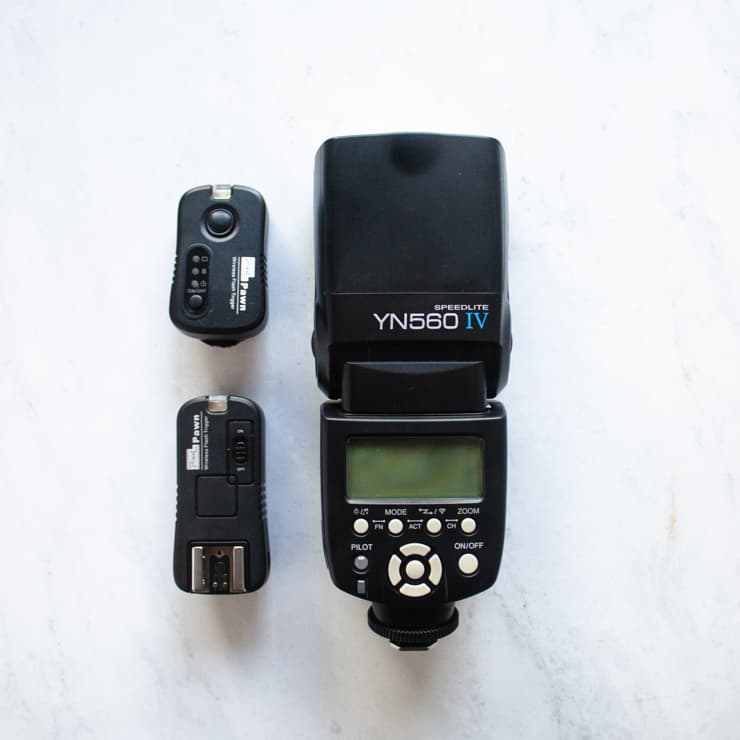
Trigger
Since we’re not going to be using this flash on top of the camera, you’ll also need to pick up a trigger to synchronize your camera’s actions (i.e. taking the picture) with your flash’s actions (i.e. setting off the flash). Again, what you use may depend on your camera and the flash, but I personally use the Pawn Wireless Flash Trigger by Pixel Enterprises Limited for Canon. I picked it up on Amazon for about $10 many, many years ago and it doesn’t seem to be available anymore. For a Canon, like I use, the Yongnuo RF-603C II Wireless Flash Trigger Kit is another great option.
Diffuser
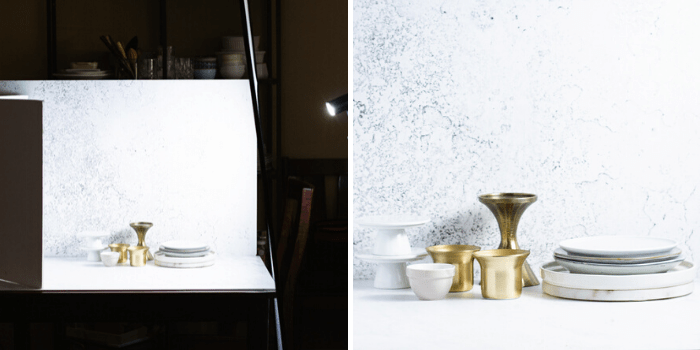
I currently have two diffusers that I use and love: a foldable 47”x71” diffuser and a 47” umbrella softbox. I’ll get more in-depth on the difference between these diffusers and how I use them in a post on manipulating artificial light, but know that both are a solid choice for beginners.
If you’re starting out with little to no budget and need a really economical option, you can also make your own using a large picture frame and some white fabric. To make it, simply removed everything from the frame (glass and all) and roll the fabric under the metal pieces meant to hold the glass and picture in place. I used this kind of diffuser when I first started out and all in all, it cost me about $10-15 to make.
Reflector
Like the light diffuser, there are plenty of commercial options available for reflectors, but to this day I still use a piece of foam board. All you need is a piece of foam board that has a glossy finish.
To help it stand upright, I cut a line down the center of my board, making sure to cut through only one side. This will allow you to fold the board slightly, which will help it stand on its own and will also allow you to change how you angle the light.
Other helpful pieces of equipment
While these additional pieces of equipment aren't required to create a basic artificial light set up, having them will be very helpful.
Light stand + mounting bracket
Although you can simply set your speedlite on the surface you’re shooting on, having a light stand allows you to do a lot more with your light, like changing it by moving it farther away as well as up or down.
I personally use a 6ft light stand from Neewer and an Anwenk swivel mount to attach my speedlite to the stand.
Tripod
Another helpful piece of equipment to have when you’re shooting with any kind of light is a tripod. This not only frees up your hands to do other things, but is crucial if you’re shooting with a slow shutter speed. Manfrotto carries a great line of tripods and I personally use this one.
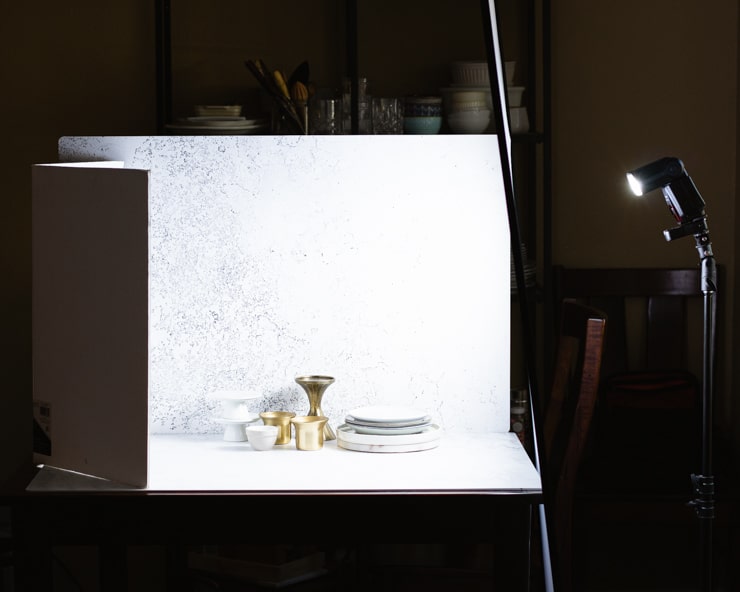
Basic setup
In its most basic sense, my artificial light set up goes speedlite - diffuser - subject - reflector. No matter how you set things up, your diffuser (if you’re using one) should be between your light source and your subject, and your reflector should be somewhere on the opposite side to bounce light back.
We’ll explore modifying your light in an upcoming blog post, but this basic set up is a good place to start to get soft, artificial light.
An introduction to flash and camera settings for artificial light
There’s no one size fits all solution when it comes to camera and flash settings, but I wanted to give you a place to start rather than just leave you hanging to figure it out.
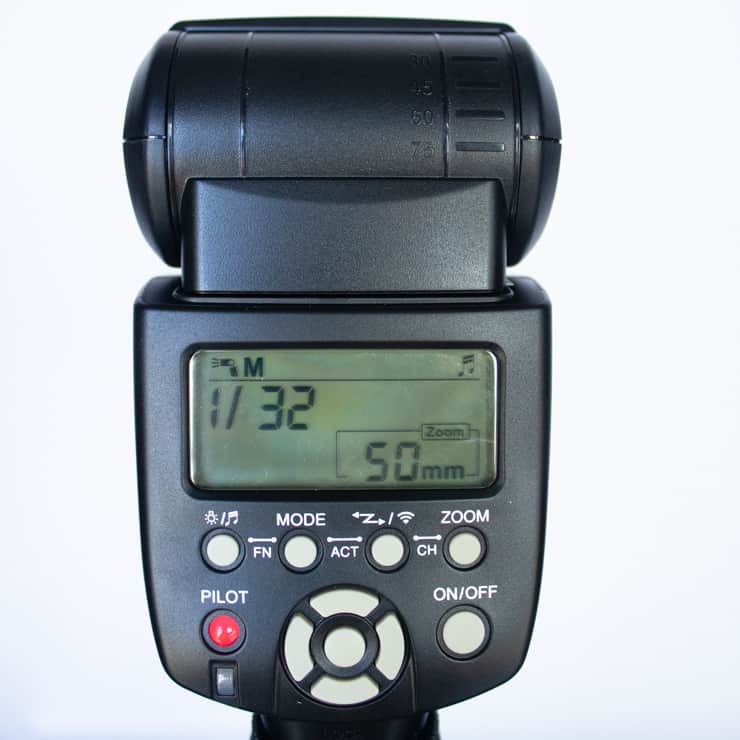
Let's start with the flash.
If you go with the Yongnuo speedlite YN560-IV or something similar to it, you’ll notice that there are settings on the back. These settings control the strength of the light coming out of the flash.
On the upper left-hand side of the screen, you’ll notice a fraction. This number represents the power of the flash. 1/1 is full strength and 1/128 is the lowest strength for the Yongnuo YN560-IV with every fraction between these two being roughly half the power of the fraction before it.
You’ll also notice a number in the lower right-hand corner of the screen followed by the letters “mm”. This setting allows you to select the camera lens you’re shooting with.As a starting point, I like to shoot with my speedlite relatively close to my diffuser with 1/32 power.
Camera settings
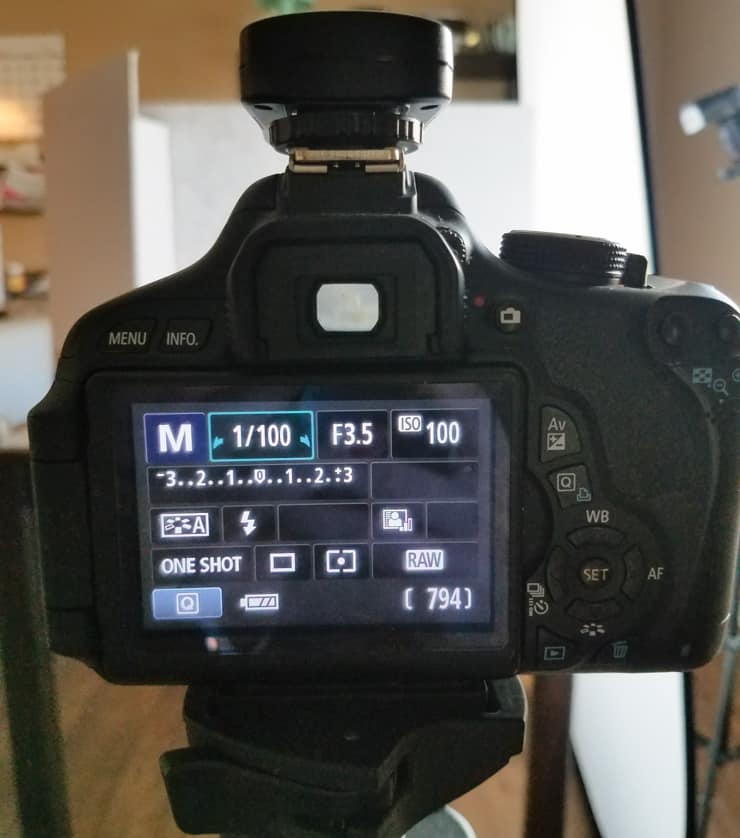
While you can use many of the same manual settings for natural light as you do for artificial light, there’s one setting that can be different and tricky: Shutter speed.
With a speedlite, a shutter speed that is too fast or too slow will result in a dark photo because your shutter either closes before the flash goes off or after it’s already closed. Keeping your shutter speed between 1/100 and 1/200 should help you avoid this problem.
If you liked this post, you might also like…
- 10 food photography props you already own
- 6 tips for photographing foods that melt
- The ultimate guide to hashtags for food bloggers
Update Notes: This post was originally published in November of 2014 but was republished with an updated setup and tips in February of 2020.

Elina Gomez says
I personally appreciate about artificial light. But if you have no opportunity to natural light. Because natural light is the best practice for photography. It helps to capture attractive photography.
Zubida says
Thank you for the wonderful post. I think side lighting is an incredible all-rounder. It works for about each circumstance, so it's a strong aptitude to have at our disposal.
Jesica Taylor says
Thanks for sharing such an informative article as we all know that natural light is very good for photosynthesis purpose but if it is not available then it is not bad to choose artificially light
Nicki Geigert says
Love those tips and I will definitely try to apply those artificial light in my next photoshoot project, and I hope it will work perfectly. In photography, there is a reality so unobtrusive that it turns out to be more genuine than the real world.
Michael Carvalho says
I like your post. Till date been shooting food photography with natural light.
I had always preferred natural light.
Will now be trying with a flash setup.
Great information though.Thanks.