


Summer... it's so hot right now. (If you didn't get this Zoolander references, we can't be friends... Just kidding, I still love your face, just, you know, maybe ever so slightly less).
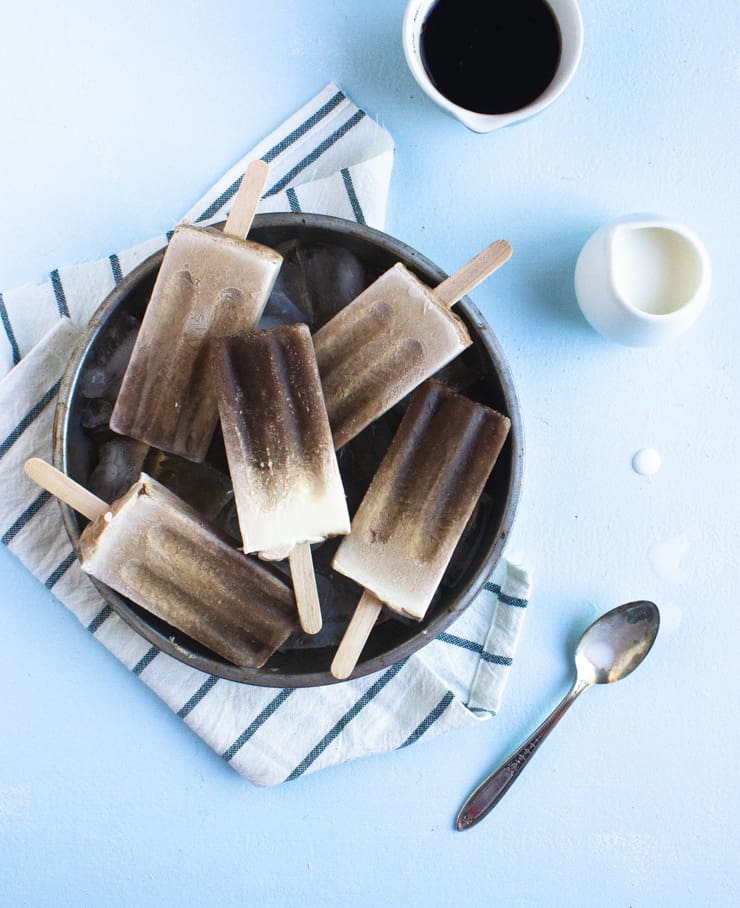
And because it's so sticky, sweaty, drippy, oh-my-god-how-is-it-humanly-possible-to-sweat-there?! hot, I think we can all agree that copious amounts of ice cream are in order. For us food bloggers, ice cream, popsicles and any other cold delight is prime real estate this time of year.
But shooting it, now that's a bear! Almost a literal bear, because wrangling ice cream on a 90F day in an unconditioned apartment while repeatedly muttering "Don't melt, don't melt, don't melt" under your breath is just about as effective as wrangling a grizzly with said drippy cone of ice cream. In other words, no bueno.
So if shooting ice cream and other foods that melt have you in the drippy dumps, here are my 6 best tips on photographing foods that melt without losing your cool (or you're damn mind).
Work in a cool space
If you're lucky enough to have a cool space in your home or the location of your shoot, work there. Cool basements, walk-in refrigerators/freezers, or even just a space in the shade will help keep your melty foods, well, less melty. Although these cool spaces may not have ideal lighting, they're a great place to prep and set up your shot.

Chill all dishware/flatware
Chill, dude... you're flatware, dishware and pretty much anything you plan to use in your shoot. Sans napkins and towels, perhaps. The cooler you can keep your props and anything else your cold food will come into contact with, the cooler your food will stay. Personally, I like to freeze my props to keep them extra chilly, and if it's possible, I'll even style my food in the dishware I want to photograph it in, and then I'll freeze it all together. Easy peasy, ice cream freezy.

Prep as much of the shot beforehand as possible
No matter what you do to keep your cold foods cold, they're going to eventually begin to melt... And it's always sooner than you'd hope for it to be. This is where planning ahead really becomes your best friend. Personally, I like to lay out my shot and snap a few photos before I add the cold food.
Use a cold marble slab or baking sheet between (or even during) shots
Sometimes your props just aren't made out of materials that freeze or conduct cold very well. And that's a bummer. BUUUUUT not the end of the world. A great way to extend the life of your shoot: keep a cold slab of marble or a frozen baking sheet on hand to park your cold foods on while you rearrange props or reorganize your shot. If you don't have time to pop your baking sheet in and out of the freezer, you can keep it cold by placing a couple of ice packs under it. Badda bing, badda boom, cold food is cold.

Scoop and freeze
One of my favorite tricks when I'm working with ice cream is to pre-scoop everything. Simply let your ice cream sit on the counter for a few minutes until it's softened enough to scoop, and then scoop it into a cupcake pan. Freeze and voila! Your ice cream is in perfect serving sizes and chilled all the way through.

Work with the drip
If all else fails and your cold food gets warm and drippy, just work with the drip!


Indya | The Small Adventurer says
Chilling all your utensils and whatnot beforehand is such a great idea! I am yet to experiment with foods such as ice cream, but I know when I do it's going to be a nightmare as I live in quite a humid place! ????
Anne says
I could have used this post a few weeks ago! Thanks for sharing your tips, they will come in handy before summer is over
Elaine @ Dishes Delish says
What an awesome and helpful post! I never thought to scoop out the ice cream in muffin tins! Great idea!!
shobee says
Your ice cream photos looks so good and you, sharing how to get the same look is so nice of you. I will surely keep these tips in mind.
Tammy says
Great tips! I actually never thought about freezing the dishware beforehand which is pretty genius! Photography ice cream has always been pretty tricky and only food bloggers know how time consuming photography a dish can actually be! Thanks for this 😀
Jessie says
WOW! Great tip's and awesome photos! Thank you
Leslie Haasch says
Shooting ice cream can be so tricky - these are great tips to make it as good as it can be! Personally, I kinda like the look of the slightly melted good. Perfectly imperfect 🙂
Veena Azmanov says
Some really great tips here. I have a love-hate kinda behavior when photographing my ice creams. It's usually about 40C here in summer so even with the air conditioning on I feel like I have to rush with my pictures.
Veronika's Kitchen says
These are very good tips! I always struggle with photographing ice cream and that's the reason you don't see it much on my blog! Will definitely use your tips next time)
Amanda Mason says
What fabulous tips! I always struggle with shooting smoothies!! I live in Phx arizona and we are talking 115 degree type hot. And I shoot in my garage!! These tips are fabulous, especially the Scoop and freeze!!! Love that! but when it comes down to it, drips do photograph well!! Great article!
Jessica Pinney says
Great tips! I always dread the days when I am shooting popsicles and ice cream. I usually blast the central AC and a little window unit I have my in my studio. ????
Nicoletta Sugarlovespices says
I like taking pictures of ice cream dripping but sometimes it's just too much, so I love the scoop and freeze tip! Thank you! Great pictures!
Amanda says
Great advice. Getting those great shots of frozen treats takes a lot of prep work. Your shots are spot on!
Judy Purcell says
Great tip about chilling all the props and using cold slate and tins -- so smart! My next round of drippy-dippy just might be easier to work with!