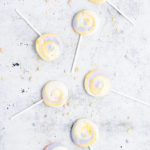
Looking for an easy, eye-catching treat? You can bake up a boat load of these easy meringue pops in no time! They're perfect as a sweet party treat, event favors or for just baking at home with the kids.

Do you ever see something and just think, "I NEED this!"? And I mean cat meme level "I NEED DIS!" Well, that was me a few weeks ago when the Meringue Girls's meringue lollipops showed up in my Instagram feed.
And seeing as how I wasn't planning a trip to England anytime soon, I resigned myself to the fact that the only way I would be getting those magical looking meringue pops in my life any time soon was by making them myself. *Cue dramatic pushing up of sleeves and smearing of flour under the eyes like eye black*
How to make meringue pops
First, make the meringue.
In the bowl of a stand mixer, combine the egg whites and granulated sugar.
Whip the mixture on high until the sugar has dissolved and the meringue holds stiff peaks. Add the vanilla extract and whip on low until just combined.
A note about grease/fats: Meringues are incredibly sensitive to any trace of grease or fats, so it's SUPER important that you start with a very clean, dry bowl to ensure your meringues whip up to their full potential. I like to re-clean all of my equipment (even if it was recently cleaned) before making meringues.

Second, color your meringue and put it in a piping bag.
Divide your meringue by the number of colors you play to use. Gently fold gel food coloring into each portion.
A quick note about food coloring: Gel food coloring works best for coloring meringue as it's highly pigmented and won't change the meringue's consistency. I don't recommend using powdered food coloring or the watery variety you find at many grocery stores.
Spoon or pipe lines of each color of meringue onto a piece of plastic wrap. Fold the plastic wrap over the meringue and twist the ends. Place the meringue in a piping bag with a Wilton 2A or other small round tip on the end.

Finally, pipe and bake the meringue.
On the back of your parchment paper, trace 1 ½" - 2" circles, making sure to leave room for the lollipop sticks. Place the parchment paper pen/pencil side down on half baking sheets.
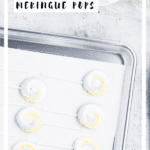
Starting in the center of each circle, pipe a large dollop of meringue and swirl your way out using the circles you traced as a guide. Insert the lollipop sticks as you go.
Bake the meringue lollipops at 200F for 1 ½ to 2 hours, or until the meringues are dry, crisp and easily pull away from the parchment paper.

Expert tips
- Start with a perfectly clean bowl: This may seem like a no-brainer but even a little bit of grease can ruin your meringue. Whatever you use, making sure it’s been thoroughly scrubbed with warm, soapy water.
- Don’t use plastics bowls: To the point above, it’s very hard to completely remove fats from plastic bowls and kitchen utensils, which tend to develop a greasy coating over time. Instead, use a glass, metal or ceramic bowl.
- Crack your eggs into a separate bowl: Egg yolks = fat and as we’ve established, fats will keep your meringue from reaching it’s full potential. To avoid having a single yolk ruin the whole batch, be sure to crack and separate your eggs over a small bowl before adding the white to the rest of the batch.
- Storage: Baked meringue is best stored in an air tight container at room temperature for 1-2 days (dependent on humidity).
New to meringue making and looking for more expert tips or help troubleshooting some common meringue problems? Check out my comprehensive post on how to make meringue.

Did you make this recipe? I’d love to hear how it went in the comments below. Better still, snap a photo and tag it on Instagram with #thesimplesweetlife. I love seeing your creations!
PrintRecipe
Meringue Pops
These meringue lollipops are every bit as pretty as they are easy to make.
- Prep Time: 20 minutes
- Cook Time: 2 hours
- Total Time: 2 hours 20 minutes
- Yield: About 30 1x
- Category: Dessert
- Cuisine: American
Ingredients
For the meringues:
- 4 egg whites
- 1 cup granulated sugar
- 1 tsp. vanilla extract
Additional tools:
- Food gel coloring
- Parchment paper
- 4" lollipop sticks
- Wilton 2A tip
- Piping bags
Instructions
- In the bowl of a stand mixer, combine the egg whites and granulated sugar.
- Whisk on high until the sugar has dissolved and the meringue holds stiff peaks.
- Divide the meringue by the number of colors you plan to use and gently fold the gel food coloring into the meringue.
- On a piece of plastic wrap, arrange your colors in the order you'd like and roll into a log-shaped tube of meringue, twisting the ends (like in this tutorial).
- On the back of several pieces of parchment paper, create 1 ½"-2" circles, making sure to leave room for the sticks.
- Snip one end of your plastic wrapped meringue, load it into a piping bag with a Wilton 2A tip, and pipe your meringue circles starting from the center and working your way out, using the circles you traced as a guide.
- Insert the lollipop sticks as you go to avoid brushing against other piped meringues.
- Bake at 200F for 1 ½- 2 hours, or until the meringues are dry, crisp, and easily pull away from the parchment paper.
Notes
- Start with a perfectly clean bowl: This may seem like a no-brainer but even a little bit of grease can ruin your meringue. Whatever you use, making sure it’s been thoroughly scrubbed with warm, soapy water.
- Don’t use plastics bowls: To the point above, it’s very hard to completely remove fats from plastic bowls and kitchen utensils, which tend to develop a greasy coating over time. Instead, use a glass, metal or ceramic bowl.
- Crack your eggs into a separate bowl: Egg yolks = fat and as we’ve established, fats will keep your meringue from reaching it’s full potential. To avoid having a single yolk ruin the whole batch, be sure to crack and separate your eggs over a small bowl before adding the white to the rest of the batch.
- Storage: Baked meringue is best stored in an air tight container at room temperature for 1-2 days (dependent on humidity).
Nutrition
- Serving Size: 1 lollipop
- Calories: 28
- Sugar: 6.7g
- Sodium: 4mg
- Fat: 0g
- Saturated Fat: 0g
- Carbohydrates: 6.7g
- Fiber: 0g
- Protein: .5g
- Cholesterol: 0mg
If you liked this recipe, you might also like...
Update Notes: This post was originally published in June of 2016 but was republished with updated photos and tips in May of 2022.

Elaina Jones says
I plan on making these, but as hoping to make them a bit bigger...around 4" or so. Do you think that will be a problem?
Briana Rosenfield says
I made mine around that size and turned out fine! A little towards the 2 hour side of baking.
Steph says
Can you use plastic lollypop sticks?
Colleen M Miska says
Help.... I tried this three times and my whites stay runny. I whipped them forever and they never formed any kind of peak. I've used the Swiss meringue method for macarons and have had no problem so I thought it would be similar. What am I doing wrong?
The Simple, Sweet Life says
Hi Colleen! I'm sorry to hear the egg whites stayed runny. Egg whites are very sensitive to any sort of grease, so that could be the culprit. I'd recommend making sure your beaters and bowl are completely grease-free and would also recommend using a stainless steel or glass bowl as plastic bowls tend to absorb any fats they come into contact with. Hope this helps!
Sue says
These are melt in your mouth adorable!