
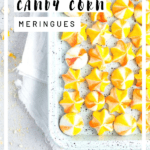
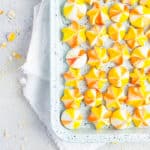
These fun, candy corn inspired meringues are all the colorful goodness of candy corn without any of the wax. And requiring just 15 minutes of work, these meringues are a breeze to make.
'Tis the season... For all things candy corn! If you want of that of colorful, marshmallowy flavored goodness with none of the wax, than these candy corn meringues are the treat for you.
And best of all, they're SUPER easy to make (and I mean like super super easy).They do take about 1-2 hours of baking at a very low temperature, so while they're the perfect fall treat to whip up the day before, they're not great if you need something in an hour.
If something with a quick turnaround is what you're looking for, check out these monster brownies or these candy corn doughnuts.
How to make candy corn meringues
First, make the meringue base.
In the bowl of a stand mixer placed over a pot of boiling water, whisk your egg whites and granulated sugar.
Continue heating until the sugar dissolves. You can test this by sticking a finger in and seeing if you can still feel granules.
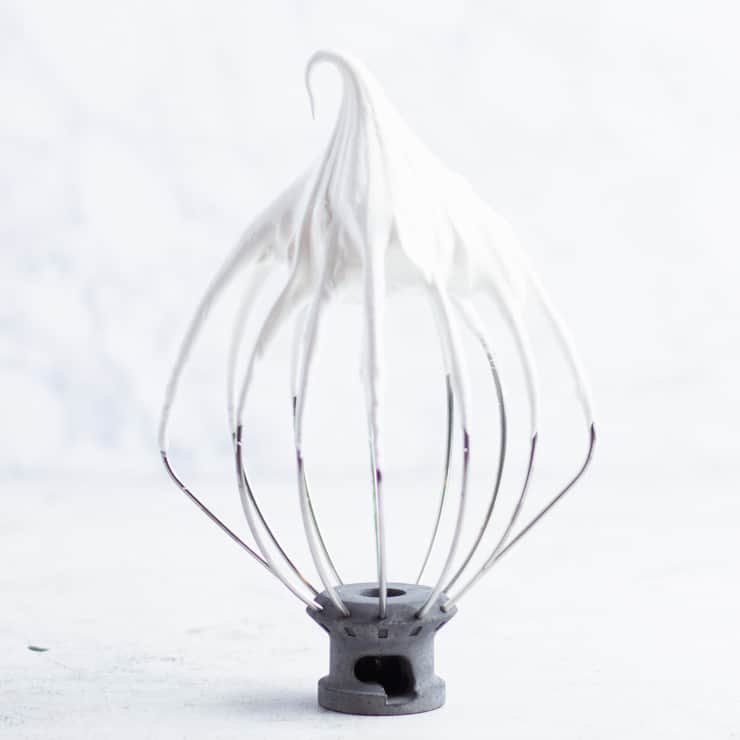
Once all of the granules have dissolved, return the bowl to your stand mixer and whip on high until stiff peaks form (you'll want to add your vanilla extract right before it reaches stiff peaks).
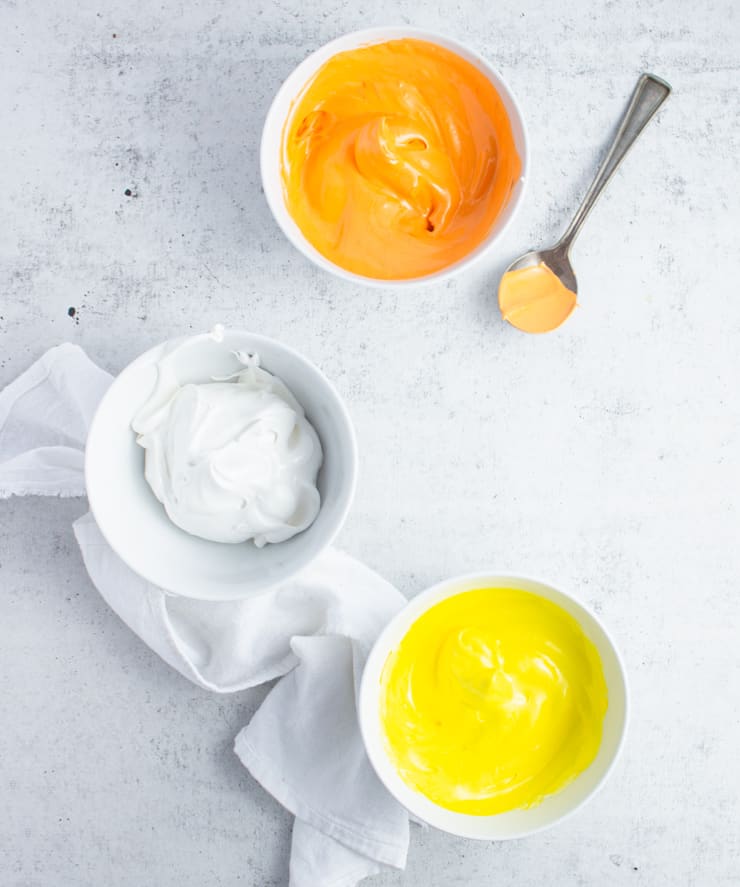
Second, color your frosting.
Divide your meringue evenly between three bowls. Tint one bowl yellow, one bowl orange and leave the other bowl uncolored.
Pro tip: With meringues, consistency is key so make sure you're using a gel food coloring. The watery food coloring you get at the grocery store will water down the meringue, which will keep it from holding its shape.
If you don't want to color your meringues, you can create a similar candy corn striping by using a small brush to run lines of food coloring down the sides of the bag.
Then, simply spoon the uncolored meringue into the bag and pipe immediately.
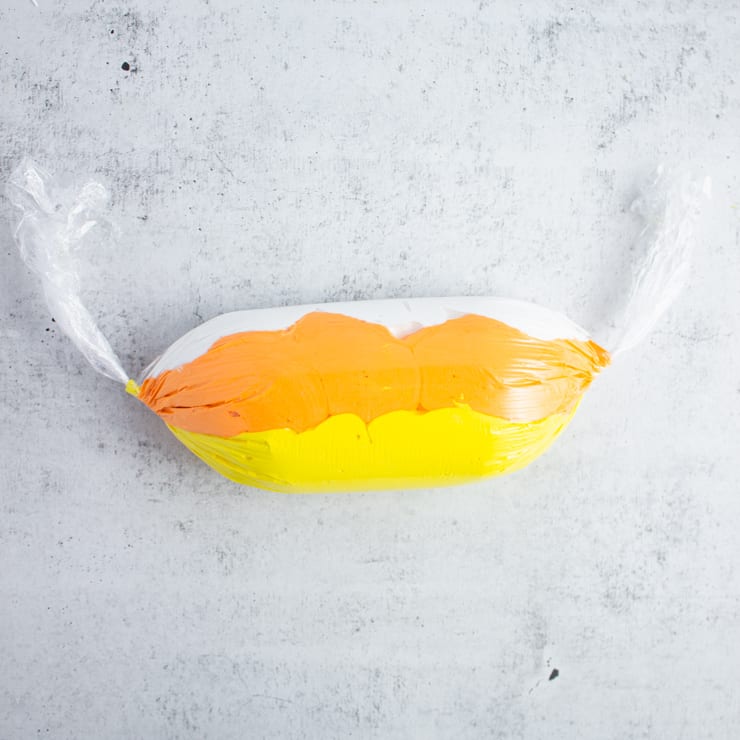
Third, fill your piping bag.
On a piece of cling wrap, create a row of each color of meringue. Make sure each row is touching and the white row is a little longer than the others (otherwise the orange and yellow line of meringues will tint the white).

Fold the cling wrap around the meringue, twisting the ends.
Snip one end and drop it into a piping bag with a tip of your choosing (I used a large round tip and a large star tip).
Finally, pipe the meringues and bake.
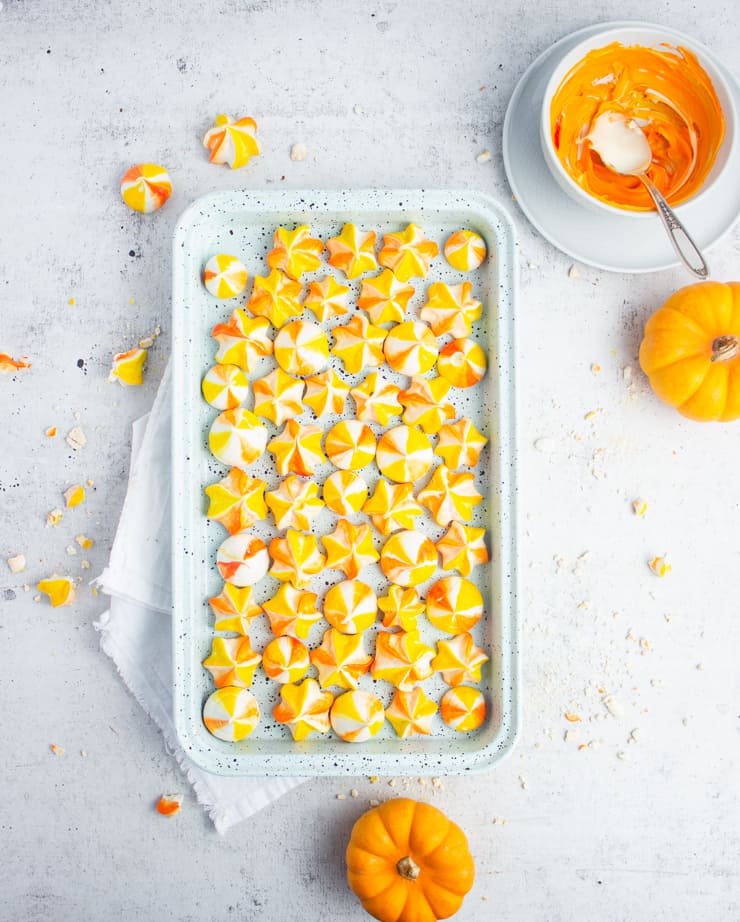
Pipe your meringues onto a parchment paper lined baking sheet and bake them at 200F for 1-2 hours.
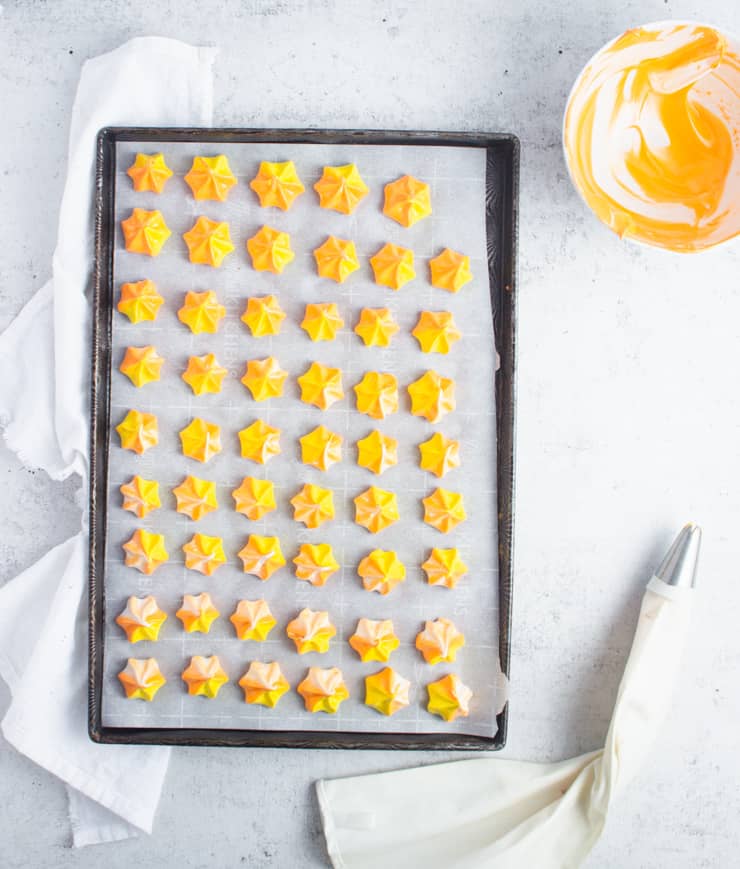
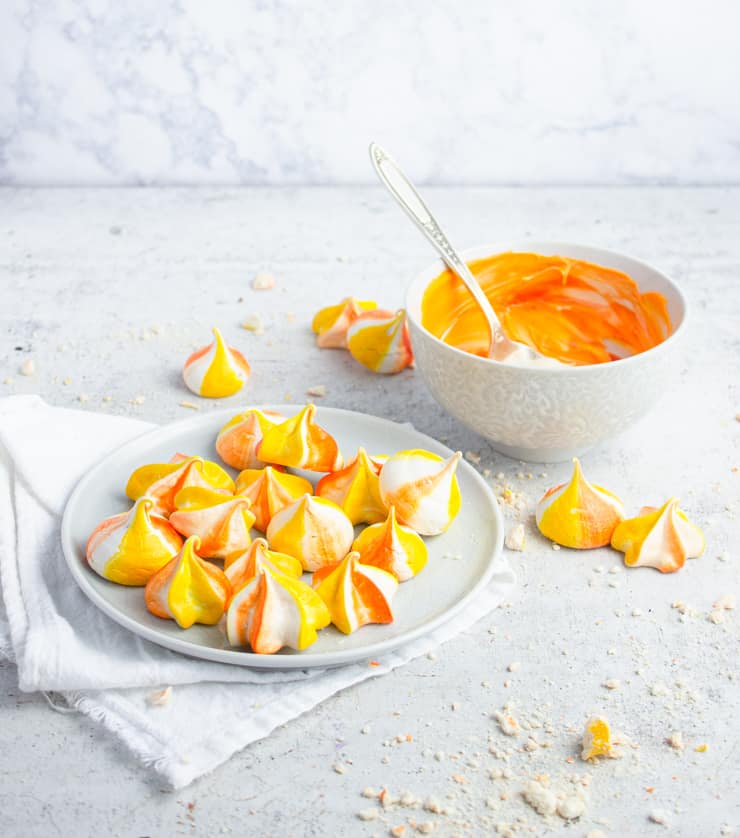
The meringues are done when they easily peel away from the parchment paper. They should not be browned, so you'll want to check them often.
Troubleshooting meringues:
For many years I found meringues very intimidating, mainly because I struggled to get my meringue to reach those perfect fluffy peaks. Here are a couple of quick tips to help you avoid the issues I had:
- Start with a perfectly clean bowl: This may seem like a no-brainer but even a little bit of grease can ruin your meringue. Whatever you use, making sure it’s been thorough scrubbed with warm, soapy water.
- Don’t use plastics bowls: To the point above, it’s very hard to completely remove fats from plastic bowls and kitchen utensils, which tend to develop a greasy coating over time. Instead, use a glass, metal or ceramic bowl.
- Crack your eggs into a separate bowl: Egg yolks = fat and as we’ve established above, fats will keep your meringue from reaching it’s full potential. To avoid having a single yolk ruin the whole batch, be sure to crack and separate your eggs over a small bowl before adding the white to the rest of the batch.
Did you make this recipe? I’d love to hear how it went in the comments below. Better still, snap a photo and tag it on Instagram with #thesimplesweetlife. I love seeing your creations!
PrintRecipe
Candy Corn Meringues
These fun, candy corn inspired meringues are all the colorful goodness of candy corn without any of the wax. And requiring just 15 minutes of work, these meringues are a breeze to make.
- Prep Time: 15 minutes
- Cook Time: 2 hours
- Total Time: 2 hours 15 minutes
- Yield: 40
- Category: Dessert
- Cuisine: American
Ingredients
- 4 egg whites
- 1 cup granulated sugar
- 1 tsp. clear vanilla extract
- Gel food coloring in orange and yellow
Instructions
- In the bowl of a stand mixer placed over a pot of boiling water, whisk your egg whites and granulated sugar.
- Continue heating until the sugar dissolves.
- Once all of the granules have dissolved, return the bowl to your stand mixer and whip on high until stiff peaks form (you'll want to add your vanilla extract right before it reaches stiff peaks).
- Divide your meringue evenly between three bowls.
- Tint one bowl yellow, one bowl orange and leave the other bowl uncolored.
- On a piece of cling wrap, create a row of each color of meringue.
- Make sure each row is touching and the white row is a little longer than the others (otherwise the orange and yellow line of meringues will tint the white).
- Fold the cling wrap around the meringue, twisting the ends.
- Snip one end and drop it into a piping bag with a tip of your choosing (I used a large round tip and a large star tip).
- Pipe your meringues onto a parchment paper lined baking sheet and bake them at 200F for 1-2 hours.
- The meringues are done when they easily peel away from the parchment paper. They should not be browned, so you'll want to check them often.
Notes
- Start with a perfectly clean bowl: This may seem like a no-brainer but even a little bit of grease can ruin your meringue. Whatever you use, making sure it’s been thorough scrubbed with warm, soapy water.
- Don’t use plastics bowls: To the point above, it’s very hard to completely remove fats from plastic bowls and kitchen utensils, which tend to develop a greasy coating over time. Instead, use a glass, metal or ceramic bowl.
- Crack your eggs into a separate bowl: Egg yolks = fat and as we’ve established above, fats will keep your meringue from reaching it’s full potential. To avoid having a single yolk ruin the whole batch, be sure to crack and separate your eggs over a small bowl before adding the white to the rest of the batch.
- With meringues, consistency is key so make sure you're using a gel food coloring. The watery food coloring you get at the grocery store will water down the meringue, which will keep it from holding its shape.
Meringue recipe adapted from Miette
Nutrition
- Serving Size: 1
- Calories: 21
- Sugar: 5g
- Sodium: 3mg
- Fat: 0g
- Saturated Fat: 0g
- Carbohydrates: 5g
- Fiber: 0g
- Protein: .4g
- Cholesterol: 0mg
If you liked this recipe you might also like...
Update Notes: This post was originally published in September of 2014 but was republished with step by step photos and tips in October of 2019.
katjeter says
Love these! So pretty! Thanks for sharing 🙂
The Simple, Sweet Life says
So glad you like them! Thanks for stopping by! 🙂
Sue says
These are so dang cute! They look very fresh 🙂
The Simple, Sweet Life says
Thank you! I'm really glad you like them! 🙂
Ginnie says
These are gorgeous! I've always wanted to try piping with more than one color, and you make it seem easy:)
The Simple, Sweet Life says
I think it's definitely one of those techniques that looks much more complicated than it actually is. And it's certainly easier if you use the plastic wrap to roll it up rather than trying to just fill the piping bag (seriously, people that can actually do that are skilled!). You'll have to let me know how it turns out if you try it! 🙂
Tammi says
These are beautiful! I pinned them because they are too lovely to not share. You make them look so easy too.
The Simple, Sweet Life says
Thank you for such a sweet comment! 🙂
liztiptopshape says
I love these!!! Candy corn is one of my favorite parts of Fall. I eat way too much of it - but, hey, it only comes around once a year!
The Simple, Sweet Life says
Is there really such a thing as too much candy corn? Ok, well maybe, but I've certainly never reached that point. 😛 Long live candy corn!
Natashalh says
These are so adorable! I made literally about 150 meringues in July. I wonder if it's been long enough since then for my husband to be okay with even more...
Visiting from Create it Thursday!
The Simple, Sweet Life says
150 meringues?? I think I might just be tired of meringues too after that! 😉 If I remember correctly, you were making them for a wedding, right? But we're into a whole 'nother season now so I think you could definitely whip up a few more. 😉
Elise @frugalfarmwife.com says
So beautiful! I love meringues... and candy corn... and fall colors. total win! Here's hoping my meringues look half as pretty!
The Simple, Sweet Life says
I'm sure your meringues will turn out gorgeously! 🙂
Vanessa @ Vanessa Baked says
Gorgeous candy corn inspired perfection!
The Simple, Sweet Life says
Thank you! 🙂
MJ says
I love these! I have to try this at home 🙂 might not have the right colours, but I can make them purple and black instead or so. Thanx for sharing!
The Simple, Sweet Life says
Absolutely! You could easily take this recipe and technique and adapt it to pretty much every season/occasion. I know I probably will. 😉
Liberti says
Visiting from TT&J link up party!
These are so fun! I love how you made the colors work together, a fun festive addition!
🙂 Liberti
http://www.loaly.com
The Simple, Sweet Life says
Thanks so much for stopping by and leaving a sweet comment! 🙂
Bernadyn Nettles (B) says
What a great idea, I don't think it's too early for candy corn either since September is here. I never thought about that but it is a little confusing to explain what candy corn is and how popular it is to someone who didn't grow up with it! Pinning this and saying G'Day from Say G'Day Saturday! Now following you on G+ 🙂
The Simple, Sweet Life says
I never thought about it, either, until I moved to Norway and found myself struggling to explain some of the foods and traditions that we totally take for granted in the US. But I think it's a pretty universal problem; there are definitely foods and traditions that Norwegians try to explain to me that I don't understand the appeal of!
bloominghomestead says
These are fabulous and so beautiful too! So glad you linked up at our Creative Collection Link Party. 🙂
The Simple, Sweet Life says
Thank you! And thanks for hosting such a fun link party each week! 🙂
The Simple, Sweet Life says
I hope you give them a try! You'll have to let me know what you think of them! 🙂
Noorah says
Gorgeous
Thanx for sharing
Could you tell me how low is the temperature ,what degree?
The Simple, Sweet Life says
200* Fahrenheit (95* Celsius). 🙂
balmtomysoul says
Claire, these are just so beautiful. You make it look easy (and I am sure it is a little more complicated) but I am pinning and going to make my best attempt!!
The Simple, Sweet Life says
As long as you whip them long enough to stiffen, meringues are really easy! I promise! And they're so easy to color and change with the time of year. Can't wait to hear how it goes. 🙂
Nikki @ Tikkido says
I love these little cuties! And I prefer meringues to actual candy corns any day!
The Simple, Sweet Life says
I'm so glad you like them! And as someone who loves candy corn, these may just be better than the real deal. 😉
Laura@Baking In Pyjamas says
I love these, they are so pretty and such a fantastic idea! This has been featured as one of my favourites over at Sweet and Savoury Sunday. Stop by, grab a button and link up again with us this week. Have a great day!
The Simple, Sweet Life says
Thanks for the sweet feature! I'm so glad you enjoyed this recipe! 🙂
SakuraMari says
Claire,
Do you think honey would work instead of sugar? Or would that make it gooey and not set up? I'm asking because of diabetes, and finding things that are sweet, but small, for an occasional treat is not easy. To complicate things, I would rather make my own treats, because they taste better. Thanks!
The Simple, Sweet Life says
I totally understand! One of my husband's best friends is diabetic, so we definitely have take that into account when making goodies for him. Unfortunately, honey wouldn't work the same in meringues as it might in other sweets; it would make the meringues gummy and they wouldn't reach that stiff peak state they need to. That being said, artificial sweeteners are a good alternative to sugar if you're looking to make a diabetic-friendly meringue. Hope that helps! 🙂
Erin says
If I'm making these for a party, how much in advance can I made them? Will they last a week in an air tight container? Also, I'm guessing I shouldn't refrigerate? (It seems like such a silly question, but I have to ask!)
This looks soooooo good! Can't wait to try them!
The Simple, Sweet Life says
Really good questions! 🙂 With meringues, storage can be kind of tricky because they tend to latch on and absorb any moisture around them. Because of this, it's best to make them as close as you can to the day they'll be served. That being said, I totally understand wanting to make them in advance. Once you've baked them and they've cooled to room temperature, pack them into an air tight container. If you live in a particularly humid place, it might be a good idea to wrap them in plastic wrap or bag them in air tight plastic bags in addition to putting them in an air tight container (it may sound like overkill but I promise it's not). I've heard you can freeze meringues to make them last longer, but I'm afraid I don't have any personal experience with that.
Mickey Jo says
well I was all excited until I seen it is done with egg whites. I can only have the yolk. grrrr
The Simple, Sweet Life says
Oh no! Unfortunately egg whites (or egg white powder) are a necessary part of making meringues. 🙁 But there are lots of other recipes where you could get away without using egg whites. 🙂
Pat says
These look so cute! I would like to make some for Thanksgiving. How long tdo they last and how do you store them? Can they be made ahea of time.
The Simple, Sweet Life says
You can absolutely make meringues in advance, and they keep best when stored in an air-tight container. How long you can make them in advance, however, will depend on your climate/weather. Meringues are very sensitive to moisture, so high humidity reduces their self-life drastically. Where I live, we typically have 60-70% humidity on any given day, and my meringues usually last 2-3 days if I store them really well in air-tight containers and baggies (I like to use both just to be on the safe side). I hope that helps point you in the right direction! 🙂
corey says
These look great! Im wanting to make some for the holidays (in red and green) but im wondering how to store these after they're cooled? Thanks ♡
The Simple, Sweet Life says
Oh, sounds like a great holiday twist! I plan on posting some Christmas inspired ones myself in the not-too-distant future! 🙂 To answer your question, the best way to store baked meringues is in as air-tight a place as possible. How long they last will depend on things like how humid of a climate you live in. I live in a fairly humid place with 60-70% humidity on any given day, and I find my meringues last about 3 days, maybe a little longer if I bag them AND put them in an air-tight container. 🙂
Donna says
Do you cut one end of the cling wrap before dropping in the piping bag?
The Simple, Sweet Life says
I usually cut the end of the cling wrap once I have the whole thing in my piping bag. I find that minimizes my chances of dripping meringue out the shorter end. 🙂
Denise says
Love it! They are so cute and such a fun idea to make! They are definitely being made for my Halloween party!
Candice says
I am in love with these! I've always wanted to make little meringues, and this step-by-step tutorial is just what I needed. Can't wait to take my halloween party to the next level with these in the goodie bags!
Debbie says
First off these candy corn meringues are the cutest thing ever!! So creative! Let me add I love your tips on making this ..I have this worst luck at making meringues like this , you have inspired me ....Thank you!!
Jacqui Debono says
These are beautiful, me and the kids are going to try these!
Lori | The Kitchen Whisperer says
Omg look how super adorable these are! These are perfect for fall! And thank you for the troubleshooting tips too!
Kushigalu says
Wow! These look so beautiful and cute. I would love to try them.
Amy says
This recipe is pure genius! I love candy corn and this is such a sophisticated way to enjoy them! I am going add this to the list to serve at our fall party this year.
Anne Lawton says
I absolutely love this version of candy corn, and so festive for the fall!
Sam | Ahead of Thyme says
OMG these are so gorgeous and cute and super festive! I can't wait to try these this year.