
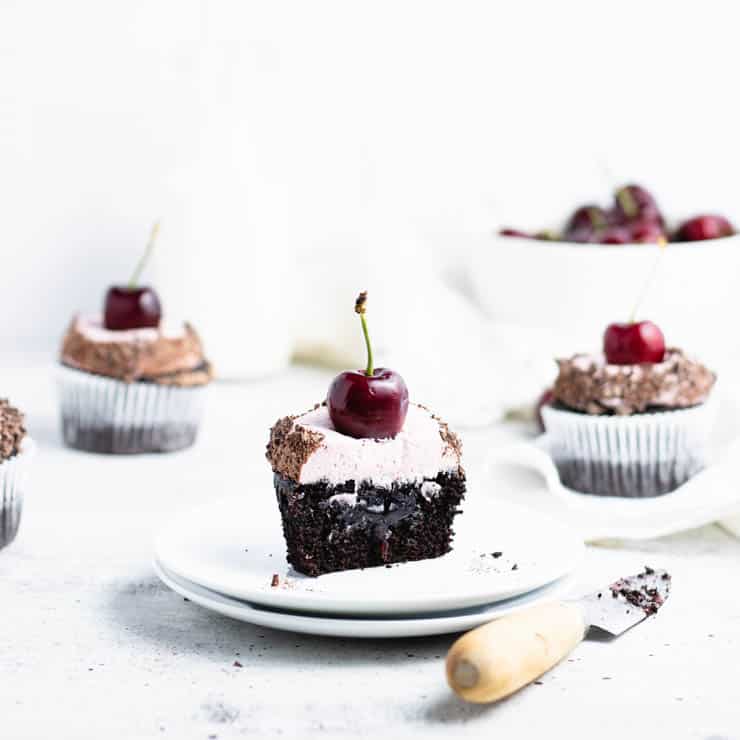
Celebrate cherry season year round with these easy chocolate cherry cupcakes! This rich treat combines an impossibly moist chocolate cupcake with a cherry preserve flavored buttercream frosting and a surprise-inside cherry center.
You know Cherry Garcia, that chocolate cherry Ben and Jerry's ice cream?
Well, our grocery store is always doing us dirty by being out of whatever ice cream flavor we're craving.
Icing on the Cake? Apparently, don't know her.
Pralines and Cream? More like pralines and can't.
Cherry Garcia? At our local grocer, it's cherry gone-cia.
So in the wise words of the Bear Grylls meme, you improvise, adapt and overcome... your way to Cherry Garcia inspired cupcakes.
Here's how to make these cupcakes
First, make the cupcakes.
In a bowl, whisk together the chocolate and hot water until the chocolate is completely melted.
Using a stand mixer, whip the egg and sugar until frothy and lightened in color (about 2 minutes). Add the oil and continue whipping until just combined.
Add the chocolate/water mixture and milk to the batter. Mix on low until just combined.
Whisk in the remaining ingredients (baking soda, baking powder, flour and baking cocoa) until the batter is lump-free.
Pour the batter into a prepared cupcake pan and bake at 350F for 18-20 minutes, or until a toothpick inserted into the center of the cupcakes comes out mostly clean.

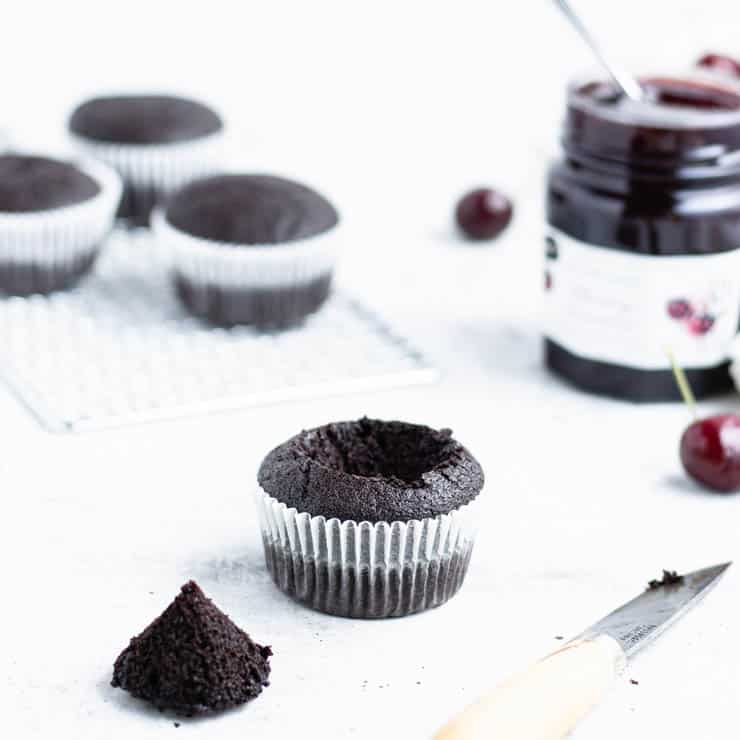
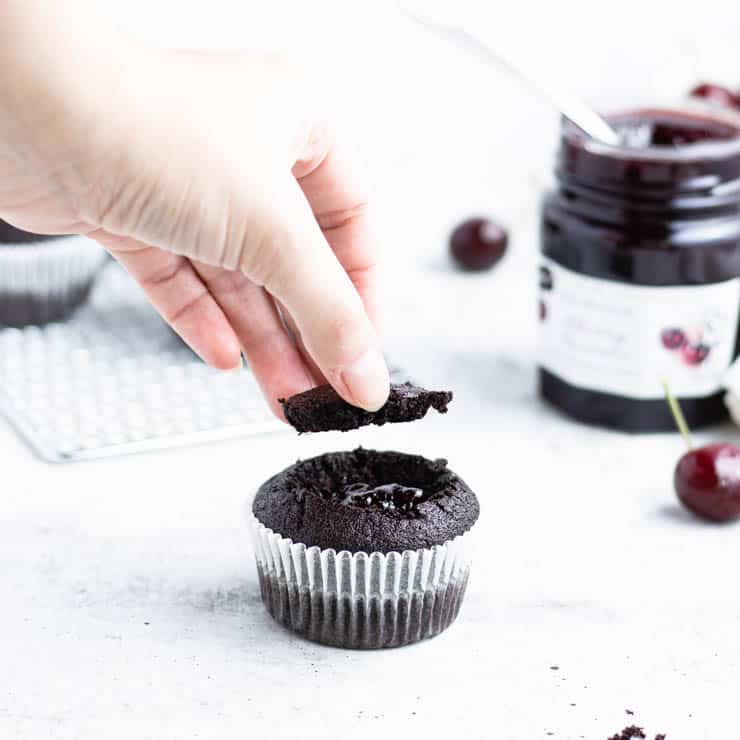
Second, fill the cooled cupcakes.
Using a small pairing knife, cut a cone shaped piece of cake out of the center of each cupcake. Set the pieces you cut out aside.
A quick note: If the pieces you cut out of the center break a part or otherwise become unusable, that's ok. While replacing the centers creates a nice little barrier between the frosting and the filling and helps ensure the filling stays in place, you can also frost over the filling directly.
Spoon a teaspoon or two of cherry preserves into the center of the cupcakes. I personally like to use a preserve because it has chunks of cherry, but a jam will work just as well.
When filling the center of the cupcakes, make sure to leave a few centimeters of space at the top.
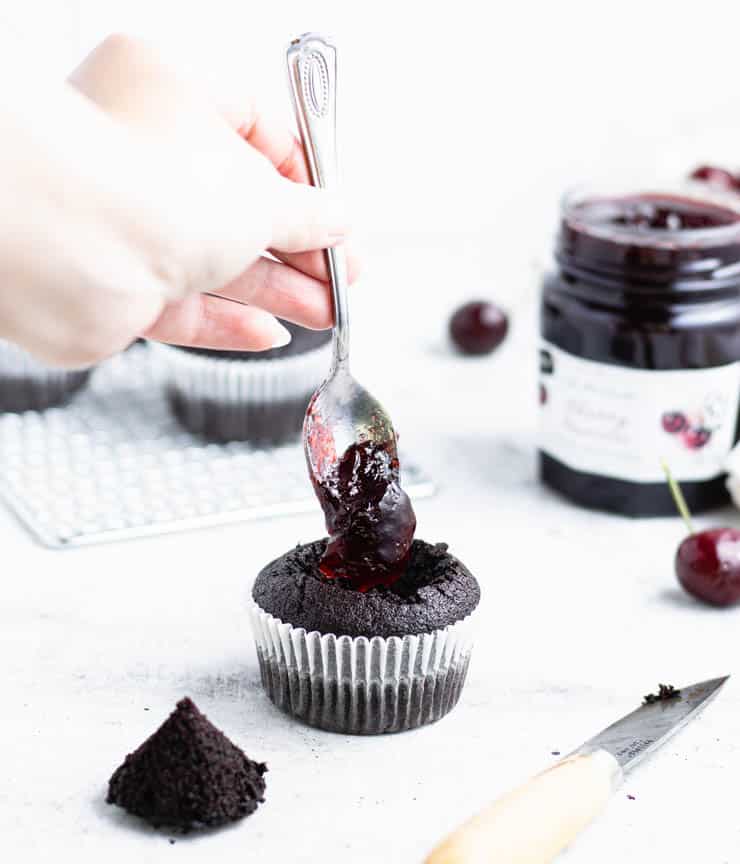
Trim the pieces you took out of the center down to a few centimeters and place them over the filling.
Finally, make the frosting.
In the bowl of a stand mixer, cream the butter until smooth.
Add the powdered sugar and beat on low until the sugar has combined with the butter. Add the cherry preserves, increase the speed to medium-high and continue beating until the frosting is light and fluffy (about 5 minutes).
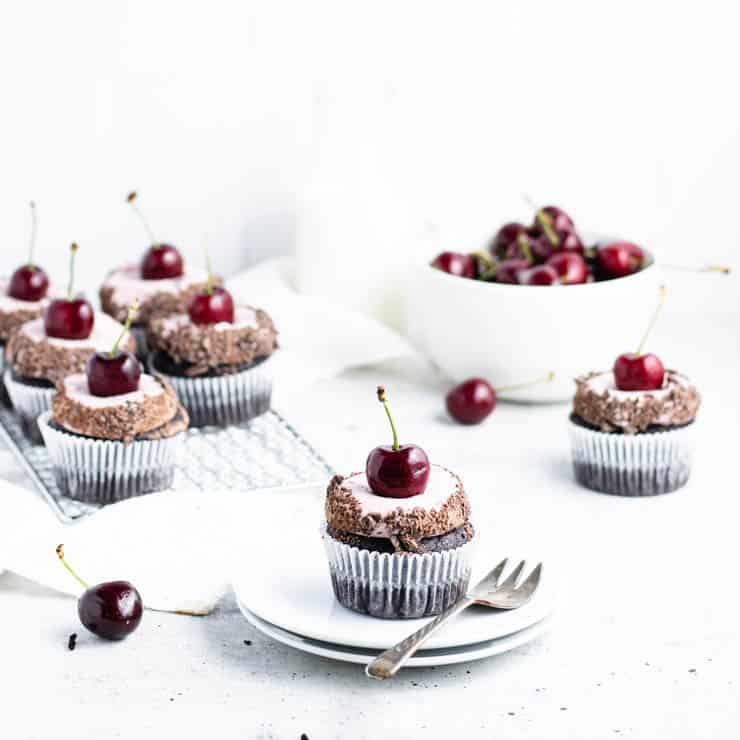
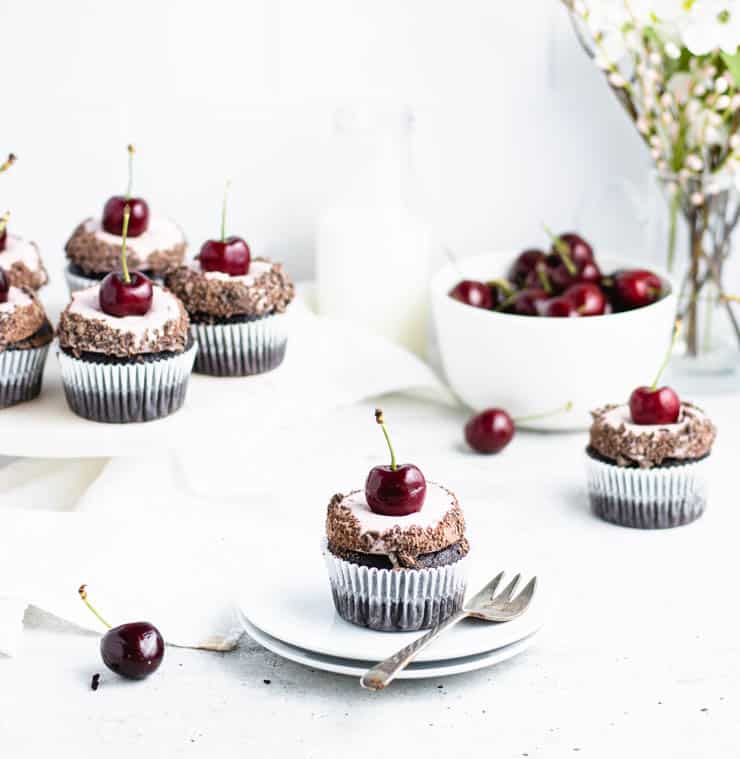
Spoon the frosting into a piping bag with a large, round tip (I used an Ateco 809) and pipe the frosting onto the cupcakes.
To create the style of frosting in the photos, start in the center, pipe out towards the edge and then back in, pushing the tip into the frosting before the releasing the pressure and pulling the tip back up.
Garnish with bits of chocolate and fresh cherries.
Expert tips
- Filling your cupcake liners: For a perfectly domed cupcake, fill you’re liners ⅔ of the way full. Any more and it’s likely to overflow.
- Knowing when your cupcakes are done: There are two ways to test for doneness. 1. Insert a tooth pick in the center of the cupcakes and if it comes out mostly clean (a few cooked crumbs are good but there shouldn't be raw batter), it’s done. 2. Gently press the top of the cupcake and if it almost immediately springs back, it’s done.
- The secret to smooth, air-bubble free frosting: Once the frosting has come together, turn your stand mixer down to low and continue beating it for about 5 minutes. This should work out most of the air bubbles.
- Fill that piping bag like a pro: Spoon your frosting onto a large piece of plastic wrap, roll and twist the ends. Trim one end so there’s about ½” in length, drop your frosting into the piping bag (short end first) with the tip already on and pipe!
- Storing frosted cupcakes: While cupcakes are always best when eaten the same day they’re made, these can be stored in an air-tight container at room temperature for 1-2 days.
Did you make this recipe? I’d love to hear how it went in the comments below. Better still, snap a photo and tag it on Instagram with #thesimplesweetlife. I love seeing your creations!
PrintRecipe
Chocolate Cherry Cupcakes

These easy chocolate cherry cupcakes combine a moist chocolate cupcake with a cherry frosting and a surprise-inside cherry filling.
- Prep Time: 30 minutes
- Cook Time: 20 minutes
- Total Time: 50 minutes
- Yield: 12
- Category: Dessert
- Method: Baking
- Cuisine: American
Ingredients
- 1 oz dark chocolate
- ½ cup hot water
- 1 egg
- ½ cup milk
- ¼ cup vegetable oil
- ½ tsp. baking soda
- ¼ tsp. baking powder
- 1 cup granulated sugar
- ½ cup baking cocoa
- ¾ cup all purpose flour
- ½ cup cherry jam
- 1 stick unsalted butter, at room temperature
- 2 cups powdered sugar
- 3 tbsp cherry jam
- 3 oz baking chocolate, finely chopped
- Fresh cherries
Instructions
- Preheat your oven to 350F and line your cupcake pan(s) with cupcake liners.
- In a bowl, whisk together the chocolate and hot water until the chocolate is completely melted.
- In the bowl of a stand mixer, whip the egg and sugar until frothy and lightened in color, then whip in the oil.
- Add the chocolate/water mixture and the milk, mixing on low until just combined.
- Whisk in the remaining cupcake ingredients and pour into the prepared cupcake pan(s).
- Bake for 18-20 minutes, or until a toothpick inserted into the cupcakes comes out mostly clean.
- Once the cupcakes have cooled, use a small pairing knife to cut a cone of cake from the center of each cupcake.
- Spoon one to two teaspoons of cherry jam into the center.
- Trim the end off the cones and return to the center of the cupcakes to cover the filling.
- In the bowl of a stand mixer, beat the butter until smooth.
- Add the powdered sugar and beat on low, increasing to medium-high once the powdered sugar is incorporated.
- Add the cherry jam and beat until the frosting is light and fluffy (about 5 minutes).
- Spoon your frosting into a piping bag with a big, round tip.
- Starting in the center, pipe out towards the edge and then back in, pushing the tip into the frosting before the releasing the pressure and pulling the tip back up.
- Garnish with finely chopped chocolate and fresh cherries.
Notes
- Filling your cupcake liners: For a perfectly domed cupcake, fill you’re liners ⅔ of the way full. Any more and it’s likely to overflow.
- Knowing when your cupcakes are done: There are two ways to test for doneness. 1. Insert a tooth pick in the center of the cupcakes and if it comes out mostly clean (a few cooked crumbs are good but there shouldn't be raw batter), it’s done. 2. Gently press the top of the cupcake and if it almost immediately springs back, it’s done.
- The secret to smooth, air-bubble free frosting: Once the frosting has come together, turn your stand mixer down to low and continue beating it for about 5 minutes. This should work out most of the air bubbles.
- Fill that piping bag like a pro: Spoon your frosting onto a large piece of plastic wrap, roll and twist the ends. Trim one end so there’s about ½” in length, drop your frosting into the piping bag (short end first) with the tip already on and pipe!
- Storing frosted cupcakes: While cupcakes are always best when eaten the same day they’re made, these can be stored in an air-tight container at room temperature for 1-2 days.
Nutrition
- Serving Size: 1 cupcake
- Calories: 401
- Sugar: 51.4g
- Sodium: 131mg
- Fat: 16.2g
- Saturated Fat: 8.2g
- Carbohydrates: 64.5g
- Fiber: 1.9g
- Protein: 3.2g
- Cholesterol: 37mg
If you liked this recipe, you might also like...
- Strawberry shortcake cupcakes
- Black forest cake with brandied cherries
- Small batch blackberry cherry jam
Update Notes: This post was originally published in October of 2013 but was republished with an updated recipe, format, photos and tips in July of 2022.


Dina says
great flavor and so cute!
The Simple, Sweet Life says
Thank you! 🙂
Laurie J Ronan says
Sorry, mine completely failed. I really don't know why. Got to start over, as my frosting is waiting along with my chopped chocolate. Birthday celebration tomorrow. Shoot, I hate starting over at this time of night.
The Simple, Sweet Life says
I'm sorry to hear that! I'd be happy to help you troubleshoot if you can give me some more details about what was wrong with them.
Scheralle says
Hi can you please give me a good cherry jam brand you use? I want to make sure I do this right lol. I tried another recipe from someone else and they said to use preserves and it didn't come out well so I want to use jam like you suggested can you please say a good brand or something u use?
Claire | The Simple, Sweet Life says
Hi Scheralle! Any thick jam or preserves should work well for this recipe. Personally, I used Safeway's Signature Select Like Homemade Cherry Preserves because that was what was available.