
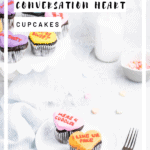
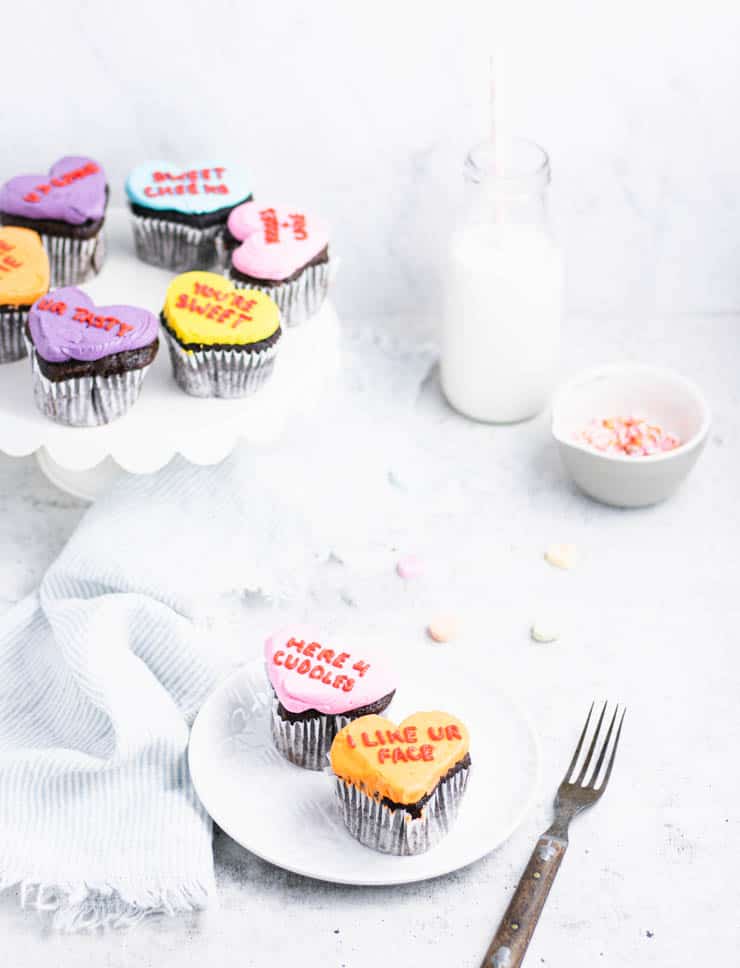
These easy Valentine cupcakes are sure to make your sweetheart's day! In this tutorial, you'll learn how to make heart shaped cupcakes with just a few everyday kitchen supplies and how to easily frost them. Be sure to scroll all the way to the bottom for my best cupcake tips.
Giving your sweetheart chalky candy for Valentine's Day = Meh. Giving them delicious cupcakes with messages of your choosing = Yass.
Keep scrolling to learn how to make these easy Valentine cupcakes.
How to make these Valentine cupcakes
First, make the cupcakes.
You can use a box mix or make your own for scratch. If you plan to make your own cupcakes and are looking for something decadently delicious, I highly recommend my go-to chocolate cupcake recipe.
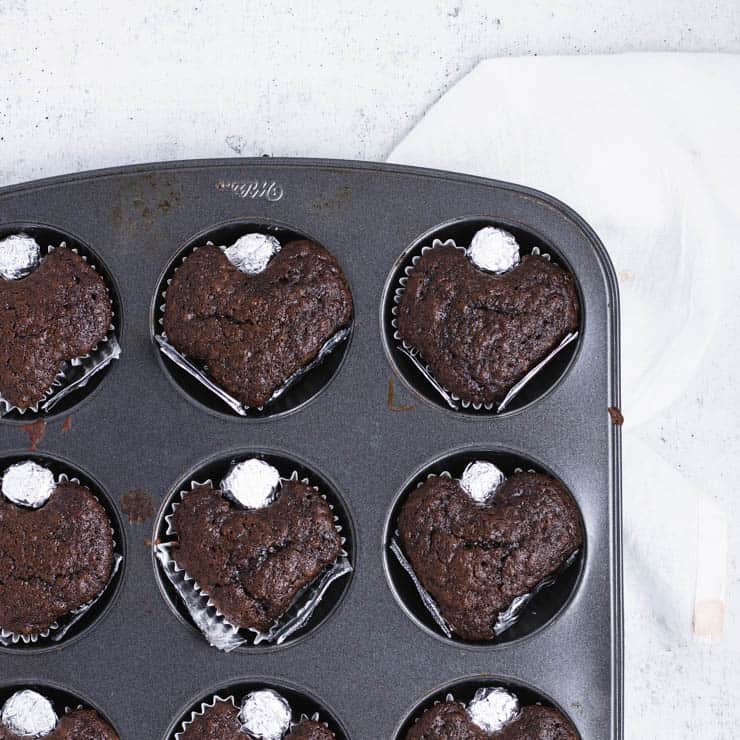
Using tin foil, create a dozen small cones, the widest part of which should be about the size of a marble, and a 24 1 ½" x ½" rectangles.
Fill the cupcake liners about ½ way full. Insert a cone at the top and two rectangular pieces of foil at the bottom to create a "v" shape. Pro tip: It helps to leave a little bit of space between the two rectangular pieces of foil at the bottom. The cupcake with naturally expand into this space as it bakes and I found that having them touch actually created a less pronounced point.
If the batter hasn't squished up to fill the liners about ⅔ of the way full after inserting the foil, add a little more batter.
Bake the cupcakes per the recipe. Allow them to cool in the pan with the tin foil pieces.
Second, frost the cupcakes.
A note on store bought vs. homemade frosting: Although you can use store bought frosting for this tutorial, I don’t recommend it. The frosting we’ll be making is a crusting buttercream, which means we’ll be able to do things with it that won’t work as well on store bought frosting, which doesn’t crust in the same way.
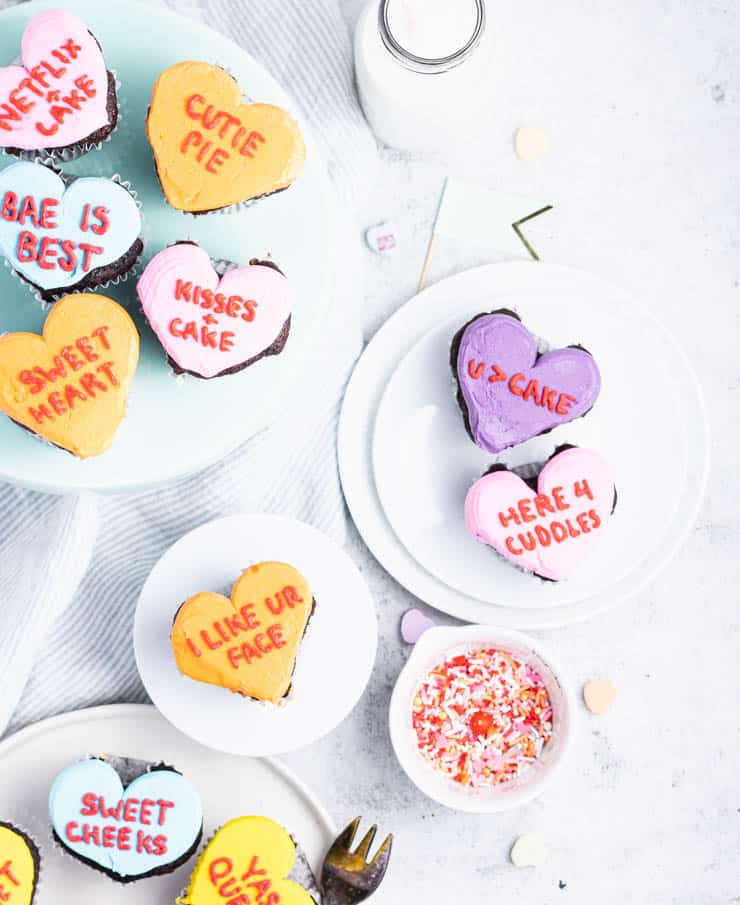
Cream the butter and add the powdered sugar and vanilla extract. Divide and color the frosting as desired, reserving a few tablespoons for the red text.
Spoon the frosting into piping bags. Clip a large opening and pipe the frosting onto the cupcakes in a heart shape.
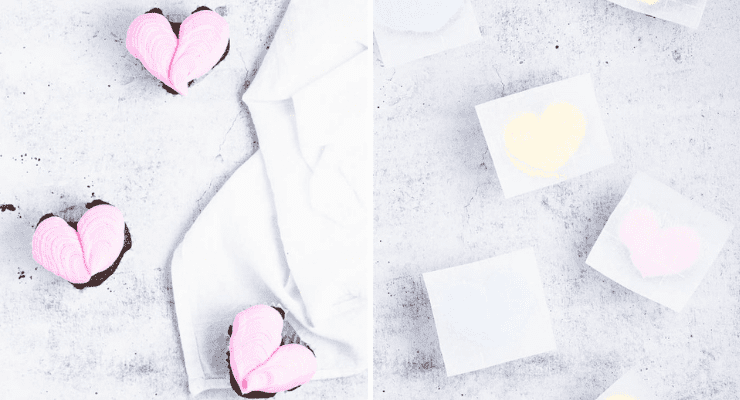
Use an offset spatula to work the frosting to the edges of the cupcakes.
To get a perfectly smooth finish, place the cupcakes frosting side down onto parchment paper, pressing gently. Refrigerate for 5-10 minutes, or until the parchment paper easily peels off the frosting.
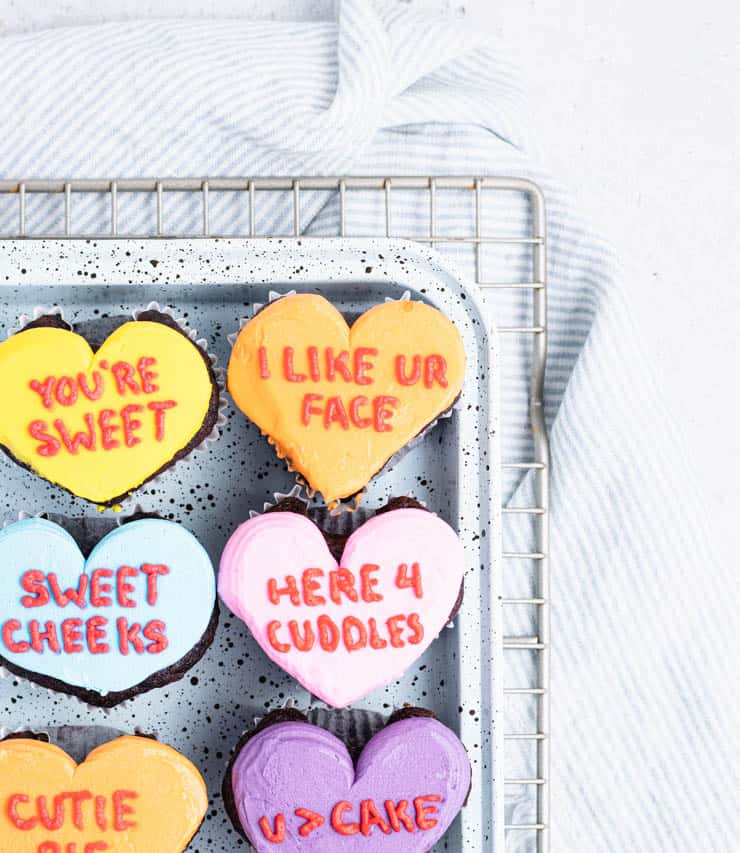
Finally, pipe your text.
Tint the frosting you reserved for the text red. Using a small, round tip (I used a Wilton #3), pipe your text onto the cupcakes.
Shorter text works better.
Tips for making these Valentine cupcakes
- Filling your cupcake liners: For a perfectly domed cupcake, fill you’re liners ⅔ of the way full once the foil pieces are in. Any more and they're likely to overflow.
- Knowing when your cupcakes are done: There are two ways to test for doneness. 1. Insert a tooth pick in the center of the cupcakes and if it comes out clean, it’s done. 2. Gently press the top of the cupcake and if it almost immediately springs back, it’s done.
- The secret to smooth, air-bubble free frosting: Once the frosting has come together, turn your stand mixer down to low and continue beating it for about 5 minutes. This should work out most of the air bubbles.
- Fill that piping bag like a pro: Spoon your frosting onto a large piece of plastic wrap, roll and twist the ends. Trim one end so there’s about ½” in length, drop your frosting into the piping bag (short end first) with the tip already on and pipe!
- To get a perfectly flat, smooth frosting, place the frosted cupcakes frosting side down onto parchment paper, pressing gently. Refrigerate 5-10 minutes, or until the cupcakes easily peel off the parchment paper.
- It's easiest to pipe letters if the frosting is soft. I like to microwave mine for about 3-5 seconds before putting it into the piping bag.
- Storing frosted cupcakes: While cupcakes are always best when eaten the same day they’re made, these can be stored in an air-tight container at room temperature for 1-2 days.
Did you make this recipe? I’d love to hear how it went in the comments below. Better still, snap a photo and tag it on Instagram with #thesimplesweetlife. I love seeing your creations!
PrintRecipe
Conversation Heart Cupcakes

These easy Valentine cupcakes are sure to make your sweetheart's day! In this tutorial, you'll learn how to make heart shaped cupcakes with just a few everyday kitchen supplies and how to easily frost them.
- Prep Time: 30 minutes
- Total Time: 30 minutes
- Yield: 12
- Category: Dessert
- Method: Baking
- Cuisine: American
Ingredients
- 12 cupcakes
- 1 ½ sticks butter, at room temperature
- 1 ½ cups powdered sugar
- 1 tsp vanilla extract
- Food gel coloring
Instructions
- Mix up a cupcake batter of your choosing, like this chocolate cupcake.
- Using tin foil, create a dozen small cones, the widest part of which should be about the size of a marble, and a 24 1 ½" x ½" rectangles.
- Fill the cupcake liners about ½ way full. Insert a cone at the top and two rectangular pieces of foil at the bottom to create a "v" shape.
- If the batter hasn't squished up to fill the liners about ⅔ of the way full after inserting the foil, add a little more batter.
- Bake the cupcakes per the recipe. Allow them to cool in the pan with the tin foil pieces.
- Cream the butter and add the powdered sugar and vanilla extract.
- Divide and color the frosting as desired, reserving a few tablespoons for the red text.
- Spoon the frosting into piping bags. Clip a large opening and pipe the frosting onto the cupcakes in a heart shape.
- Use an offset spatula to work the frosting to the edges of the cupcakes.
- To get a perfectly smooth finish, place the cupcakes frosting side down onto parchment paper, pressing gently. Refrigerate for 5-10 minutes, or until the parchment paper easily peels off the frosting.
- Tint the frosting you reserved for the text red.
- Using a small, round tip (I used a Wilton #3), pipe your text onto the cupcakes.
Notes
- Filling your cupcake liners: For a perfectly domed cupcake, fill you’re liners ⅔ of the way full once the foil pieces are in. Any more and they're likely to overflow.
- Knowing when your cupcakes are done: There are two ways to test for doneness. 1. Insert a tooth pick in the center of the cupcakes and if it comes out clean, it’s done. 2. Gently press the top of the cupcake and if it almost immediately springs back, it’s done.
- The secret to smooth, air-bubble free frosting: Once the frosting has come together, turn your stand mixer down to low and continue beating it for about 5 minutes. This should work out most of the air bubbles.
- Fill that piping bag like a pro: Spoon your frosting onto a large piece of plastic wrap, roll and twist the ends. Trim one end so there’s about ½” in length, drop your frosting into the piping bag (short end first) with the tip already on and pipe!
- To get a perfectly flat, smooth frosting, place the frosted cupcakes frosting side down onto parchment paper, pressing gently. Refrigerate 5-10 minutes, or until the cupcakes easily peel off the parchment paper.
- It's easiest to pipe letters if the frosting is soft. I like to microwave mine for about 3-5 seconds before putting it into the piping bag.
- Storing frosted cupcakes: While cupcakes are always best when eaten the same day they’re made, these can be stored in an air-tight container at room temperature for 1-2 days.
If you liked this post, you might also like...


Sue says
Love these!