
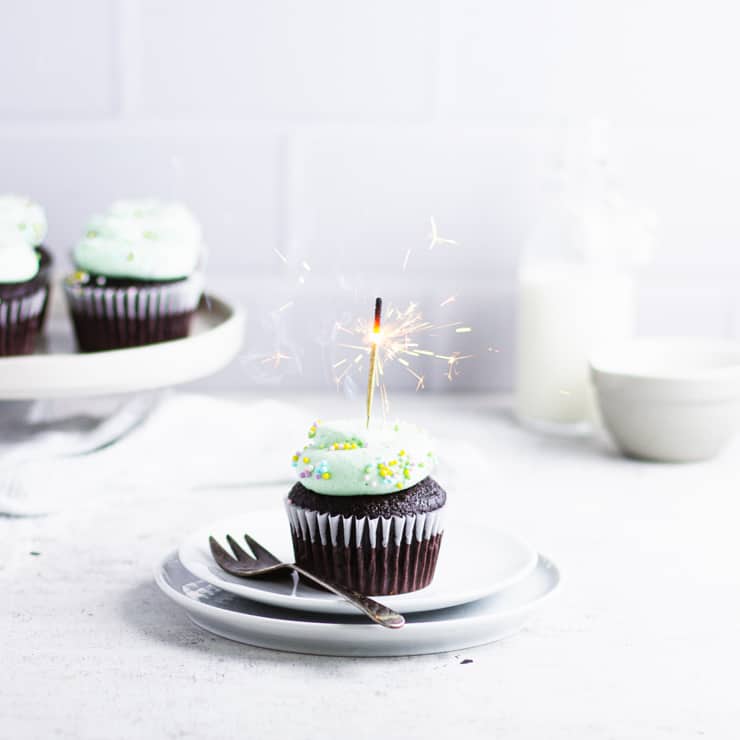
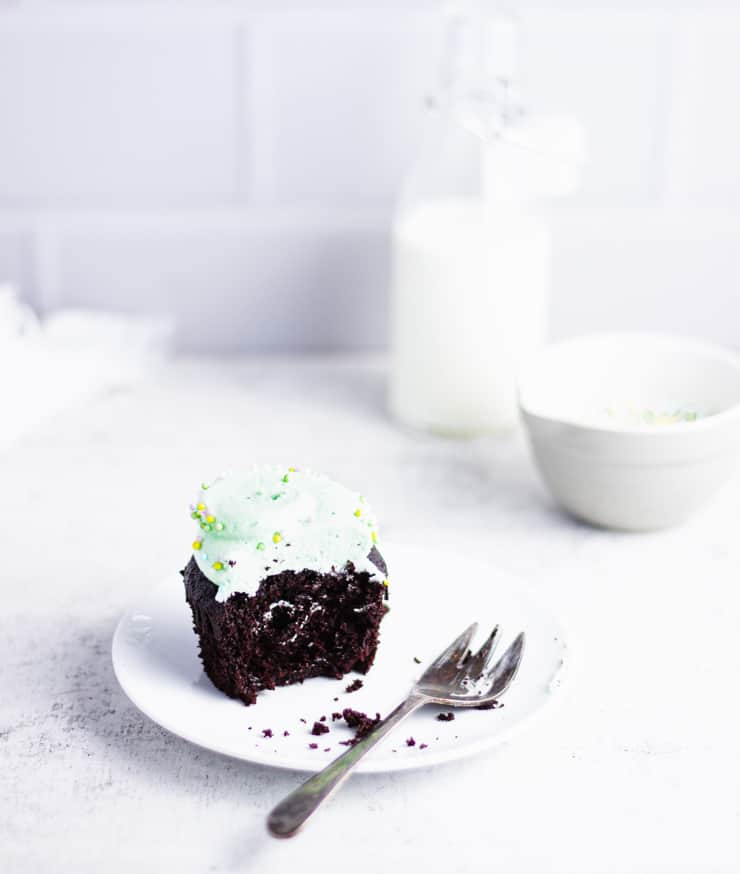
Looking for a quick chocolate fix? Look no further than these foolproof chocolate mint cupcakes! With an impossibly moist chocolate cupcake base topped with a sweet swirl of mint frosting, these cupcakes are sure to satisfy even the toughest craving.
About a month ago, while I was watching some news on the internet, I came across a segment about Georgetown Cupcake. I know I'm probably way behind the rest of you in discovering Georgetown Cupcake's delightful little cupcakes but holy cow am I hooked!
To be more specific, I'm hooked on their signature swirl (I still live a little too far away to have actually tried their cupcakes at this point). There's just something... perfect... about that low signature swirl... Maybe it's how smooth the frosting is, or the fact that a little divot forms in the center, perfect for holding little bits of candy or sprinkles.
Either way, I just knew I had to learn how to make that swirl myself, and then use it to make these chocolate mint cupcakes with little pastel sprinkles!
How to make these chocolate mint cupcakes
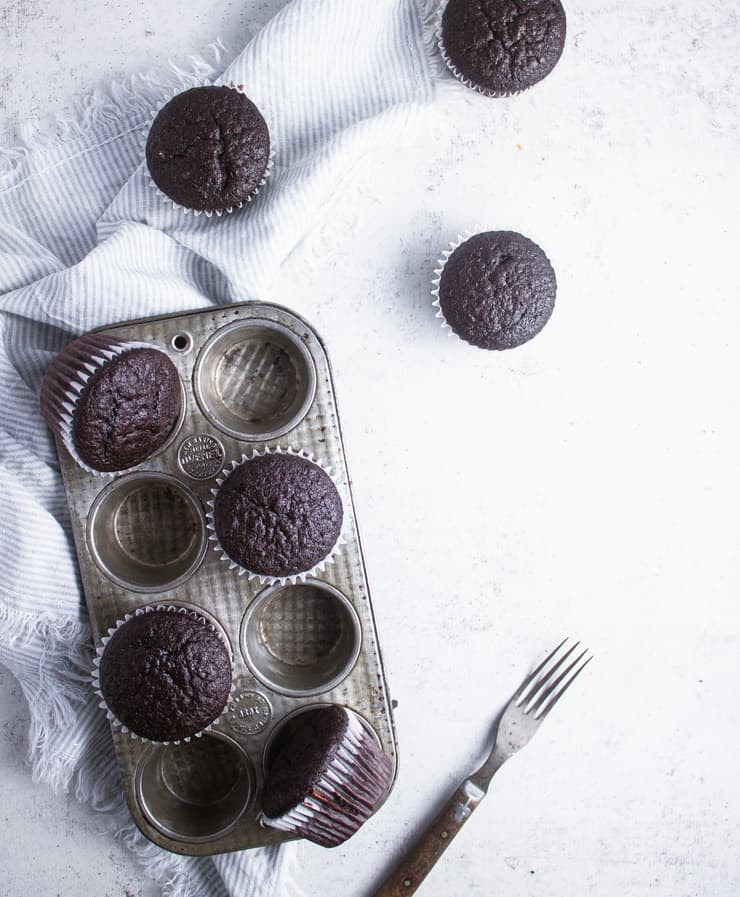
First, make the chocolate cupcakes.
Start by preheating your oven to 350F and lining your cupcake pan(s) with cupcake liners.
In a large bowl, whisk together your chocolate with the hot water until the chocolate is completely melted. Alternatively, you can combine the chocolate with tap water and microwave it for about 30 seconds.
In the bowl of a stand mixer, whip your egg until frothy and lightened in color, then whip in the oil. Add the chocolate/water mixture and the milk, mixing on low until just combined.
Whisk in the rest of your cupcake ingredients, and pour your batter into your prepared cupcake pan(s). Bake for 18-20 minutes, or until a toothpick inserted into the cupcakes comes out clean.
Substitution: If you don't have time to make cupcakes from scratch or don't have all the ingredients on hand, you can swap this recipe for a boxed cake mix. To make it taste like a bakery cake, check out my boxed cake mix hacks.
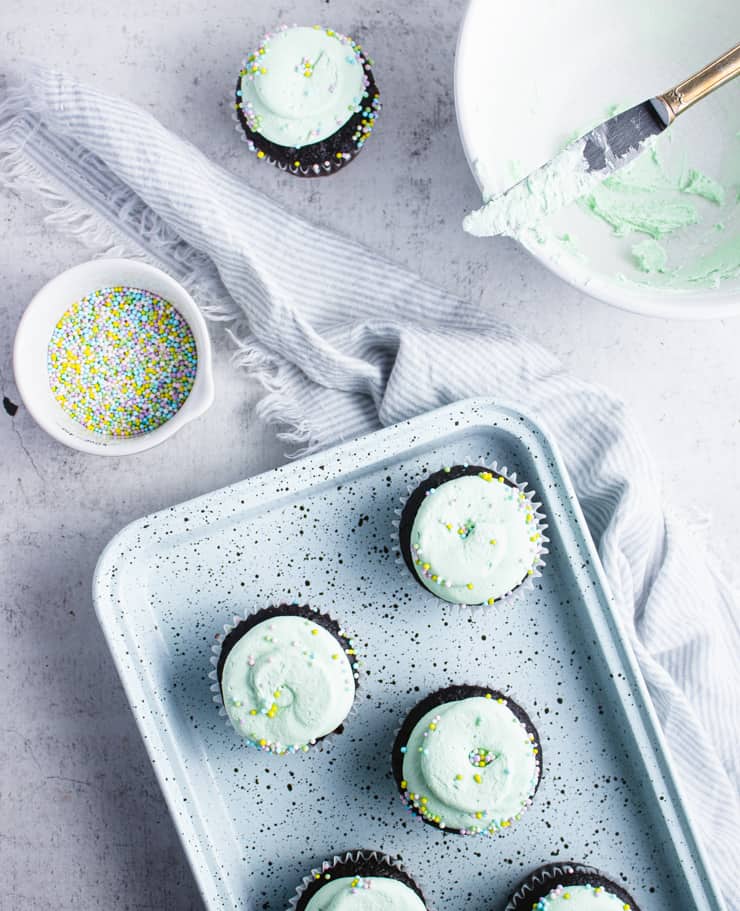
Second, make the mint frosting.
While the cupcakes cool, you can whip up the frosting. In a large bowl, combine your butter and powdered sugar. Begin by beating the frosting on low, increasing to medium-high once the powdered sugar is incorporated.
Add your milk and mint extract, and beat until the frosting is light and fluffy (about 5 minutes). Mix in the green food coloring until the frosting is a light, mint green.
Finally, frost your chocolate mint cupcakes.
To frost these cupcakes with Georgetown Cupcakes signature swirl, spoon your frosting into a piping bag with a big, round tip (I used an Ateco 809).
Starting in the center, pipe out towards the edge and then back in, pushing the tip into the frosting before the releasing the pressure and pulling the tip back up. Georgetown Cupcakes and Pop Sugar have an awesome tutorial on this, which you can find here.
Garnish with sprinkles or coarsely chopped chocolate.

Expert tips
- Filling your cupcake liners: For a perfectly domed cupcake, fill you're liners ⅔ of the way full. Any more and it's likely to overflow.
- Knowing when your cupcakes are done: There are two ways to test for doneness. 1. Insert a tooth pick in the center of the cupcakes and if it comes out clean, it’s done. 2. Gently press the top of the cupcake and if it almost immediately springs back, it’s done.
- The secret to smooth, air-bubble free frosting: Once the frosting has come together, turn your stand mixer down to low and continue beating it for about 5 minutes. This should work out most of the air bubbles.
- Fill that piping bag like a pro: Spoon your frosting onto a large piece of plastic wrap, roll and twist the ends. Trim one end so there’s about ½” in length, drop your frosting into the piping bag (short end first) with the tip already on and pipe!
- Storing frosted cupcakes: While cupcakes are always best when eaten the same day they’re made, these can be stored in an air-tight container at room temperature for 1-2 days.
Frequently asked questions
While both butter and oil work well in cupcakes, they each have different advantages. Cupcakes made with oil tend to be more moist, take longer to go stale and have a more even crumb. Butter, on the other hand, creates a smaller crumb, adds flavor and can help with leavening.
For a perfectly domed cupcakes, fill your liners about ⅔ of the way full. This usually comes out to 3-4 tablespoons, depending on the leavening agents present in your batter.
Did you make this recipe? I’d love to hear how it went in the comments below. Better still, snap a photo and tag it on Instagram with #thesimplesweetlife. I love seeing your creations!
PrintRecipe
Chocolate Mint Cupcakes

Looking for a quick chocolate fix? Look no further than these foolproof chocolate mint cupcakes! With an impossibly moist chocolate cupcake base topped with a sweet swirl of mint frosting, these cupcakes are sure to satisfy even the toughest craving.
- Prep Time: 20 minutes
- Cook Time: 20 minutes
- Total Time: 40 minutes
- Yield: 12
- Category: Dessert
- Method: Baking
- Cuisine: American
Ingredients
For the chocolate cupcakes:
- 1 oz dark chocolate
- ½ cup hot water
- 1 egg
- ½ cup milk
- ¼ cup vegetable oil
- ½ tsp. baking soda
- ¼ tsp. baking powder
- 1 cup granulated sugar
- ½ cup baking cocoa
- ¾ cup all purpose flour
For the mint buttercream frosting:
- 1 stick unsalted butter, at room temperature
- 2 cups powdered sugar
- 1-2 tbsp. milk
- ½ tsp. mint extract
- Green food coloring
- Optional: Sprinkles
Instructions
- Preheat your oven to 350F and lining your cupcake pan(s) with cupcake liners.
- In a large bowl, whisk together your chocolate with the hot water until the chocolate is completely melted.
- In the bowl of a stand mixer, whip your egg until frothy and lightened in color, then whip in the oil.
- Add the chocolate/water mixture and the milk, mixing on low until just combined.
- Whisk in the rest of your cupcake ingredients, and pour your batter into your prepared cupcake pan(s).
- Bake for 18-20 minutes, or until a toothpick inserted into the cupcakes comes out clean.
- In the bowl of a stand mixer, combine your butter and powdered sugar for your frosting.
- Begin by beating the frosting on low, increasing to medium-high once the powdered sugar is incorporated.
- Add your milk and mint extract, and beat until the frosting is light and fluffy (about 5 minutes). Mix in the green food coloring until the frosting is a light, mint green.
- Spoon your frosting into a piping bag with a big, round tip.
- Starting in the center, pipe out towards the edge and then back in, pushing the tip into the frosting before the releasing the pressure and pulling the tip back up.
- Optional: Garnish with sprinkles.
Notes
- Filling your cupcake liners: For a perfectly domed cupcake, fill you're liners ⅔ of the way full. Any more and it's likely to overflow.
- Knowing when your cupcakes are done: There are two ways to test for doneness. 1. Insert a tooth pick in the center of the cupcakes and if it comes out clean, it’s done. 2. Gently press the top of the cupcake and if it almost immediately springs back, it’s done.
- The secret to smooth, air-bubble free frosting: Once the frosting has come together, turn your stand mixer down to low and continue beating it for about 5 minutes. This should work out most of the air bubbles.
- Fill that piping bag like a pro: Spoon your frosting onto a large piece of plastic wrap, roll and twist the ends. Trim one end so there’s about ½” in length, drop your frosting into the piping bag (short end first) with the tip already on and pipe!
- Storing frosted cupcakes: While cupcakes are always best when eaten the same day they’re made, these can be stored in an air-tight container at room temperature for 1-2 days.
Sources:
Frosting recipe adapted from Georgetown Cupcake
Cupcake recipe adapted from Miette
Nutrition
- Serving Size: 1 cupcake
- Calories: 308
- Sugar: 38.1g
- Sodium: 119mg
- Fat: 14g
- Saturated Fat: 6.8g
- Carbohydrates: 46.5g
- Fiber: 1.5g
- Protein: 2.6g
- Cholesterol: 35mg
If you enjoyed this recipe, you might also like...
- Salty sweet chocolate stout cupcakes
- Anything but basic cake (with 6+ variations)
- Hot chocolate cake
Update Notes: This post was originally published in January of 2015 but was republished with an updated format and tips in October of 2021.


Nicky @ Pink Recipe Box says
I might be getting a bit ahead of myself here, but I think these cupcakes would be perfect for St Patrick's Day!
The Simple, Sweet Life says
I'd never even thought of that, but you're so right! 😀
Thalia @ butter and brioche says
Looking at the images of these cupcakes has just got me craving one so bad. They look SO perfect.. pinned!
The Simple, Sweet Life says
So glad you liked them! And they're so easy to make, you could have some in about 30 minutes. 😉
writermomangela says
That is my favorite ice cream flavor in cupcake form!!
The Simple, Sweet Life says
Mine too! 🙂
Mary says
Oh my! These look amazing! I'm a sucker for anything mint, especially when there's chocolate involved as well!
The Simple, Sweet Life says
I completely agree! It's so hard to beat mint and chocolate! 🙂
anna4t2014 says
Oh yum. Chocolate + Mint is definitely a major weakness of mine, so I cannot wait to try out your recipe!! Looks absolutely delish! 🙂 Pinned!
The Simple, Sweet Life says
You'll have to let me know what you think of it if you get around to making it! 🙂
Becky at Cooking with Vinyl says
These look delicious! Thank you for sharing. I've followed your social sites and hope we can connect. I look forward to reading more. Becky
The Simple, Sweet Life says
Thanks so much for stopping by! I can't wait to stop by and check out your blog! 🙂
Bernadyn says
I had to click on this, I love mint chocolate! Yum, pinned!
The Simple, Sweet Life says
I'm such a sucker for chocolate and mint too! 🙂 Thanks for stopping by!
Stephanie says
YUM!! Thank you so much for linking up at Tasty Tuesday! Your recipe has been pinned to the Tasty Tuesday Pinterest board! Please join us again this week!
bel @ Mums Take Five says
I love these! They looks so good, Thanks for contributing this post to The Sunday Brunch Magazine!
All the best, Bel
The Simple, Sweet Life says
I can't wait to see the latest magazine! I was seeing some pretty stunning stuff being linked up! 🙂