
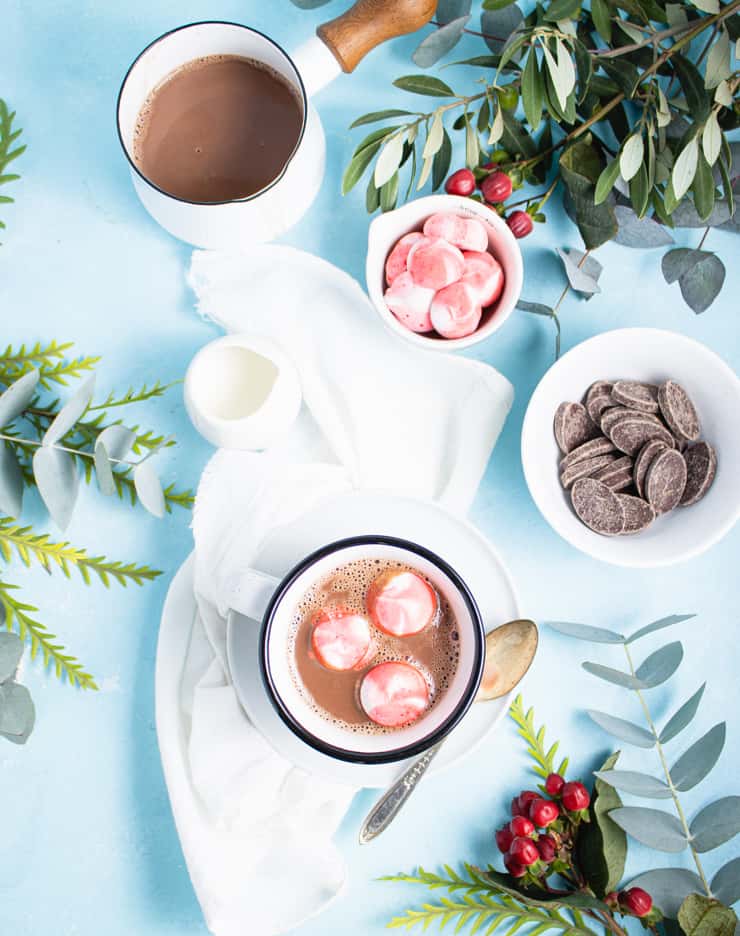
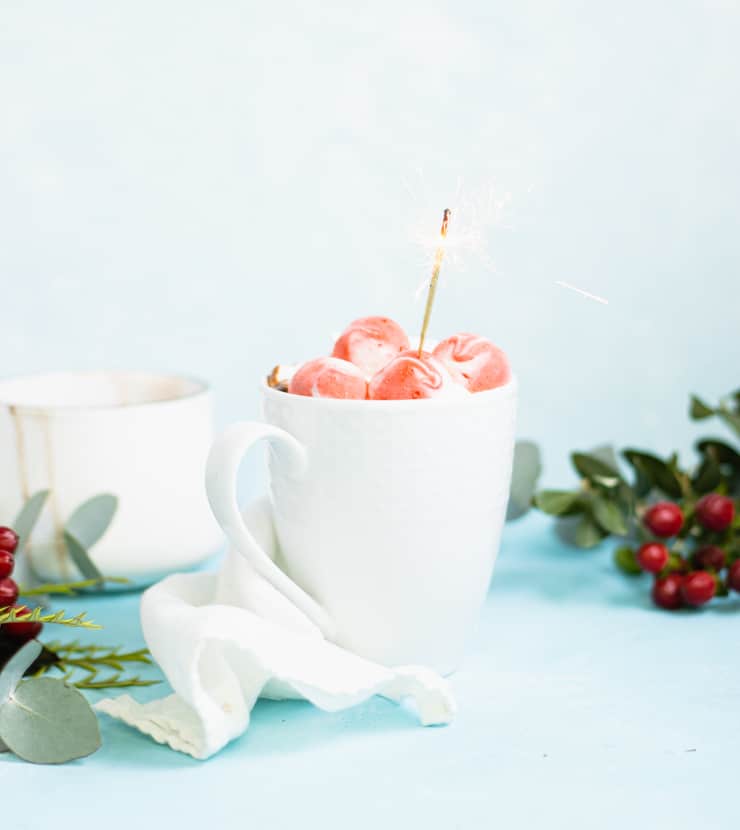
Whether you're adding them to your own hot chocolate or including them in a gift basket to a lucky someone, these peppermint marshmallows are sure to make the season cheery and bright!
Guys, I have a confession. A confession that will surprise all of none of you if you've been with me for any length of time.
My confession: I like my hot chocolate extra. Extra chocolate. Extra marshmallows. And a big ol' helping of extra indulgence. Why? Well one, because I'm an adult and I do what I want. And two, because winter is me time.
Summer bod? Hibernating under three layers of sweaters and a parka. Leg shaving? Optional... at best. More pajama pants wearing than should be legal? Probably. Snuggled up somewhere next to a heater with a warm beverage? You know me too well.
And as long as we're indulging, we might as well be extra about it. So extra, that we make our own marshmallows... colorful marshmallows... in festive holiday flavors. The trifecta of extra.
So go ahead, cozy on up to that heater and grab yourself a hot cup of chocolate with a heaping handful of these peppermint marshmallows. Here's to us time! Pajama pants: optional.
How to make peppermint marshmallows
First, make the marshmallow base.
You’ll need to prepare your gelatin, make a sugar syrup, and whip up some egg whites. Add your gelatin to your syrup, combine with your egg whites, and whip until fluffy.
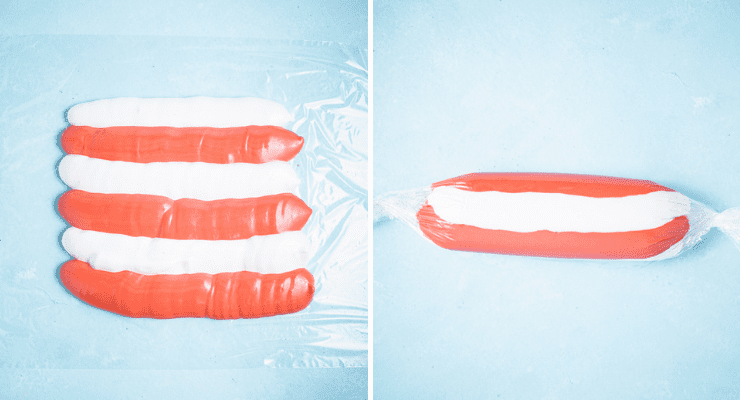
Second, color half of the marshmallow red.
Load the white and red marshmallow into two separate piping bags and pipe 6 lines of marshmallow (3 of each color) onto a piece of plastic wrap, alternating colors.
Place another piece of plastic wrap over the top of the marshmallow, roll it up and twist the ends.
Third, pipe your marshmallows.
You'll want to pipe your marshmallows onto powdered sugar dusted parchment paper using a large, round tip (I used an Ateco 809).
You can smooth out any bumps or raised areas on your marshmallows by wetting your finger and running it over the top of the marshmallows.
Allow the marshmallows to dry for at least 8 hours but preferably overnight.
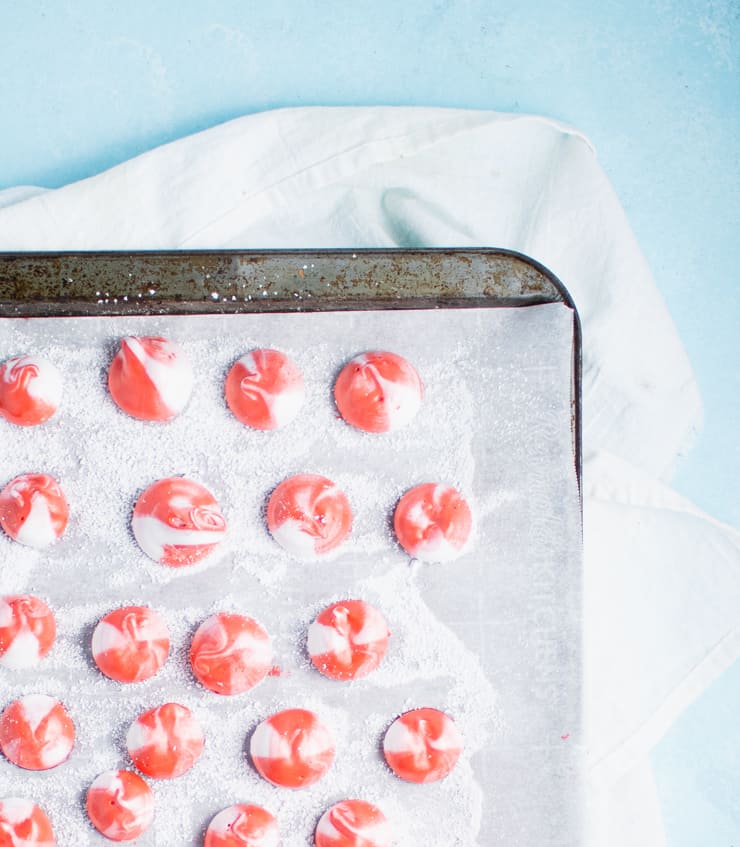
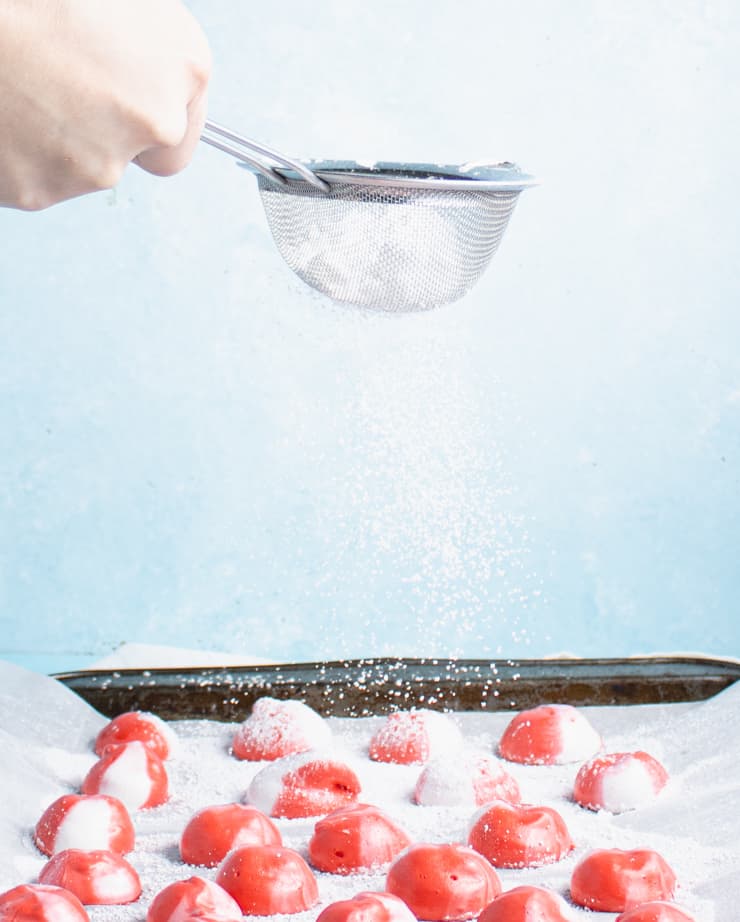
Finally, dust your marshmallows with powdered sugar.
Even once they've dried, the tops of your marshmallows will likely still be a little sticky. To remedy this, simply dust them with a little powdered sugar, brushing off any excess.
Expert tips
Never made hand piped marshmallows? No worries! Here are some quick tips to help you make them right the first time around:
- Hand piped marshmallows are all about consistency. You’ll want to whip your marshmallow until light and fluffy but still very malleable. You’ve nailed your consistency if you can pick up a spoonful of your freshly whipped marshmallow, drop it back into the bowl, and it reabsorbs in about 20 seconds.
- Once your marshmallow is the right consistency, put it in a piping bag and pipe immediately. Marshmallow will slowly firm up, even in a warm room, so you’ll want to pipe your marshmallow immediately.
- Grease AND dust your parchment paper with powdered sugar to make peeling off those marshmallows a breeze.
- If you're having a hard time getting the marshmallows to release from the piping bag/tip, simply wet your fingers and use them to "cut" the marshmallows and press them back onto the parchment
- After you dust your marshmallows with powdered sugar, they can look a little faded. This means there's still too much excess powdered sugar on them. I find the easiest way to remove it is the rub the marshmallows back and forth in my hands.
- Storage: homemade marshmallows will keep for about a month when stored in an airtight container in a cool place.
Recipe
Peppermint Marshmallows

Whether you're popping these babies in hot chocolate or starting a new trend in the world of s'mores, these from-scratch peppermint marshmallows are sure to be a hit!
- Prep Time: 8 hours
- Cook Time: 10 minutes
- Total Time: 8 hours 10 minutes
- Yield: ~70 marshmallows
- Category: Dessert
- Cuisine: American
Ingredients
- ¼ cup light corn syrup
- ¾ cup granulated sugar
- ¼ cup water + 2 tbsp.
- 2 egg whites
- 1 tbsp gelatin powder (1 packet)
- ½ tsp vanilla extract
- Powdered sugar (for dusting)
- Red food gel coloring
Instructions
- In a small bowl stir together the gelatin and 2 tablespoons of (ice cold) water. Set aside so the gelatin can absorb the water.
- In a small saucepan whisk together the corn syrup, granulated sugar, and ¼ cup water. Bring to a boil and allow to cook until a candy thermometer registers 235F/113C.
- In the meantime, beat your egg whites until they hold soft peaks.
- Once the sugar mixture reaches the right temperature, whisk in the gelatin (be careful with your hands because it’s likely to release hot steam when you do this) and stir to dissolve.
- Slowly add the hot mixture and vanilla extract to the egg whites and whip until light and fluffy (about 5-7 minutes).
- Cover a couple of baking sheets with parchment paper and dust with sifted powdered sugar.
- Divide the marshmallow into two equal parts and tint one red.
- Spoon the red and white marshmallow into two separate piping bags and pipe 6 lines of marshmallow (3 of each color) onto a piece of plastic wrap, alternating between colors.
- Place another piece of plastic wrap over the marshmallow, roll it up, twist the ends and put it in a piping bag with a large, round tip.
- Allow your marshmallows to dry overnight.
- Gently peel the marshmallows from the parchment paper or dust a spatula generously with powdered sugar to gently lift them if they prove difficult.
- As you remove the marshmallows from the parchment, drag them through a small bowl of powered sugar to make sure they’re thoroughly coated. Dust them off so there’s no excess powdered sugar.
Notes
- Hand piped marshmallows are all about consistency. You’ll want to whip your marshmallow until light and fluffy but still very malleable. You’ve nailed your consistency if you can pick up a spoonful of your freshly whipped marshmallow, drop it back into the bowl, and it reabsorbs in about 20 seconds.
- Once your marshmallow is the right consistency, put it in a piping bag and pipe immediately. Marshmallow will slowly firm up, even in a warm room, so you’ll want to pipe your marshmallow immediately.
- Grease AND dust your parchment paper with powdered sugar to make peeling off those marshmallows a breeze.
- If you're having a hard time getting the marshmallows to release from the piping bag/tip, simply wet your fingers and use them to "cut" the marshmallows and press them back onto the parchment
- After you dust your marshmallows with powdered sugar, they can look a little faded. This means there's still too much excess powdered sugar on them. I find the easiest way to remove it is the rub the marshmallows back and forth in my hands.
- Storage: homemade marshmallows will keep for about a month when stored in an airtight container in a cool place.
Marshmallow recipe adapted from Buttercream Blondie
Nutrition
- Serving Size: 1 marshmallow
- Calories: 17
- Sugar: 3.4g
- Sodium: 2mg
- Fat: 0g
- Saturated Fat: 0g
- Carbohydrates: 4.2g
- Fiber: 0g
- Protein: .3g
- Cholesterol: 0mg
If you liked this, you might also like...
Update Notes: This post was originally published in December of 20157 but was republished with an updated format, recipe and tips in November of 2021.


Gloria Duggan says
OMG these are so pretty. I have never made marshmallows. After seeing how awesome these look, sounds like some fun in the kitchen.
Jessica Robinson says
I've never made homemade marshmallows, but these I've GOT to try! They are so festive and would the perfect handmade holiday gift. They look so tasty!
Abby says
I'm with you on the hot chocolate: the richer, the better! I've yet to make my own marshmallows, but these are pretty enough that I just might try it.
Nicola @ Happy Healthy Motivated says
I made my own (plain) marshmallows once, but they were nowhere near as pretty as these. I can just imagine how amazing these must taste in coffee and hot chocolate. Definitely going to give them a try!!
Paige says
This is a super creative idea - love it! And your photos are great too!
Analida's Ethnic Spoon says
The marshmallows look so lovely! I would spend the entire winter in comfy clothes too with some of these if I could! Thanks for sharing!
Helene says
I like my hot chocolate with extra chocolate too. What I have still not tried yet is adding marshmallows, I don't know where to get them and I am bit lazy in making them from scratch. I wish I could have a cup full right now!!
Amanda Mason says
Oh! How fun are these and oh so pretty! I've not heard of anything like this before! This would be so fun to make during the holidays and over the winter months! Pinning this one for later!
FoodieGirlChicago says
I've been wanting to make marshmallows for a while. This is the perfect recipe for the season. Pinned!!
lauren says
Omg I'm in love! Marshmallows + Hot Chocolate is a natural combination, but I never thought about peppermint! This sounds so delicious, like a creamy peppermint mocha!
Michelle @ Vitamin Sunshine says
These are gorgeous-- and I am sure they make hot chocolate extra special!
Monica says
These are gorgeous - really pretty photography! And I'm with you - if you're having hot cocoa, you might as well have it with the fixings!
Sara Lehman says
These are gorgeous! I know they have to be great in cocoa!