
Lately, I've been working with and posting more about desserts decorated with fondant, and it seemed like it was high time to write a little bit about the basics of making and working with fondant. Some of you have easy access to premade fondant, and if you're not interested in making it yourself, there's certainly no shame in that. That being said, not everyone (myself included) can easily purchase fondant because of where they live, and it can start to get expensive if you're purchasing a lot of it. So in this post, I'm going to show you how to easily make fondant, how to work with it, store it, and talk about some of the differences between store bought and home made fondant, as well as providing some links for more resources.
Basic Marshmallow Fondant
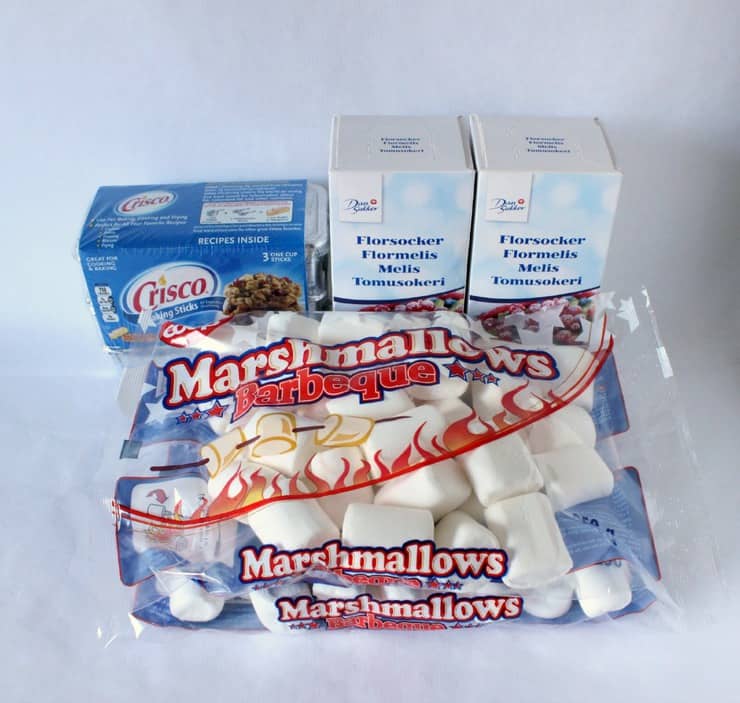
Makes enough to cover and decorate two 8'' cakes
What you'll need:
16 oz (454 grams) marshmallows (any size)
2 lbs (907 grams) powdered sugar
2 tbsp. water
Vegetable shortening (to grease the bowl)
Making Marshmallow Fondant
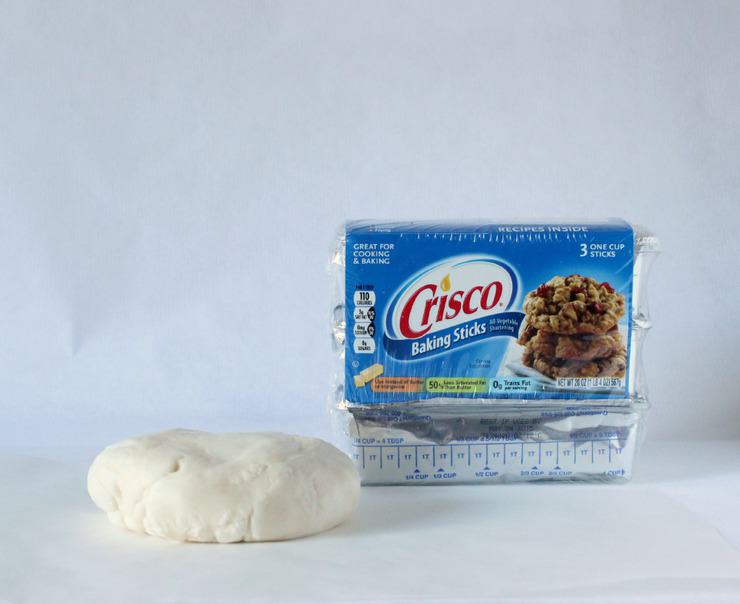
Marshmallow fondant is really easy to make and, in my opinion, tastes better than the other kinds. To make the fondant, start by greasing the bowl of a stand mixer with vegetable shortening. You'll want to use the hook attachment for this mixing job. In a large, glass bowl, combine the marshmallows and water, and heat in the microwave until melted (it doesn't need to be liquefied but melted enough that it sticks to your fingers when touched). Pour your melted marshmallows into your stand mixer, and start mixing and adding your powdered sugar.
A note about how much powdered sugar to add: I rarely use the entire 2 lbs of powdered sugar, but depending on the room temperature where you're working and the humidity, you may need more or less powdered sugar. I usually start with 1 ½ lbs and add more until I get the right consistency (remember, you can always add more powdered sugar, but you can't take it away once you've added it). The correct consistency is a soft and workable fondant that may stick slightly to it's work surface but shouldn't stick too much to your hands when handled. Keep in mind that the fondant will stiffen as it cools down to room temperature, so try not to add too much powdered sugar while it's warm (you can always come back and knead it in by hand).
Shelf Life and Storage
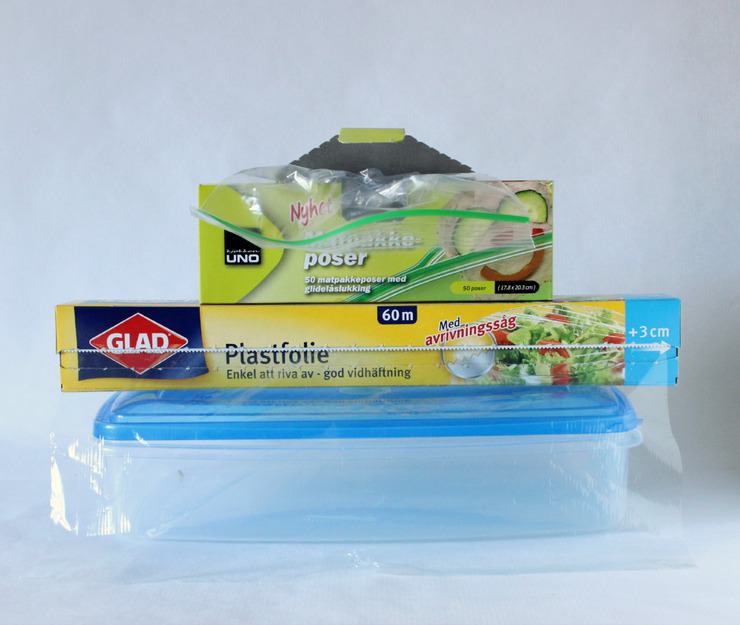
Fondant can be stored for quite some time if stored properly. The main thing to keep in mind when storing your fondant is keeping it in something that's airtight like plastic wrap, airtight containers, and sealable bags. I like to use at least two of these just to be on the safe side (I usually wrap my fondant in plastic wrap and put it in some sort of sealable baggie/container). After it's wrapped, I simply store my fondant at room temperature in my pantry.
When kept this way, marshmallow fondant can last for several months, and I've heard some even say up to four months (although I've never kept it so long myself). Once you're ready to use your stored fondant, you can unwrap it and microwave it in 5 second intervals until it's soft again (it should still be soft when unwrapped, but it won't be as soft as when you first made it).
Working with your Fondant
To get the most out of your fondant, you'll want to make sure you're working with it correctly. Marshmallow fondant has a tendency to stick to work surfaces and rolling pins, even when it's the right consistency, so you'll want to make sure to smear everything with a thin layer of vegetable shortening (I've also heard people use corn starch or powdered sugar, but vegetable shortening is my preference). If you use too much shortening, your fondant will become really greasy (but not anymore workable). It also helps to work on some sort of plastic surface, like a cutting board, pastry mat, etc. If you accidentally use too much shortening and your fondant becomes greasy, you can remove most of the grease by rubbing down your fondant with a dry paper towel.
Coloring Fondant
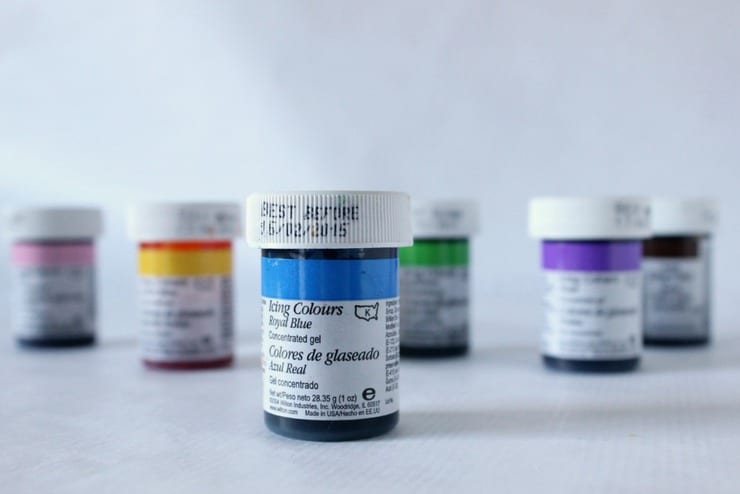
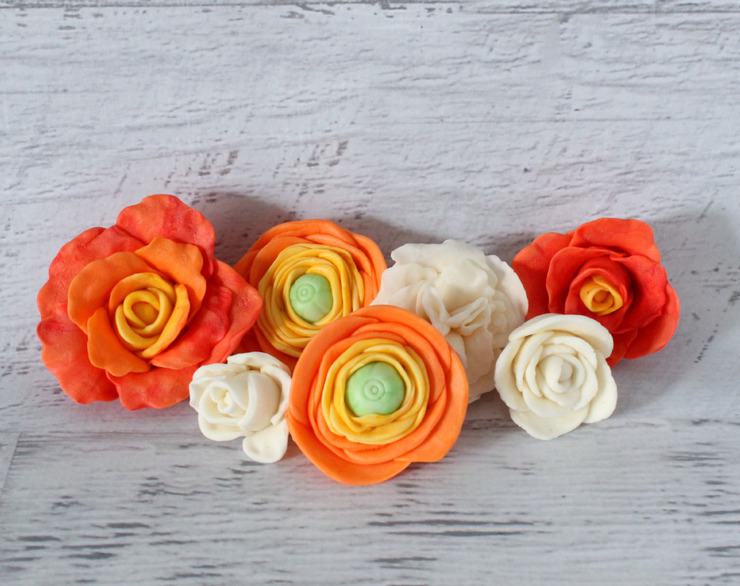
To color your fondant, you'll want to use a concentrated food coloring gel. Simply flatten out your piece of fondant, apply a little food coloring, fold it over so the food coloring is covered, and knead it in. Remember, you can always add more food coloring to make the color darker, but it's really hard to lighten it if you've added too much. If you're worried about staining your hands, you can use plastic gloves, but I've found a thin coat of vegetable shortening keeps the color from staining. Colored fondant can be stored the exact same way as uncolored fondant.
Marshmallow Fondant vs. Store Bought

Although I've used store bought fondant a lot less than the homemade marshmallow fondant, there are several differences that I've noted that I think are worth pointing out. First, as I mentioned before, marshmallow fondant tends to taste better. If you're going to be covering an entire cake with it, I think it's definitely worth going to marshmallow route. Secondly, marshmallow fondant takes a little longer to set up than store bought fondant. All of the store bought fondants I've used have hardened within 5 hours to a day. The marshmallow fondant I make, on the other hand, usually takes several days to harden. It does become stiff enough to build on it (if you're building a figure, for example) within a day, but it does take longer to reach the same level of hardness as the store bought stuff. If this is an issue for the project you're working on, you can knead in tylose powder to help it dry faster.
More Resources
She Knows Food and Recipes: Learn to Work with Fondant Like a Pro
Cake Boss: Fondant Basics Part 1
Food Network: Decorating with Fondant
Artisan Cake Company: Fondant YouTube Tutorials
Lynlee's: Fondant Tutorials
Make Decorate Celebrate: Fondant Decorating Techniques
Happy baking!
Recipe adapted from Cake Central

Sue says
This makes perfect sense. Thank you!
The Simple, Sweet Life says
I'm so glad you found it helpful! 🙂
Alic R. Balmes says
Hi. I love how this post make the making of MFondant a lot easier.. i tried it once and it was a bit dry. Quick question. Can i make the fondant designs 15 days ahead of time? and would it still be edible? the reason im asking is the designs is very detailed and i wann make sure i get the details correctly. Would love to hear your input on this. 🙂 thanks!
The Simple, Sweet Life says
Absolutely! The fondant can be made and stored for months, and the finished designs can easily be made and stored for 15 days. I recommend storing them in an airtight container, unless you want them to harden, in which case you can leave them out to dry. Hope that helps! 🙂
Kelsey says
Does it have to be a glass mixing bowl or is metal ok? Thanks, I found this info very helpful though!
The Simple, Sweet Life says
I'm so glad you found this helpful Kelsey! Glass would probably be your best bet, but a well-greased stainless steel bowl would work well too, I'm sure. Just, whatever you do, don't use a plastic bowl! 🙂
Emily Simpson says
When you are referring to "drying out" time is that time after mixed, or time once applied to the cake? I know this may be a silly question, but I am a novice here 😉
The Simple, Sweet Life says
Great question! And there are no silly questions. 🙂 Drying out usually refers to the time after you've shaped the fondant into something, like flowers or a figure. You usually don't want it to dry out before you've started working with it. 🙂
Sandy says
How do I store fondant cake when done.
Carol says
Wiqlql this recipe cover a double layer 8x13 cake?
The Simple, Sweet Life says
Hi Carol! Great question! This recipe makes about 3lbs (36oz) of fondant. Ultimately the amount of fondant you need will depend not only on how long and wide your cake is, but also how tall. I like to use this website to estimate how much fondant I'll need to cover various size cakes: https://www.craftybaking.com/howto/fondant-amounts-needed-cover-cake For a 9"x13" cake that's 2" high, they estimate you would need about 40 oz of fondant. If you wanted to cover a cake that's 9"x13" that's 4" high, you'd need about 1.5x this recipe.
Christine Bean says
Micro wave🤔😯😲😧 sorry couldn't resist
Lorraine ROMERO says
Are dried flowers 🌸 made out of fondant ok to eat?
Cristabelle Almeida says
After making mmf, does it need to be refrigerated overnight to set