

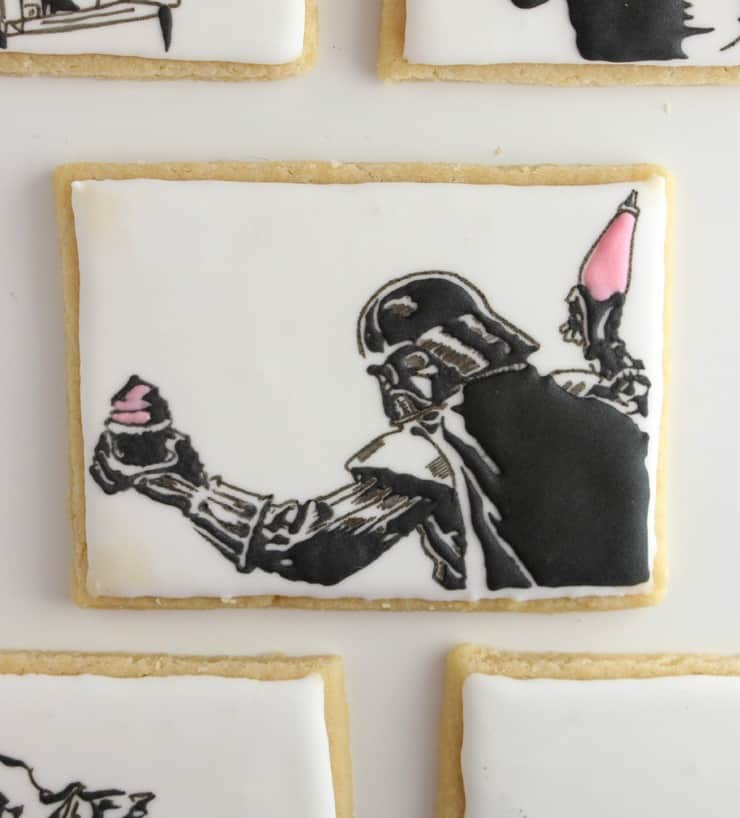
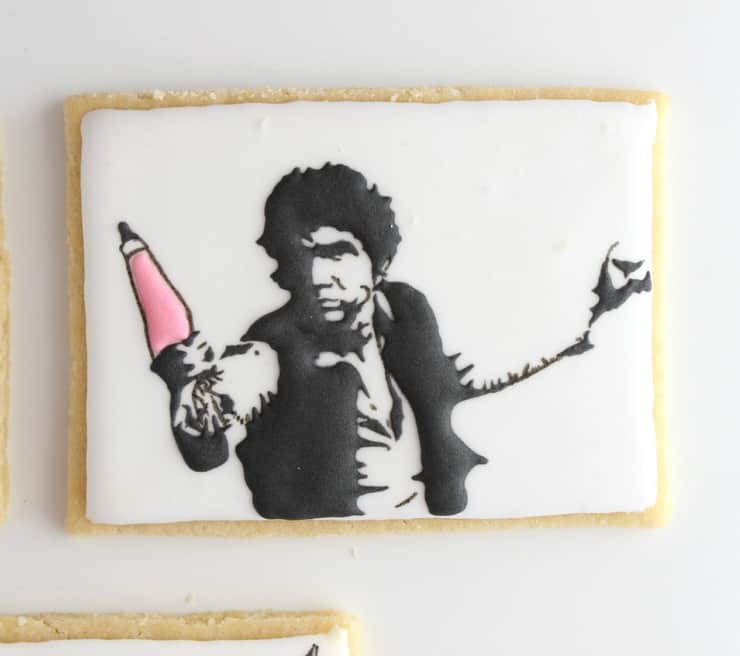
First and foremost: May the 4th be with you! I know we're still a day off, but now you have time to make these cookies to celebrate, right? These cookies were actually inspired by a t-shirt I saw over at Evil Cake Genius (a shirt that I'm pretty sure needs to be in my life) where Han Solo was holding a piping bag of frosting. I loved the idea so much, I couldn't help but make an entire cookie set with that theme for May the 4th. I really wanted to do it with black royal icing to create dimension and depth, but there were so many fine lines and subtle shading in some of the designs I'd put together that I just didn't think it was possible to do it all in royal icing. Which got me to thinking about mixed media art. A friend of mine and her mom do a lot of amazing mixed media art, and thinking about that made me realize that I didn't have to use only one type of cookie art. In fact, by using multiple forms of cookie art media, I could much more easily achieve the look I was going for!
Mixed Media Cookie Art
What you'll need (for these cookies):
Cookies iced with white royal icing
Black and pink royal icing (flood consistency)
A fine tip black food pen
A pin/needle
#1 piping tip and bags
You may have noticed that the supply list for this tutorial says, "What you'll need (for these cookies)." That's because the idea of mixed media cookie art encompasses a whole range of cookie art media. In this particular tutorial, we're using royal icing and a food pen, but you could also use food coloring for painting, gum paste or fondant accents, or other edible embellishments all under the umbrella of mixed media cookie art. Although it's not a have to, I would recommend using a projector or some other tool to help you transpose the image you're working with onto your cookie because we'll be working backwards, starting with the fine detail and working our way out to the outline. If you're not sure how to transpose your image, here's a cheaper projector alternative to the Kopy Kake and here's a method for doing it with just some tissue paper, a food pen, and a pin.

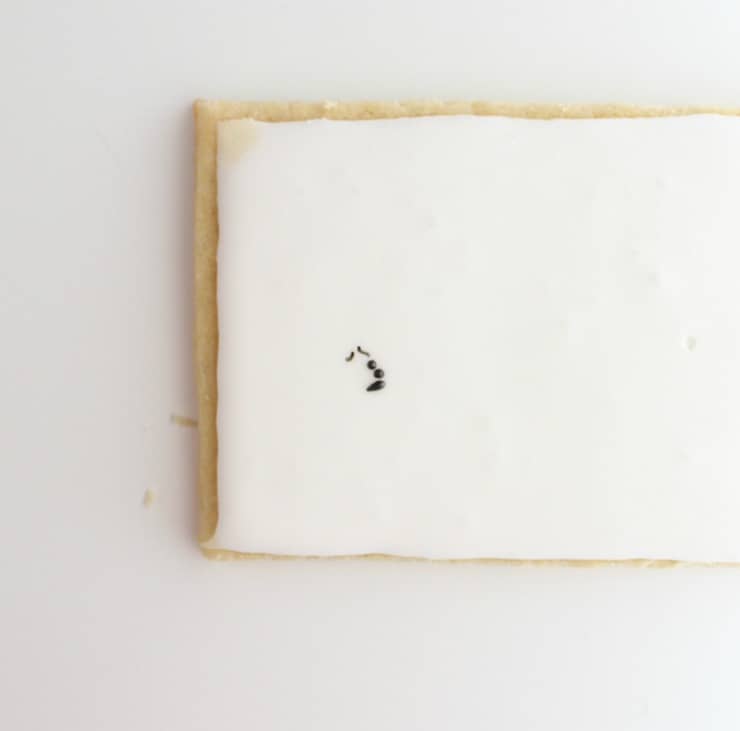
Using your black food pen (I used Rainbow Dust's double ended pen in jet black), start drawing in the fine lines and shading. Once you have all of those in place, you can start adding the black royal icing. The reason you want to begin with the fine lines is because it can be really hard to get those lines flush with the royal icing once the icing's in place. And if you try to do it while the royal icing is wet, you run the risk of coating your food pen with it, blocking the ink from coming out. Using black royal icing with a flood consistency (I like to use 10 second icing) in a piping bag with a #1 tip, start piping in the larger areas, working left to right, top to bottom (if you're right handed). Only fill in the large areas of color with the icing, and then use your pin or needle to gently work the icing out towards and over the lines you've drawn in with your food pen. You don't need to work the icing all the way over the lines (the pen lines are meant to be seen), but working it over the lines a little helps to blend the whole thing together. Because the icing starts to set up quickly, you'll want to pipe a little, move it around with your pin/needle, repeat. This is also why I don't have a ton of process pictures for you. Sorry, guys.

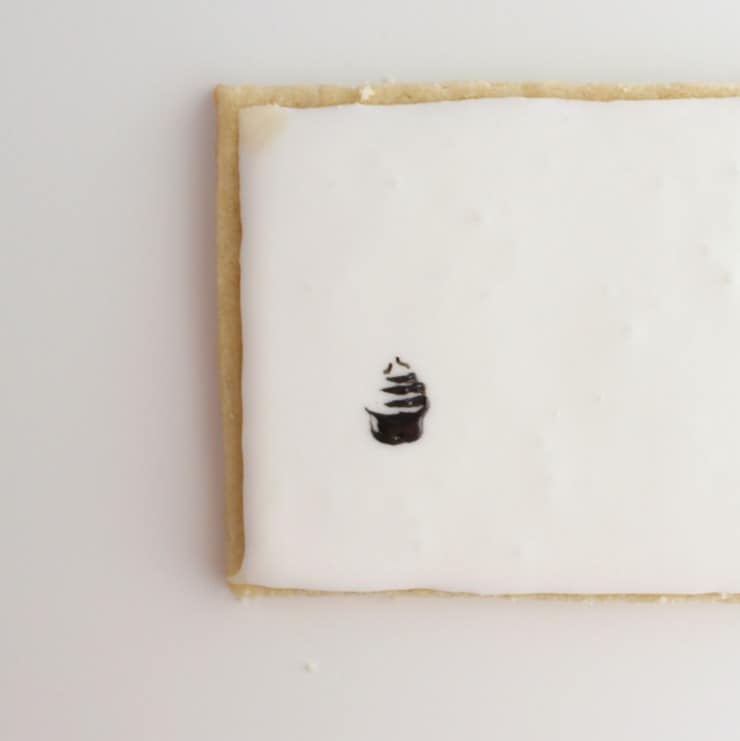
After all your black icing is in place, you can come back through with touches of pink icing for the piping bags and cupcake frosting.

I feel bad that I wasn't able to take more process photos because the icing was starting to set up, so is this something you'd like to see a video tutorial on? I don't really do video tutorials, but I'll do it just for you guys. Because you're awesome and I like your faces.


Alexis @ Persia Lou says
These are amazing! Love the mixed media technique!
The Simple, Sweet Life says
Thank you! 🙂
saltytomatoes says
I don't think I'll ever be able to make these :p Just stopped by to admire your work! Also HUGE star wars fan over here! Wished I had these cookies later when I'll be watching all 6 movies yet again 😀 congrats on the amazing work!
The Simple, Sweet Life says
All 6 movies?! Now THAT'S dedication! So glad you liked the cookies! 🙂
Uli says
Where can I buy them?! 😉 They look amazing!!! And yes, I think a video tutorial would be great. I'm sure you already have a lot of followers for this kind of DIY. Well done! x
FOUND SOME PAPER BLOG
The Simple, Sweet Life says
Thank you! So glad you liked them! 🙂
Paola @ Do It With Heart says
These are amazing! The patience Oh My!
The Simple, Sweet Life says
Thank you! This sort of thing is definitely a labor of love. 🙂
mj says
Wow you are talented!
The Simple, Sweet Life says
What a sweet thing to say! Thank you for makin' my day, MJ! 😀
Mary W. says
Omigawwwwwd! Just found your blog...love it and love these cookies! So clever! You must have been cracking yourself up the whole time you were making them!
The Simple, Sweet Life says
All I can say is that the nerd in me was far more excited about these cookies than any one person should be... And I may or may not used my best Obi Wan Kenobi voice on more than one occasion to tell my husband "These are not the cookies you're looking for" when he'd try to sneak some off the kitchen counter. 😉