
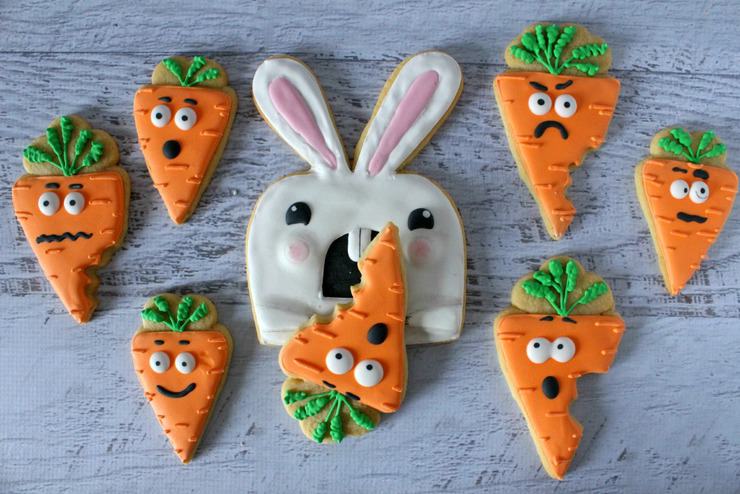
It doesn't matter what holiday we're celebrating, I always have to make some sort of silly goodies! I may not always get around to posting them on Facebook or writing a tutorial for them here, but I can guarantee, I always make silly holiday goodies. With Easter quickly approaching, and all sorts of fun and delicious goodies popping up on Facebook and Pinterest, I couldn't help but get in the mood for some Easter silliness. I've also been enjoying some anime in my free time, and I'd be lying if I said my cookie bunny wasn't partially inspired by Domo (if you haven't heard of Domo before, you can check out one his shorts here).
Killer Bunny Cookies
Cookies
Royal icing
Food gel coloring in orange, green, pink, and black
Piping bags
A clean brush
Toothpicks (or wooden skewers)
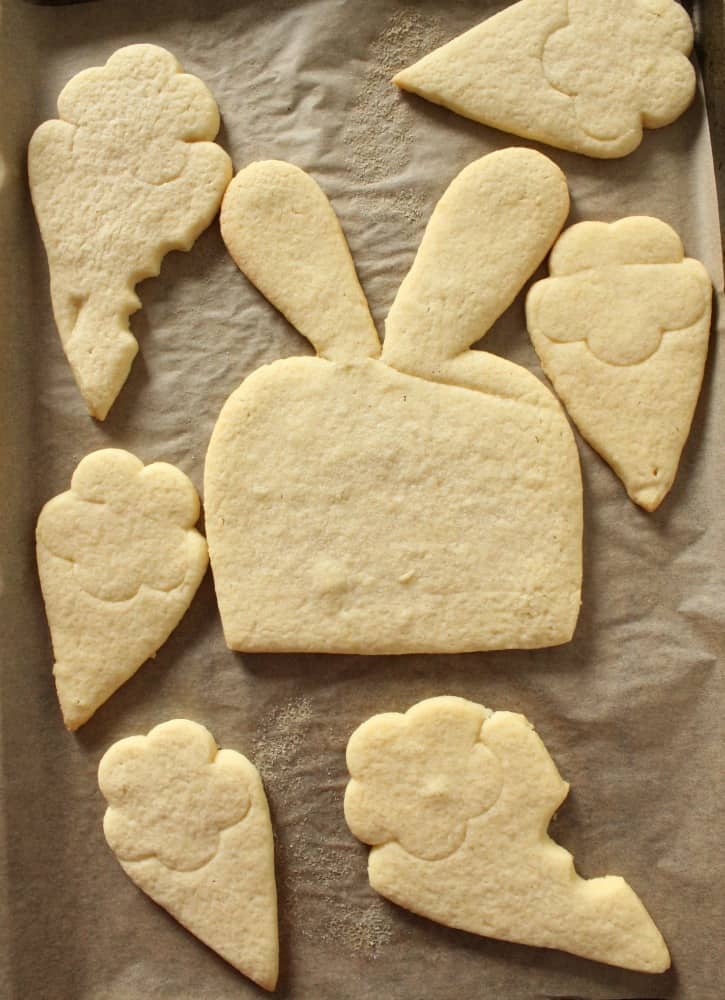
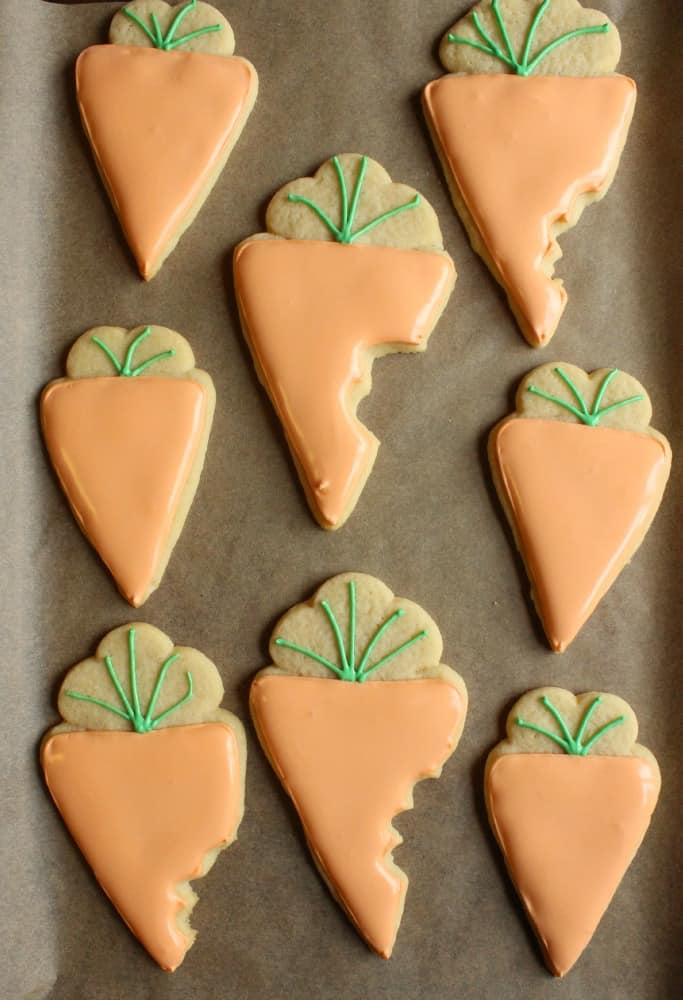
Start with your baked and cooled cookies (I used my go-to sugar cookie recipe). If you're like me and don't have a cutter that work for these cookie shapes, you can make custom cutters (I made mine out of cardboard and cut the cookies out with a knife. The tops of the carrots were made with flower cutters, and the bite marks were the tail-end of a turkey cookie cutter). There are two distinct designs in this set, so let's start with the bunny first.
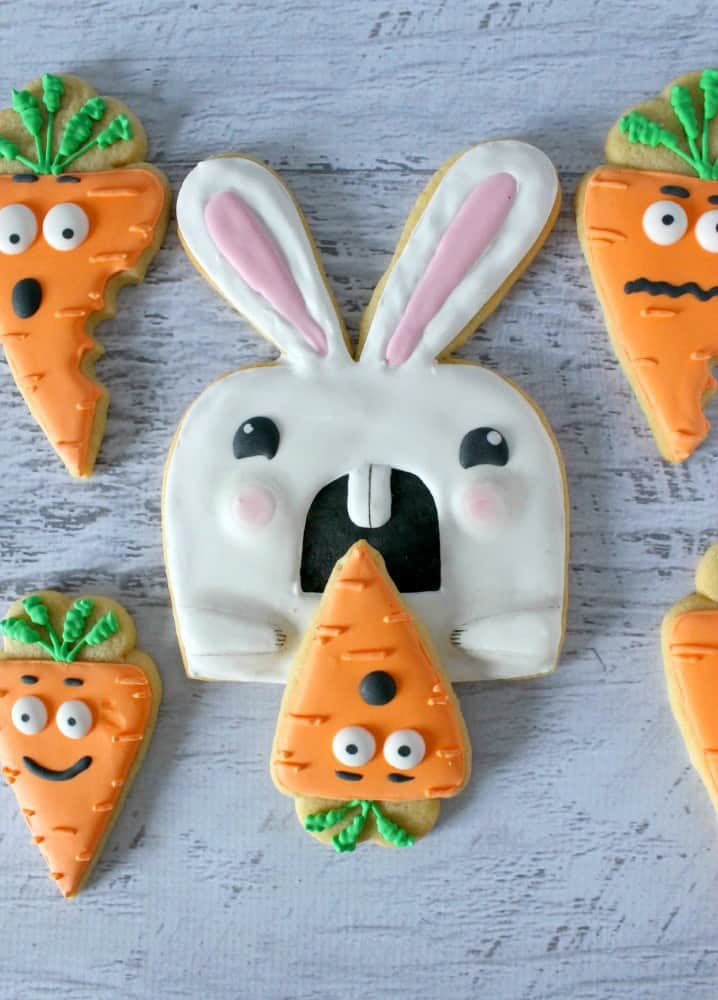
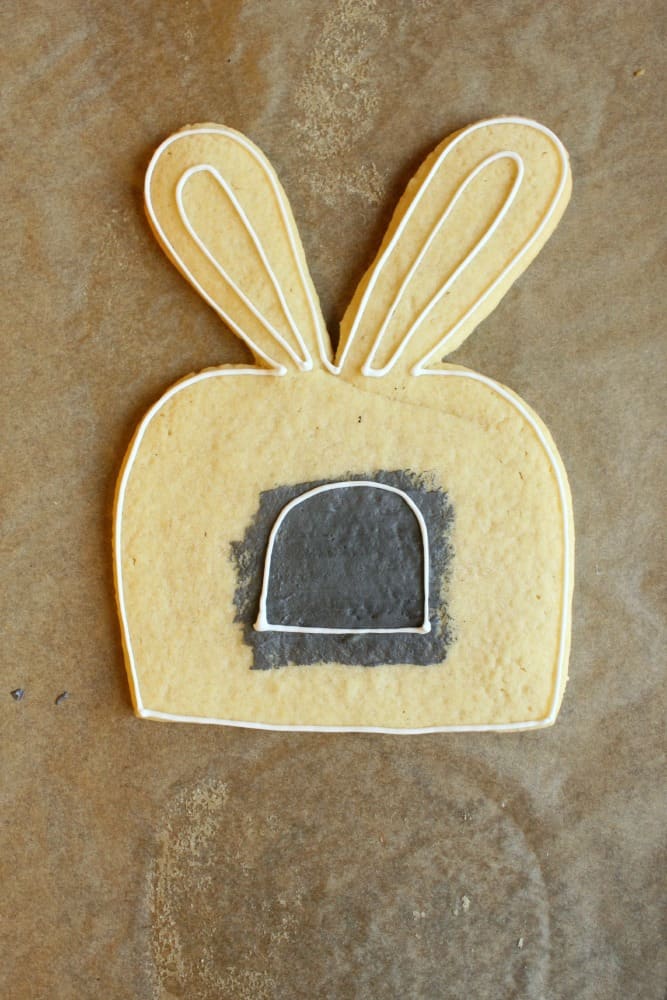
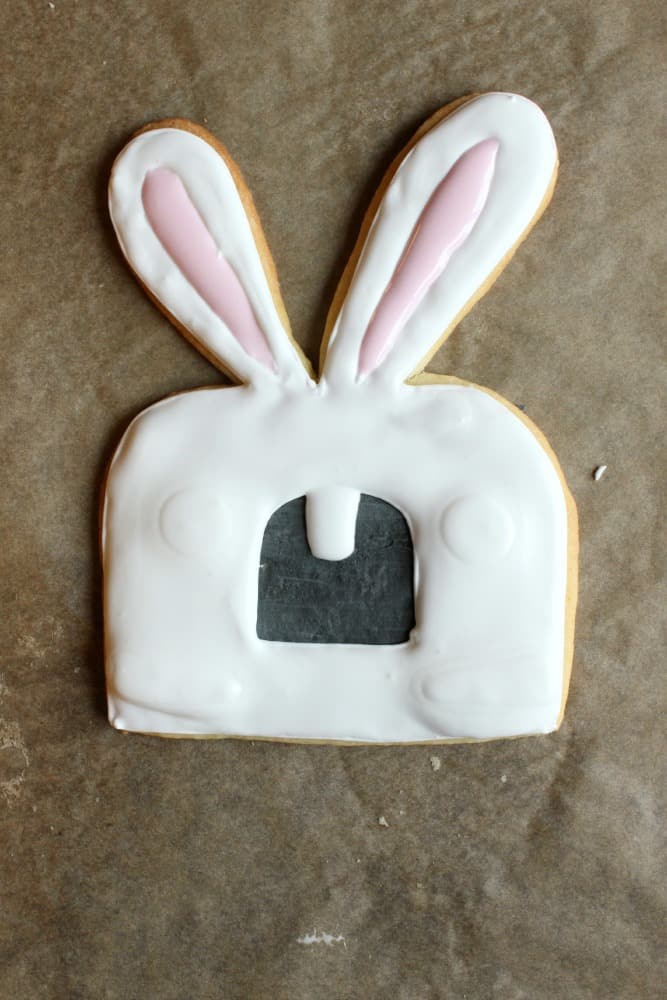
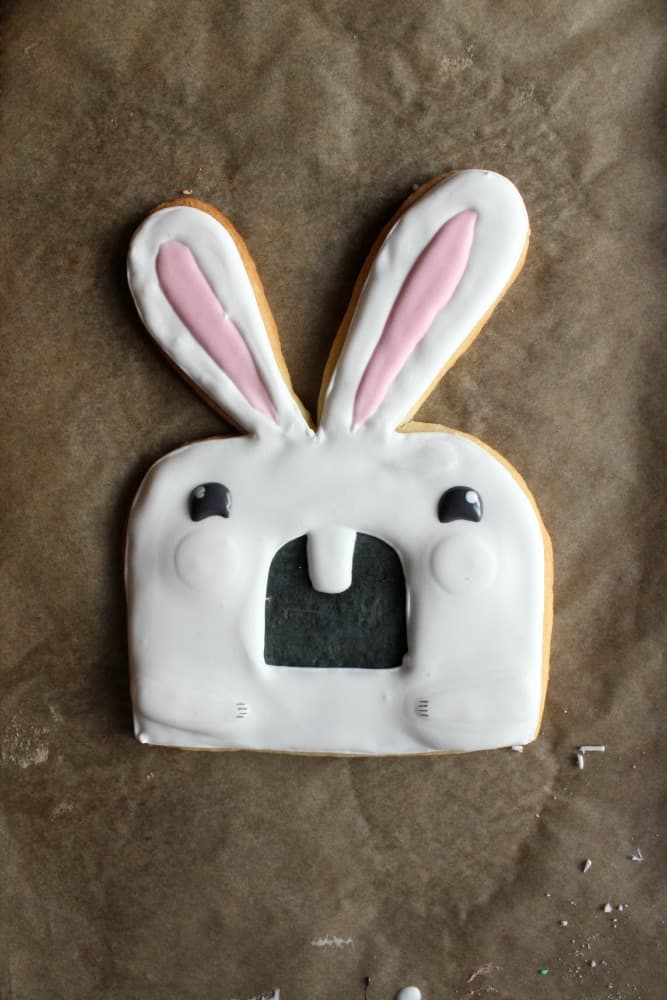
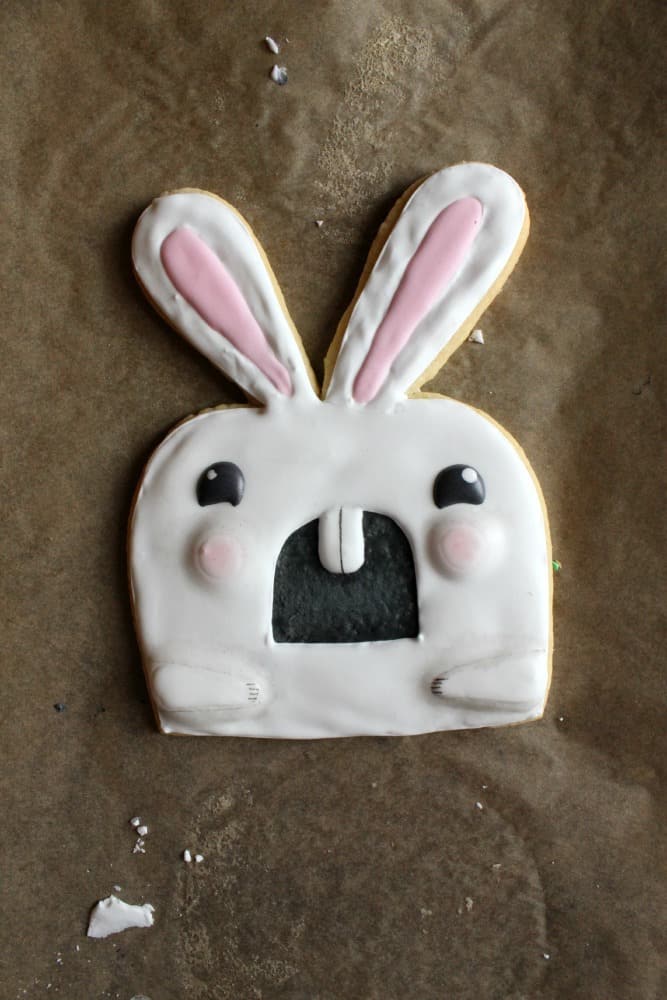
With your brush, paint some thick, black royal icing onto your cookie where the mouth will be. Don't worry about being exact; you'll be covering it with white icing in a moment (but do be sure that you paint a large enough area so you don't have any gaps between the black and white icing). Using piping consistency icing in white, outline your cookie, the inside of the ears, and the mouth area. Fill in your outline with white flood icing.

You want to let the icing set just a little bit before you start making the cheeks and arms, so now is a good time to fill in the center of the ears with pink icing in a flood consistency. Once your ears are done, go back with your white flood icing and add arms, cheeks, and the teeth. This should be just enough time that the icing won't totally melt into the icing that's already there, but not so much that it looks like an extra layer (we want a smooth transition).
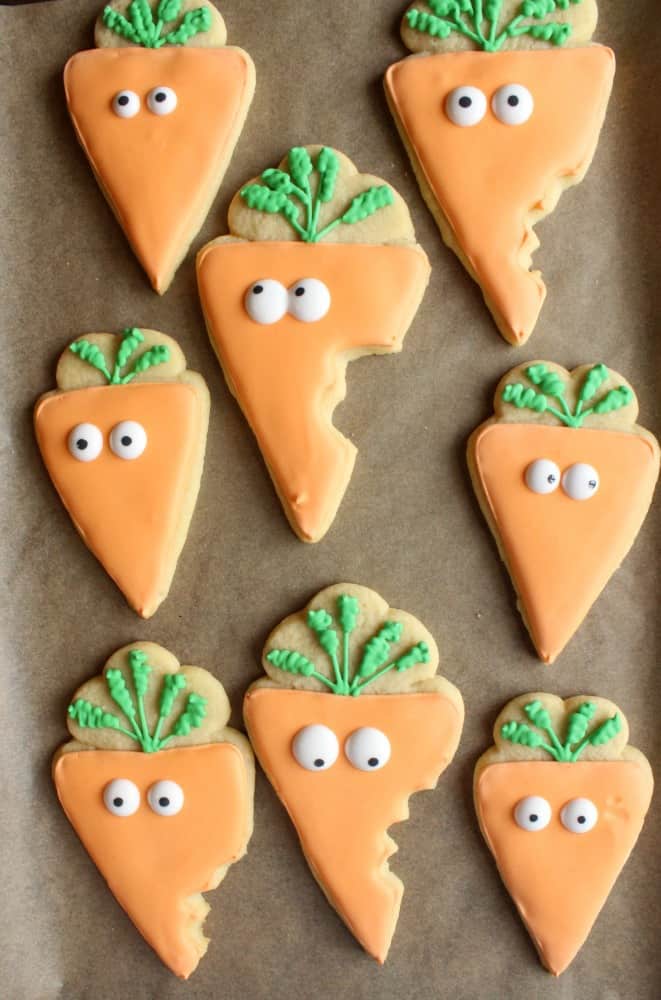
While the bunny cookie(s) start to dry, we can move onto the carrots. These guys are really simple. Start by outline your carrot area with orange piping icing and filling it with orange flood icing. With a green icing with a 20 second consistency, start adding lines for your stems our of the top of the carrots. Go back and add some zigzag lines over the lines you just made to create that sort of bushy look that the stems have.


While the icing on the carrot cookies start to dry, we can pull those bunny cookies back out and keep working on them. With a black 20 second consistency icing, pipe the bunnies' eyes. Add a small dot of your white icing while the black is still wet to add dimension. Set your bunnies aside to dry until completely hard (at least 4 hours).
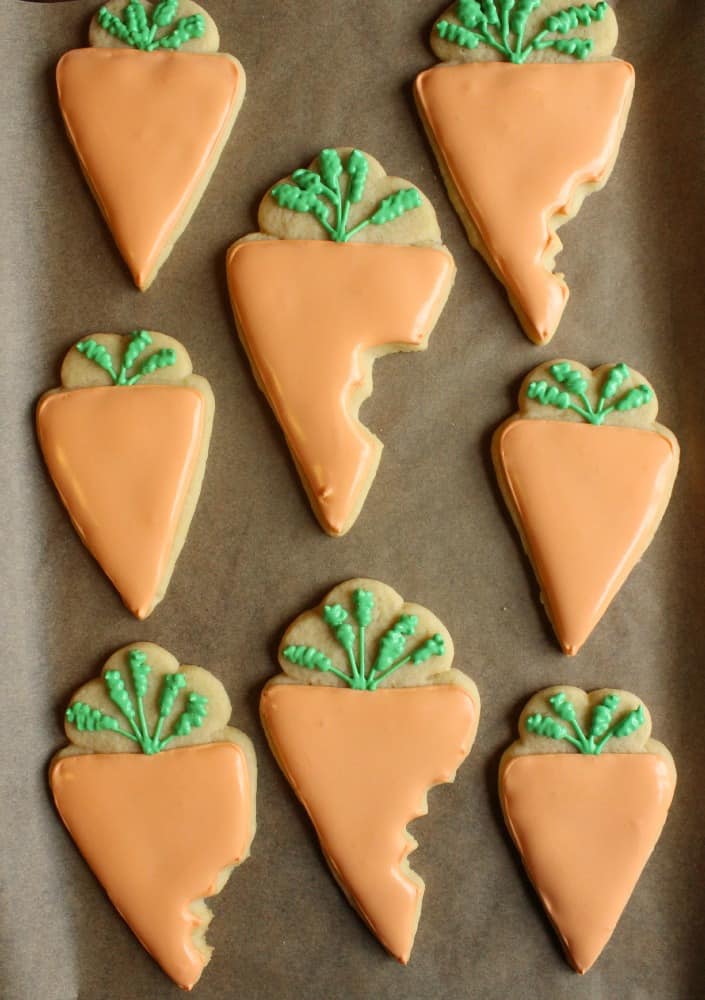
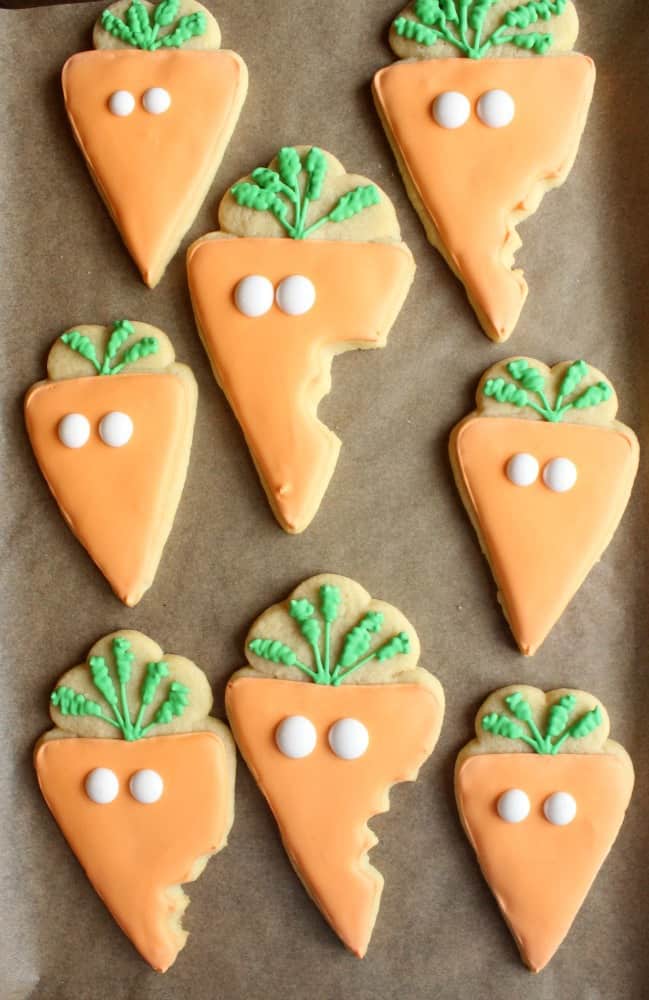
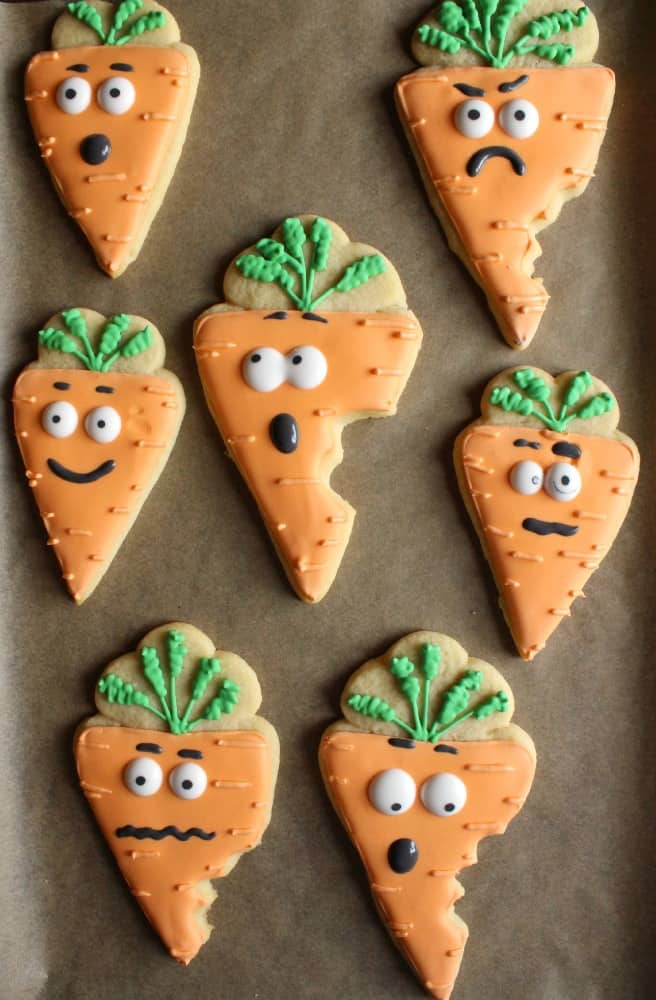
Now that the carrot cookies have had a chance to crust, you can start adding some features. Using white icing with a 20 second consistency, add large white dots for eyes. Go back through while the white icing is still wet and use your black icing to add pupils. Once the eyes are done, you can start adding the rest of the features like mouths and eyebrows to create a wide range of expressions for your carrots. Finish off your cookies by going back with your orange piping icing and adding lines along the body of the carrots.
Once your bunnies are completely dry, you can shade around the arms and cheeks with a little brown/black food coloring to accentuate the dimensions created by that extra layer of icing. Don't forget to add some detailing to the teeth, paws, and even a little pink on the cheeks.
Let all your cookies dry before packaging.

Happy baking!


Sue says
It shows! Each one is different. It reminds me of the bells 🙂
The Simple, Sweet Life says
Thank you! It took me a moment to get your reference to the bells, but as soon as I did, I had to go watch that short again. There's nothing wrong with watching Christmas shorts in the middle of spring, right? 😉
Joni says
These are so fun. I love them. You are so creative! Joni
The Simple, Sweet Life says
Thank you so much! 🙂
Angela says
I love these! Especially the expressions on the carrots!
The Simple, Sweet Life says
I'll admit, I totally had a blast making all their little expressions. 🙂 Glad you liked them!
liztiptopshape says
These are the absolute cutest!! I can't stop smiling looking at these!
The Simple, Sweet Life says
I'm so glad you enjoyed them! 🙂
Kristy O says
OMG these are AMAZING!!!! and SO funny! My Niece loves bunnicula (the book) and these cookies remind me of that! These cookies made my day, seriously, way too cute!
Kristy @ 3 Peppers Recipes - Cooking, Crafts & Color
The Simple, Sweet Life says
Oh my God! I used to read Bunnicula as a kid and I'd TOTALLY forgotten about him!! Thanks for bringing back that childhood memory. 🙂 I'm glad you enjoyed the cookies!
Bobbi - 3GLOL says
LOL....I wish I had your talent for the decorating part! These would be right up our alley! Love em! Thanks for sharing!
The Simple, Sweet Life says
I'm sure with a little practice you'd be whipping these guys out in no time! 🙂 I'm glad you enjoyed them!
lisa@hooplapalooza says
oh my goodness. these TOTALLY made me smile! especially after the week i had when i wish i was that bunny eating i dunno...certain carrots 🙂
The Simple, Sweet Life says
I'm so glad they were able to brighten your day! 🙂