

Whenever I put together a treat table, I try to have a balance in terms of goodies... Not all cupcakes, and not all cookies. So as I was putting together our Halloween sweets table, I needed to come up with some cake pops to give my table a little more dimension. And what better cake pops to spook up your treat table than some creepy, crawly eyes!
Eyeball Cake Pops
Yields about 2 dozen cake pops
For the cake pops:
¼ cup vegetable oil
1 cup granulated sugar
½ tsp. baking soda
½ tsp. baking powder
1 tsp. vanilla extract
2 eggs
4 tbsp. baking cocoa
¼ cup milk
1 cup flour
½ container frosting
For the coating:
500 grams of white candy melts OR white chocolate (5 bars)
Food gel coloring in blue, green, and black
Additional materials:
Lollipop sticks
A small, clean brush
A cookie sheet lined with parchment paper
Ribbon and cellophane (optional packaging)
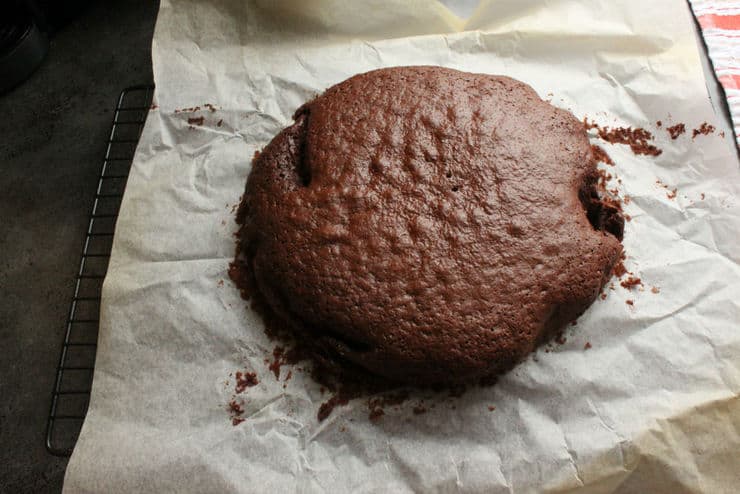
Start by making your cake. This is something you can even do the night before as it needs to be completely cool before you start working with it. To make the cake, preheat your oven to 350* Fahrenheit (175* Celsius) and line a 9″ pan with parchment paper (you don’t have to worry about being neat with it since you’ll just crumble the cake later). In a large bowl, beat together the vegetable oil, granulated sugar, baking soda, baking powder, vanilla extract, and eggs. Mix until all ingredients are well combined and there are no lumps. Gently stir in the cocoa powder until there’s no longer any powder on top of the batter. Add the milk and beat until the batter is smooth. Add the flour and mix until the batter thickens and is lump free. Bake for 25-30 minutes, or until a toothpick inserted in the center of the cake comes out clean. Remove the cake from the pan and allow it to cool completely before proceeding.
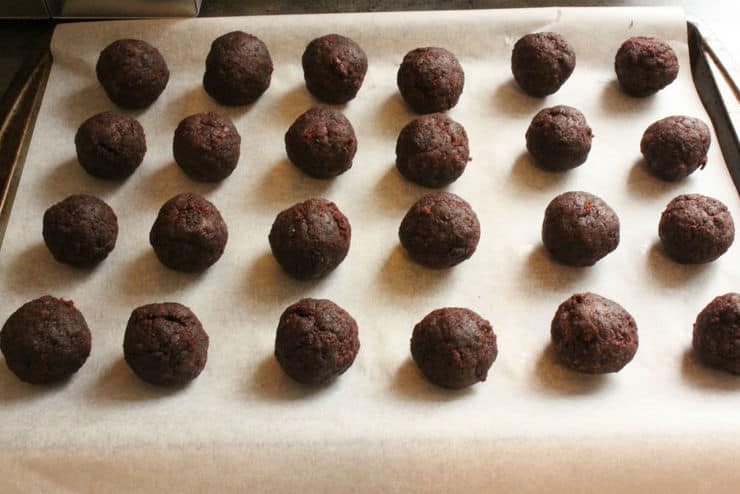
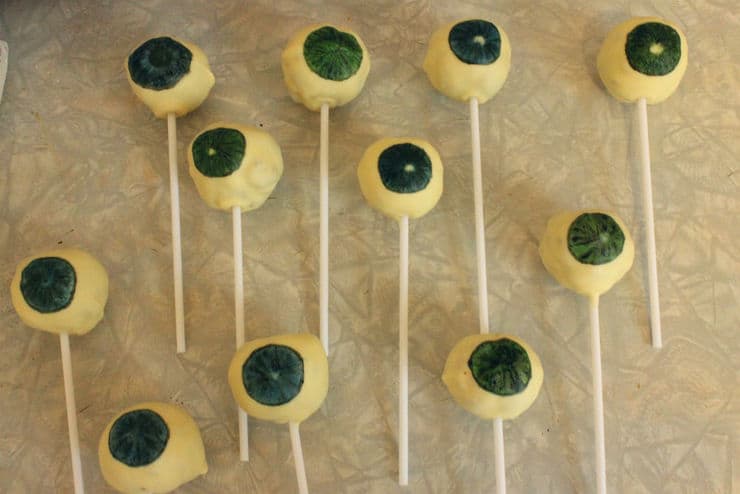
To make the cake pops, crumble the cake in a large bowl. Add a few scoops of frosting and begin mixing, adding more frosting as needed until the cake begins to clump, but isn’t sticky to the touch. Roll your cake mix into quarter size balls and place them on a cookie sheet lined with parchment. In a microwave safe bowl, melt your candy melts or white chocolate using 30 second intervals and stirring after each interval. Once the chocolate is melted, dip the end of each lollipop stick and stick it about halfway into each cake ball. Set the cake pop lined cookie sheet into the freezer for a few minutes to allow the chocolate to harden.

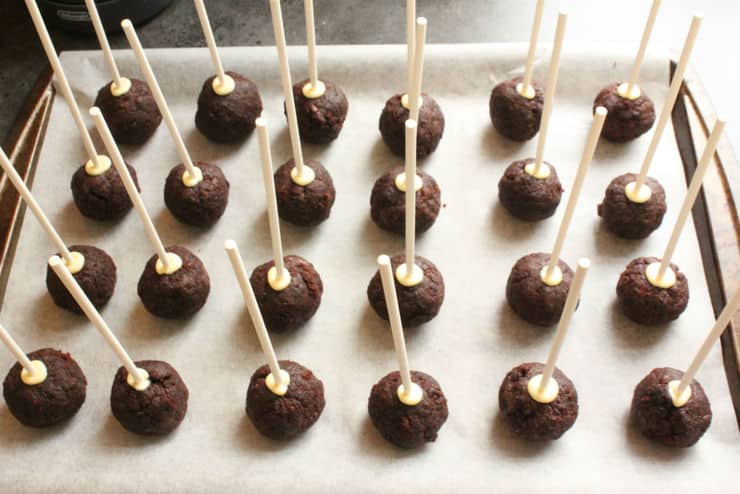
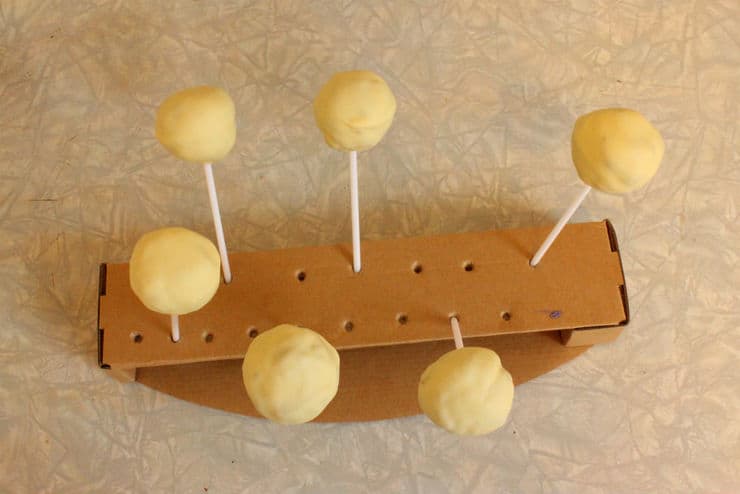
Once the chocolate gluing the sticks to the cake has hardened, remove the cake pops from the freezer. If the melted chocolate is too thick, you might want to thin it a little bit with some vegetable oil before dipping your cake pops. To coat the cake pops, dip the cake pop into the chocolate, turn to coat all the way around, and gently pull it back out. Allow any excess chocolate to drain off of the pops before setting them aside (I like to use a piece of styrofoam or cardboard with holes in it to stand my cake pops up while they dry). Allow the chocolate to harden completely before decorating. To speed up this process, you can set the cake pops in the freezer for about 5 minutes until the chocolate is completely hard.
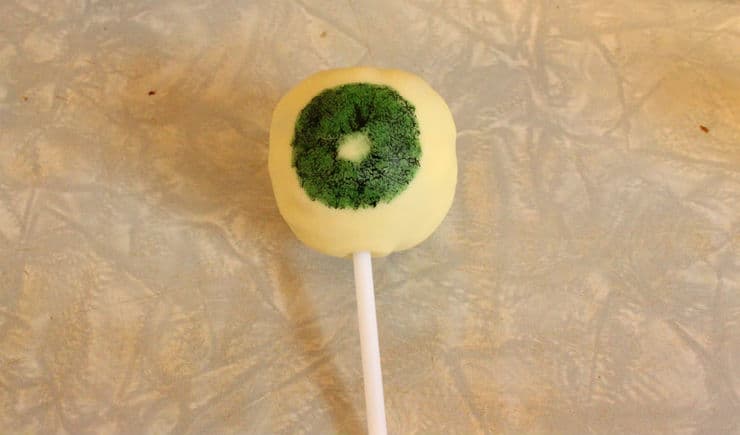
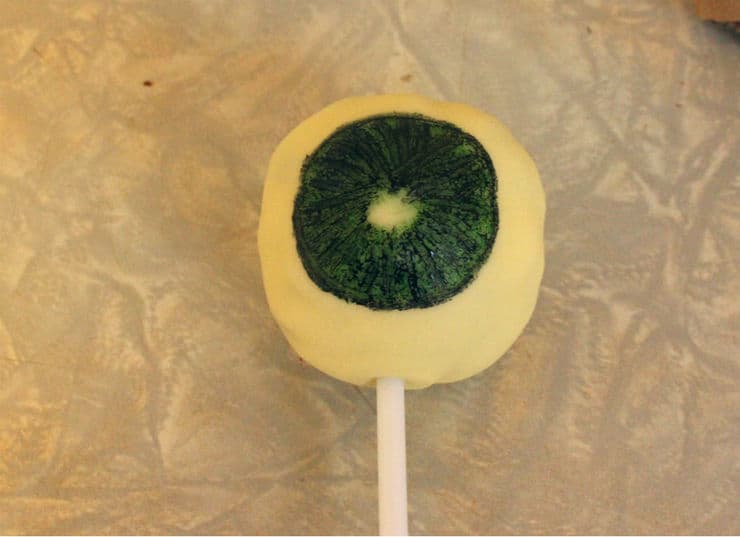
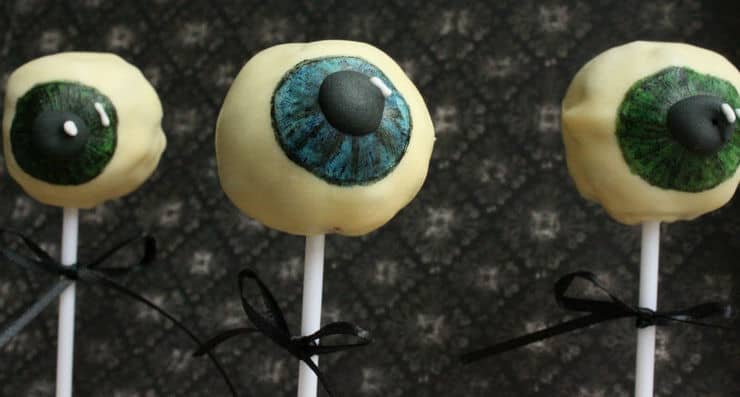
Once the chocolate coating is completely hard, it's time to paint on your eyes! Using the small brush, dampen it just a little with water and paint on a large circle using the blue or green food gel. Don't worry about the brush strokes showing, that will just add to the effect. Once the base color is done, paint on black lines while the coloring is still wet, and gently brush across them so they blend with the rest of the color. Outline the eye and add a pupil with the black.
Since I had a little leftover royal icing from my cookies, I colored a little black and used that to pipe the pupils instead. You can also add a little glint to the pupil and iris with a little white royal icing as well.

Happy baking!
Sources:
Cake pop making technique adapted from Bakerella


liztiptopshape says
This is disgustingly perfect for Halloween! lol
The Simple, Sweet Life says
Thank you! 🙂