
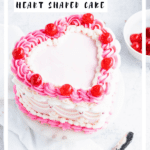
Say "I love you" in the sweetest possible way this Valentine's Day with this vintage heart cake.
There's no sweeter way to say "I love you" than with cake. And if you want to kick your confections up a notch this Valentine's Day, this heart shaped cake with vintage buttercream embellishments is sure to do the trick.
In this tutorial you'll learn how to make a heart shaped cake from any size round cake (no special pan and no wasted cake) as well as create this fun, vintage cake design.
How to make a heart shaped cake
While there are many ways to make a heart shaped cake, this technique requires just a few layers of round cake. I like this method best because it doesn't require any special cake pans, nor does it waste cake.
For this particular design, I made a homemade cherry chip cake (this recipe makes three 6" layers). You can use any flavor of cake you'd like, or even a boxed cake mix (might I recommend a few upgrades to make you cake mix taste nearly homemade?) for this tutorial.
The amount of frosting you'll need will be dependent upon how big your cake layers are and how many you plan to use. For this tutorial, I used three layers of six inch cake, which meant I needed 4 cups of frosting (2 ½ for frosting the cake + 1 ½ cups for decorating).
If you plan to make a different size cake, check out my post on estimating frosting for more information.
Tutorial Note
Because you'll be cutting and moving parts of your cake, you'll want to place your cake off-center on your cake board/plate so that whatever part of the cake will be the bottom of the heart is closest to the edge.
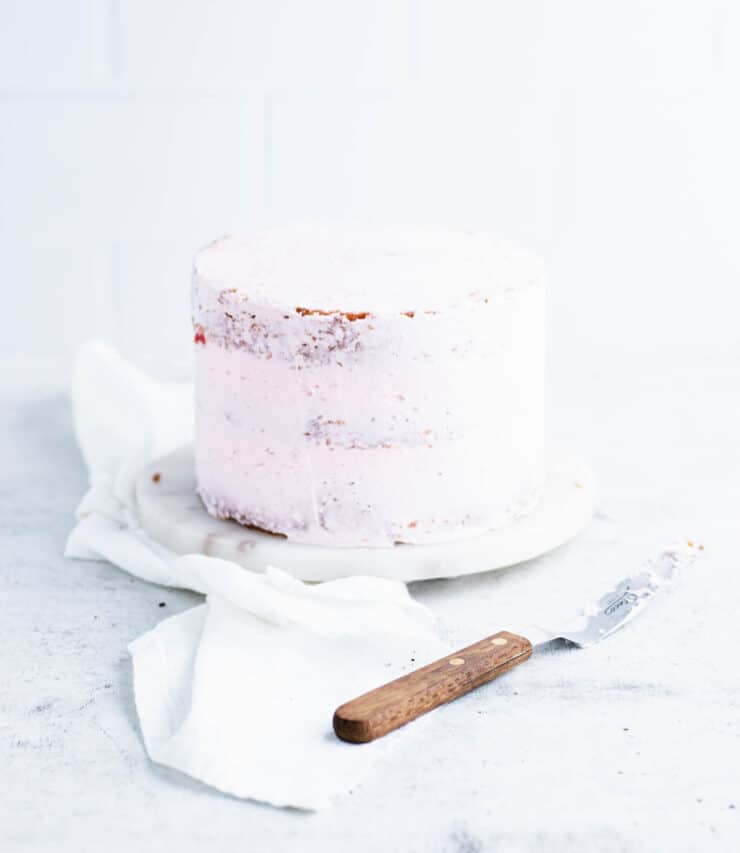
Step one: Start with chilled layers of cake.
Level, fill and stack your cake with a buttercream frosting of your choice. Spread a thin layer of frosting over the top and sides of the cake.
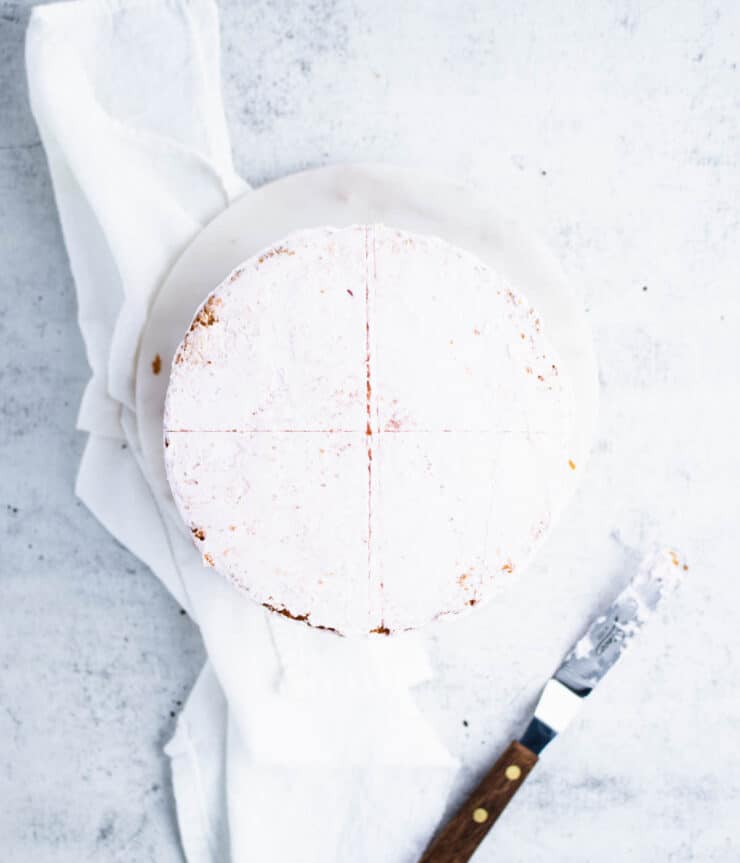
Step two: Using a serrated knife, mark the center line of the cake. Turn 90 degrees and repeat so that the lines evenly divide the cake into fourths. These lines will be guides for the upcoming cuts.
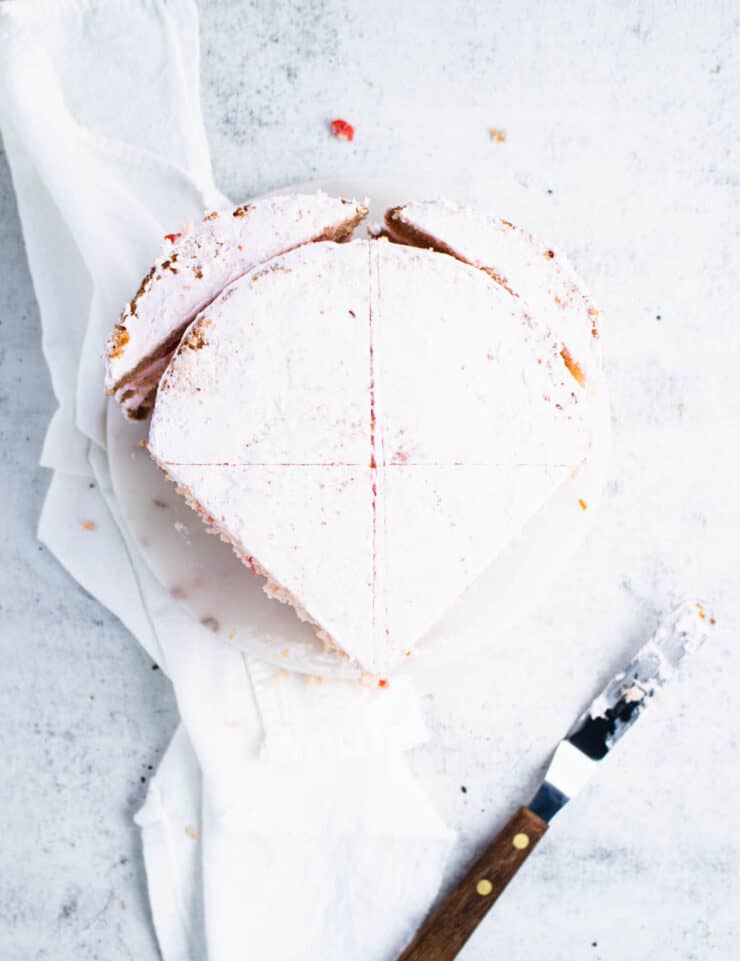
Step three: With the same serrated knife, cut from the end of the line on the right side of the cake to the end of the line at the bottom. Repeat on the left side so that the bottom of the cake forms a point.
Take the two pieces you just cut off and press them flat side down against the top of the cake, molding them into a curved shape to create the top of the heart.
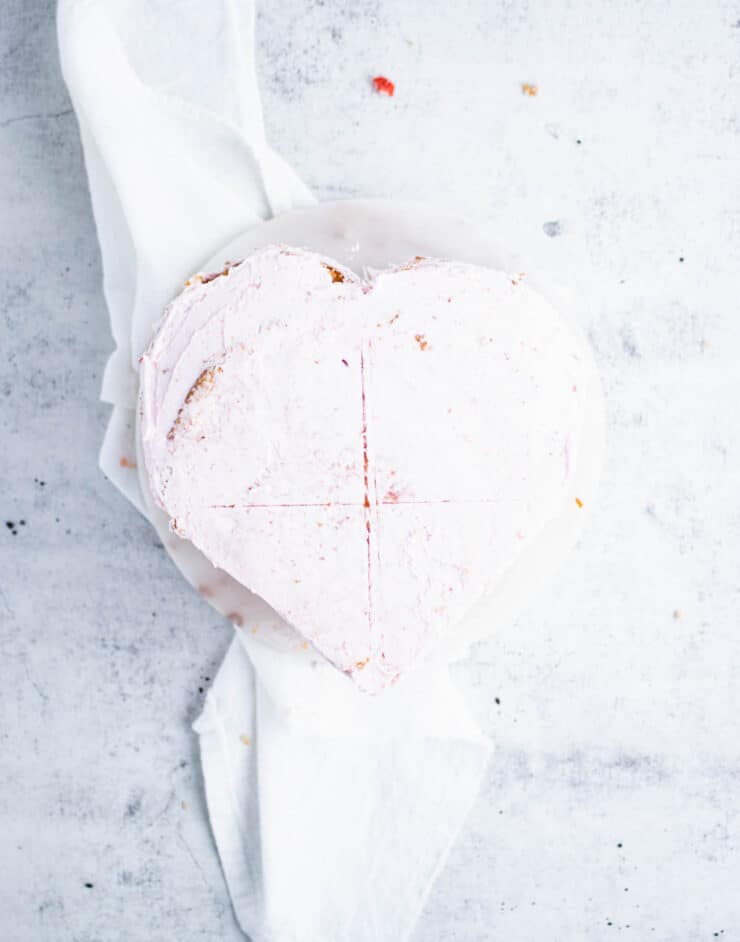
Step four: Use frosting to seal the ends of these newly cut pieces to the top of the cake and spread a thin layer over the exposed sides of the bottom of the heart.
Place the cake in the refrigerator to chill until the frosting forms a crust (about 10 minutes). This will seal in the crumbs.
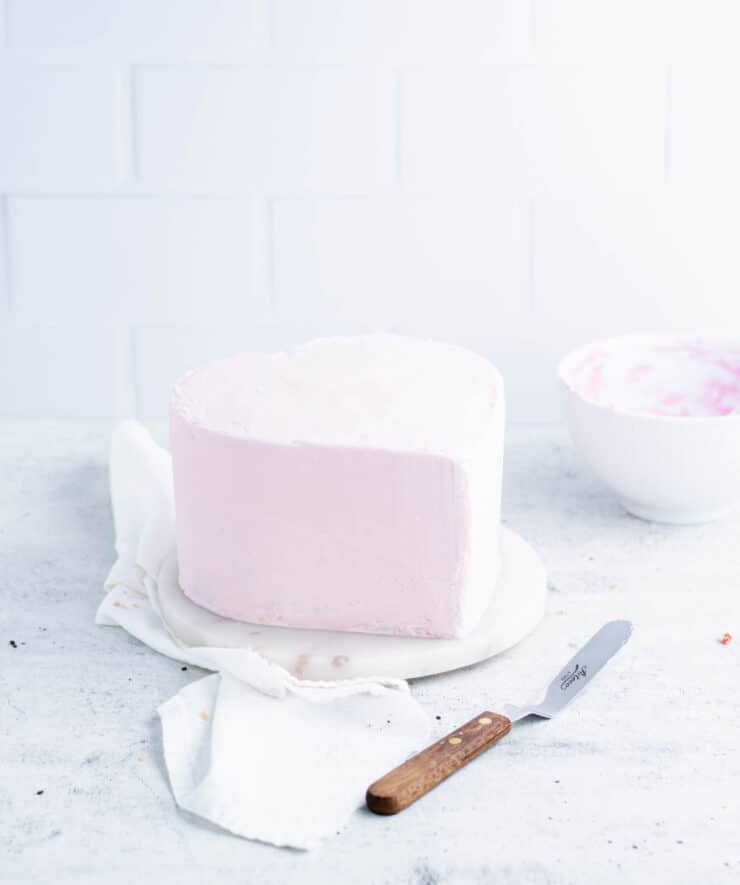
Step six: Set 1 ½ cups of frosting aside and use what remains to frost the top and sides of the cake.
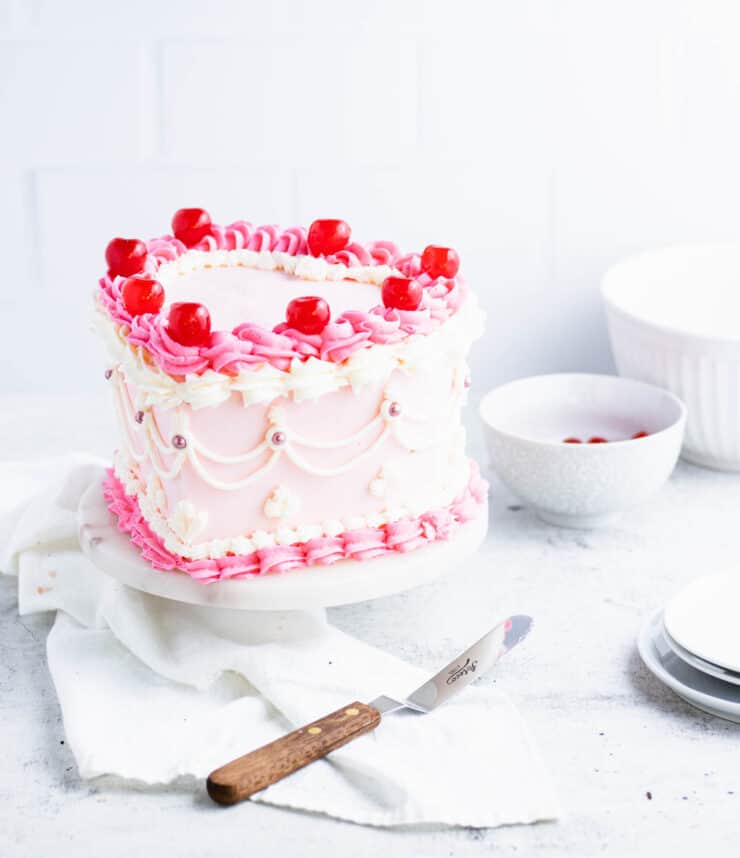
How to create this heart cake design
For this design, you'll need about 1 ½ cups of buttercream frosting and three piping tips: an Ateco 844, a Wilton 27 and a Wilton 5.
Using the Ateco 844, pipe a shell border around the top and bottom edge of the sides of the cake.
To pipe a shell border, place the tip of the bag just above the cake. Squeeze the bag, allowing the frosting to fan out as it reaches the cake. Release the pressure as you lower the tip to the surface of the cake pulling it gently away from the frosting you just piped.
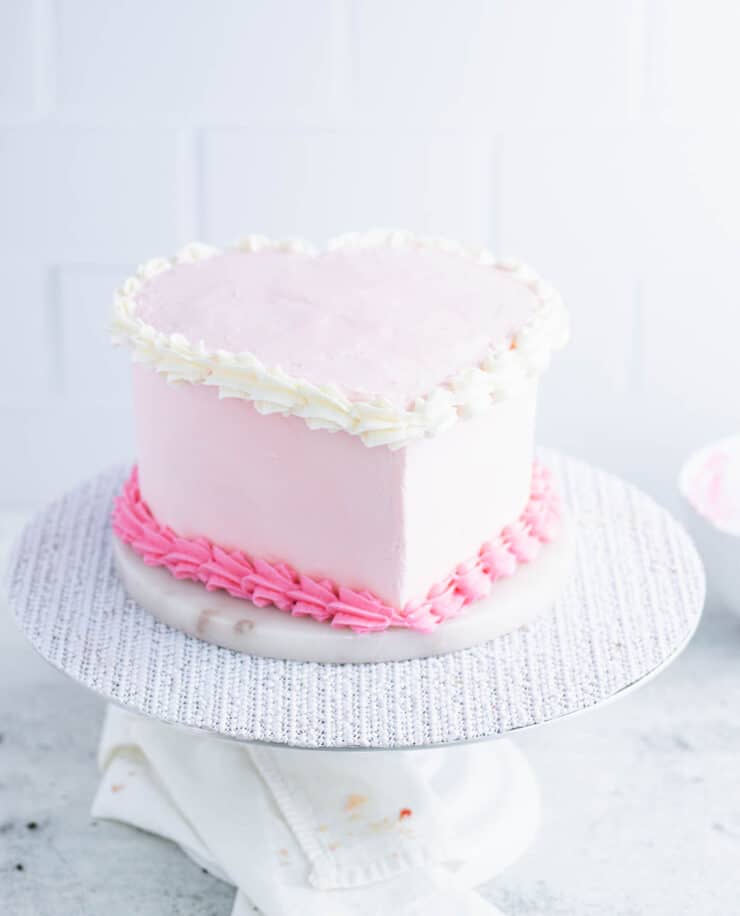
With that same tip, pipe a spiral border around the top edge of the cake.
To pipe a spiral border, touch the tip to the surface of the cake and squeeze to attach the frosting. While continuing to squeeze, move the tip in a circular motion, starting where you attached the frosting, then up, to the left, down to the cake and to the right. Repeat across the entire top edge of the cake.
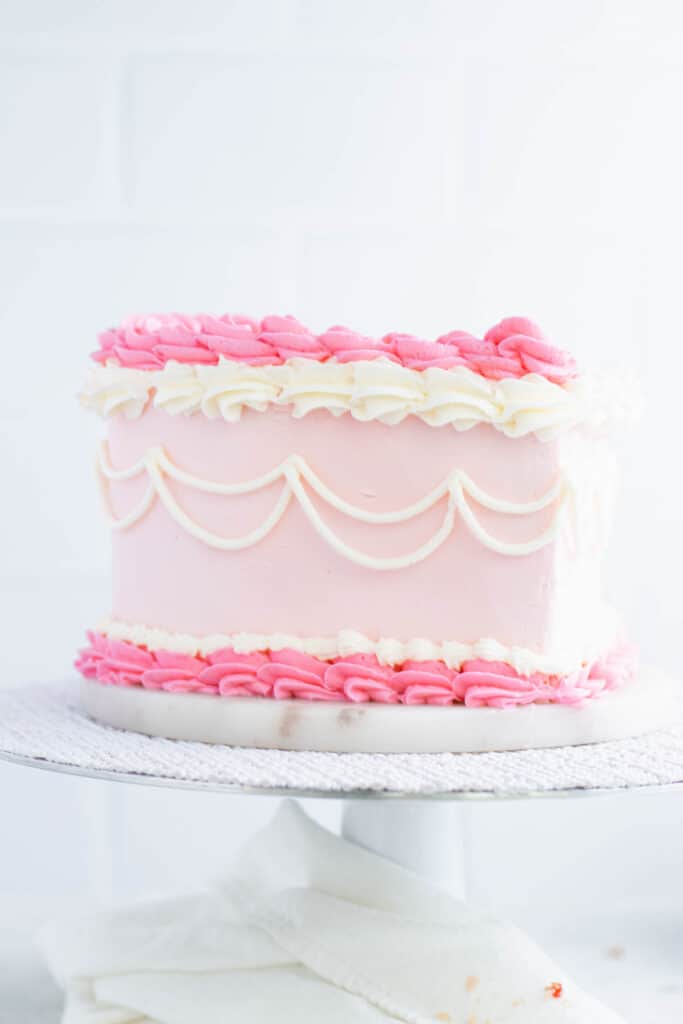
Using the Wilton 5, pipe the garlands along the side of the cake.
To make them symmetrical, I recommend measuring each side of your cake (I used a vinyl sewing tape measuring) and then dividing that into equal parts (I divided each side of my cake by 5). Once you have that measurement, mark the top of each section using a toothpick.
Starting at one of the dots, place the tip of your piping bag against the cake and squeeze to attach the frosting. Continue squeezing, letting the the frosting hang and droop into place before attaching it to the next dot. Repeat across the side of the cake.
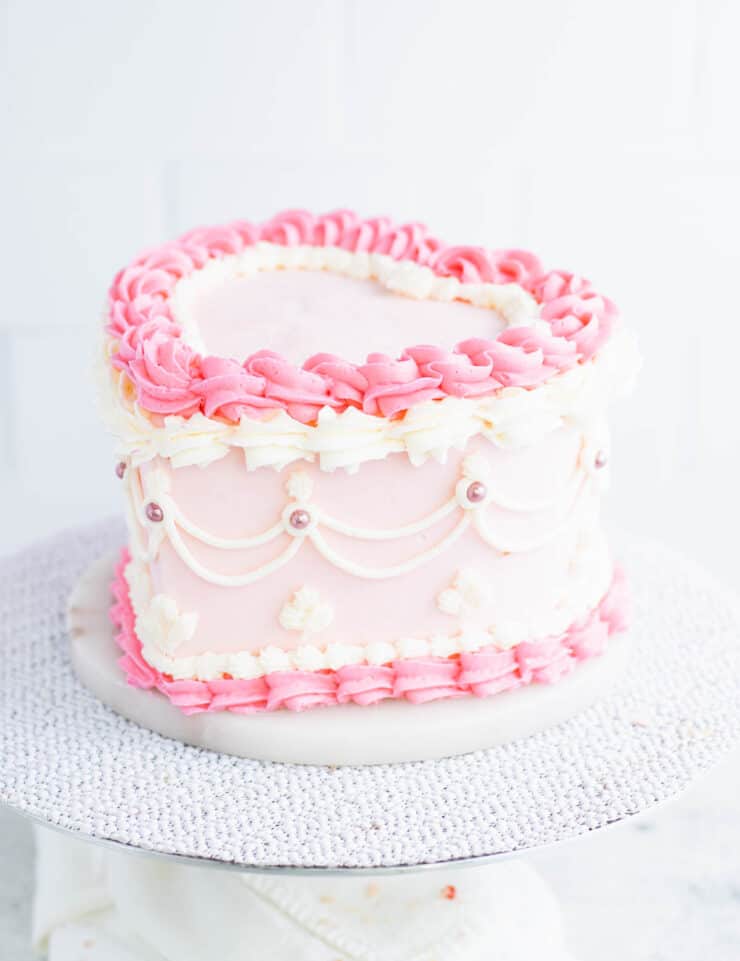
Use the Wilton 27 to pipe a shell border along the bottom of the cake, inside the shell border on top of the cake and to create small embellishments along the sides.
Garnish with maraschino cherries and sprinkles.

Expert tips
- Chill your cake: A cool cake is easier to cut and handle, so chilling your cake for a short while before frosting it will make the whole process a lot easier.
- Frosting needed: The amount of frosting you'll need for this cake will depend on the size and number of layers. You can find general guidelines on my post about estimating frosting by cake size.
- Air bubble-free frosting: If your frosting has a lot of air bubbles in it, beat it on the lowest speed for 3-5 minutes.
- Crumb coating: Crumb coating means spreading a thin layer of frosting over the sides and top of the cake and then chilling it. This locks in all of the crumbs so they don’t get into the outer layers of frosting. This is a particularly important step if you’re working with a dark cake and a light frosting.
- Storing a cut cake: Once your cake is cut, you’ll want to protect the exposed part. The easiest way to do this is to place a piece of plastic wrap directly onto the exposed cake.
Recipe
Vintage Heart Cake
- Prep Time: 40 minutes
- Total Time: 40 minutes
- Yield: 16 slices
- Category: Dessert
- Cuisine: American
Ingredients
- 3 layers of 6" cherry chip cake
- 4 cups buttercream frosting
- Optional: Food coloring, maraschino cherries and sprinkles
Instructions
How to make a heart shaped cake:
- Level, fill and stack your chilled cake layers with a buttercream frosting of your choice.
- Spread a thin layer of frosting over the top and sides of the cake.
- Using a serrated knife, mark the top of the cake with two lines to divide it into four even parts.
- Cut from the end of the line on the right side of the cake to the end of the line at the bottom.
- Repeat on the other side to create a point.
- Take the two pieces that were just cut off and press them flat against the top of the cake, molding to fit the curve.
- Apply frosting to the ends of the new pieces to seal them against the cake.
- Apply a thin layer of frosting to the exposed sides on the bottom.
- Place the cake in the refrigerator to chill until the frosting forms a crust (about 10 minutes).
How to create this vintage frosting design:
- Using the Ateco 844, pipe a shell border around the top and bottom edge of the sides of the cake.
- With that same tip, pipe a spiral border around the top edge of the cake.
- Using the Wilton 5, pipe the garlands along the side of the cake.
- To make them symmetrical, measure each side of your cake and divide that into equal parts.
- Once you have those measurements, mark the top of each section using a toothpick.
- Starting at one of the dots, pipe the garlands, letting the the frosting hang and droop into place before attaching it to the next dot.
- Use the Wilton 27 to pipe a shell border along the bottom of the cake, inside the shell border on top of the cake and to create small embellishments along the sides.
- Garnish with maraschino cherries and sprinkles.
Notes
-
- Chill your cake: A cool cake is easier to cut and handle, so chilling your cake for a short while before frosting it will make the whole process a lot easier.
- Frosting needed: The amount of frosting you'll need for this cake will depend on the size and number of layers. You can find general guidelines on my post about estimating frosting by cake size.
- Air bubble-free frosting: If your frosting has a lot of air bubbles in it, beat it on the lowest speed for 3-5 minutes.
- Crumb coating: Crumb coating means spreading a thin layer of frosting over the sides and top of the cake and then chilling it. This locks in all of the crumbs so they don’t get into the outer layers of frosting. This is a particularly important step if you’re working with a dark cake and a light frosting.
- Storing a cut cake: Once your cake is cut, you’ll want to protect the exposed part. The easiest way to do this is to place a piece of plastic wrap directly onto the exposed cake.
If you liked this recipe, you might also like...


Sue says
This is beautiful!