
Growing up, my parents always made sure my life was full of books. Even before I was born they started collecting children's books for me. From Beverly Cleary to Chris Van Allsburg, Shel Silverstein to Bill Watterson, my bookshelves had it all... with the exception of one 80s staple that my Mum was convinced would give me nightmares: Scary Stories to Tell in the Dark.
Oh, you don't think I should read this? Yeah, I'm going to have to read this now. <-- solid kid logic right there.
I was SO dead set on reading this book that I'd sneak away while we in the book store, casually back up to the shelf (because CLEARLY no one knew what I was up to), and when I had determined the coast was clear of all parental units, snatch it from the shelf and bury my little nose in it. Mum was right, it gave me nightmares.
If I hadn't kept my hands clear of the edge of the bed or all lights on when entering an otherwise dark hallway, I sure did after reading that book.
But one story in particular sat lodged in the back of my mind. The story was essentially a history of the urban legend of Bloody Mary and how you might call her into a dark bathroom mirror your own, should your little heart desire such. For months, I wondered if it was possible and whether or not I dared to find out. If it was real, did I REALLY want to know?
Probably not.
But as summer turned to fall, and the month of October rolled in with the smell of wood-fire smoke, dried leaves crunching under foot, and cool breezes lapping at my cheeks, my mind turned once again to spooks and spirits.
And so it was that I found myself in front of a dark bathroom mirror one autumn day. Better to do it during the day so you can rush out into the light should some ghoul actually appear, right? <-- Again, solid kid logic.
I think I got to the second "Bloody Mary" before I began positioning my body towards the door for the inevitable bolt. With a final yell of "Blood Mary" I ran for it. For just a moment, my little mind was so sure it caught a flicker in the mirror before I tore my eyes away and fixed them firmly on freedom (aka the door). In retrospect I'm sure what I saw was light sneaking in through the closed blinds as I moved, but boy oh boy, childhood me was convinced I'd found the portal to another realm.
Excuse me, waiter, I'll take a big ol' helping of NOPE to go alongside my OH HELL TO THE NO on this one.
My love for Halloween and all things spooky only extends so far, and "so far" stops firmly at "portal to the netherworld."

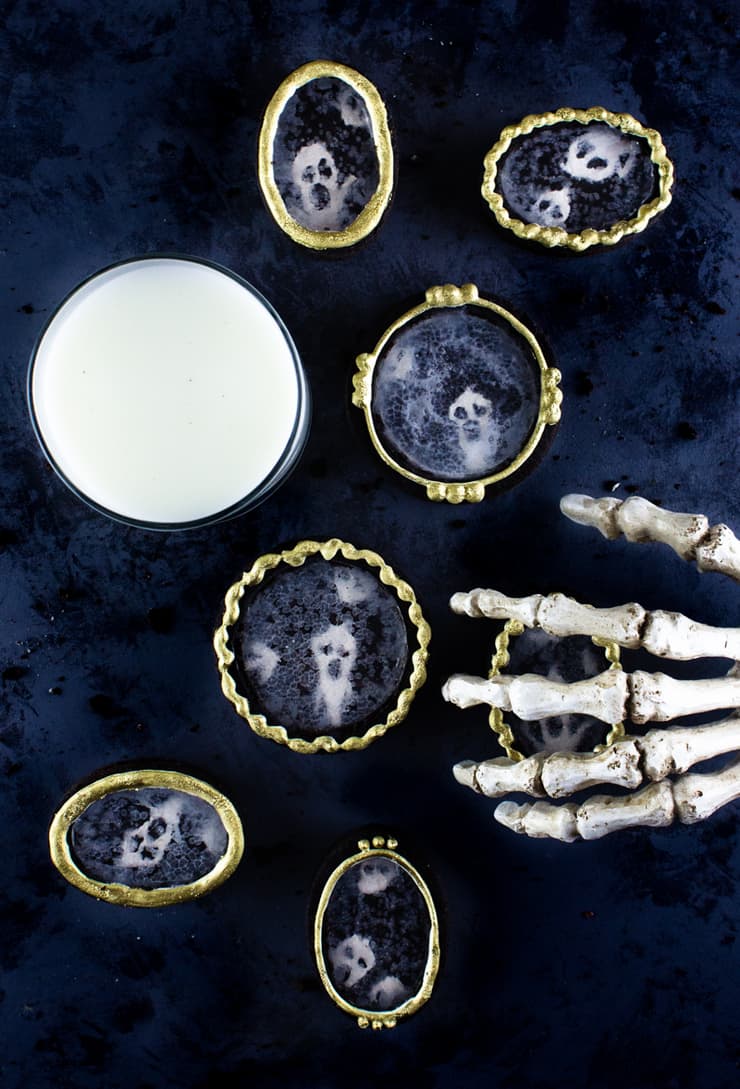
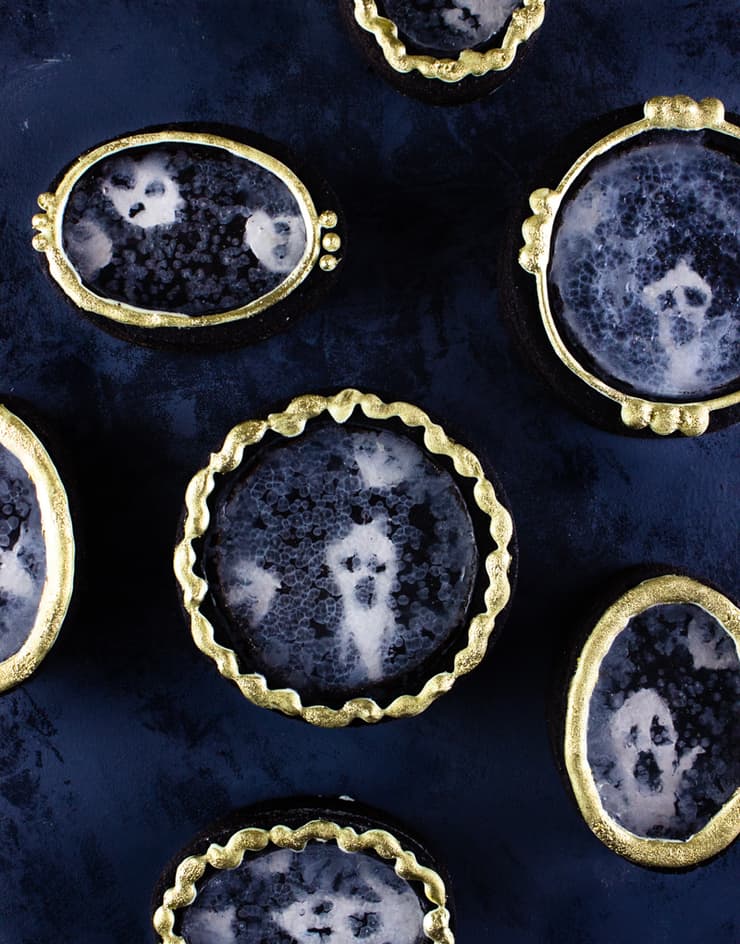
Ever since, mirrors have held an extra spooky place in my heart. And so I could think of nothing more deliciously spooky this Halloween season than conjuring up some ghastly mirror cookies. Don't worry, the scariest thing about these cookies will be your inability to eat just one.
PrintRecipe
Ghastly Mirror Cookies
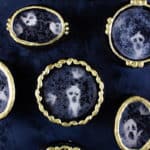
These ghastly mirror cookies are sure to delight all the boys and ghouls this Halloween! If you've never worked with isomalt before, don't worry, it's really easy to use and these cookies come together very easily.
- Prep Time: 6 hours
- Total Time: 6 hours
- Yield: 12
- Category: Dessert
- Cuisine: American
Ingredients
- 2 dozen cookies (I used half of this chocolate sugar cookie recipe)
- ½ batch of royal icing
- Powdered gold food coloring
- Yellow food coloring
- White food coloring
- 1 cup isomalt
Instructions
- Start with 2 dozen cookies in various sizes of circles and ovals. Half of these should be whole cookies and half should have the centers cut out. Line a baking sheet with parchment paper (make sure you have some hot pads under it) and place the cookies with the cut out centers on it, nice side down (whatever side you want to face outward on the finish cookies should be turned down on the parchment).
- Melt your isomalt. Allow the hot isomalt to sit for a couple of minutes so that the bubbles have a chance to disperse. To fill the center of your cookies, pour the isomalt into the center in a thin stream and work your way out towards the edges. Make sure you fill in all the little gaps. Allow the isomalt to harden completely before removing from the parchment (1-2 hours).
- If you want completely see-through isomalt, heat up a knife with a chef's torch and gently run it over the top of the isomalt. If you want your isomalt to be clear in places but opaque in others (like mine), do a couple of passes with the hot knife and then let them sit out for a day or two. The humidity which naturally cause the isomalt to fog over.
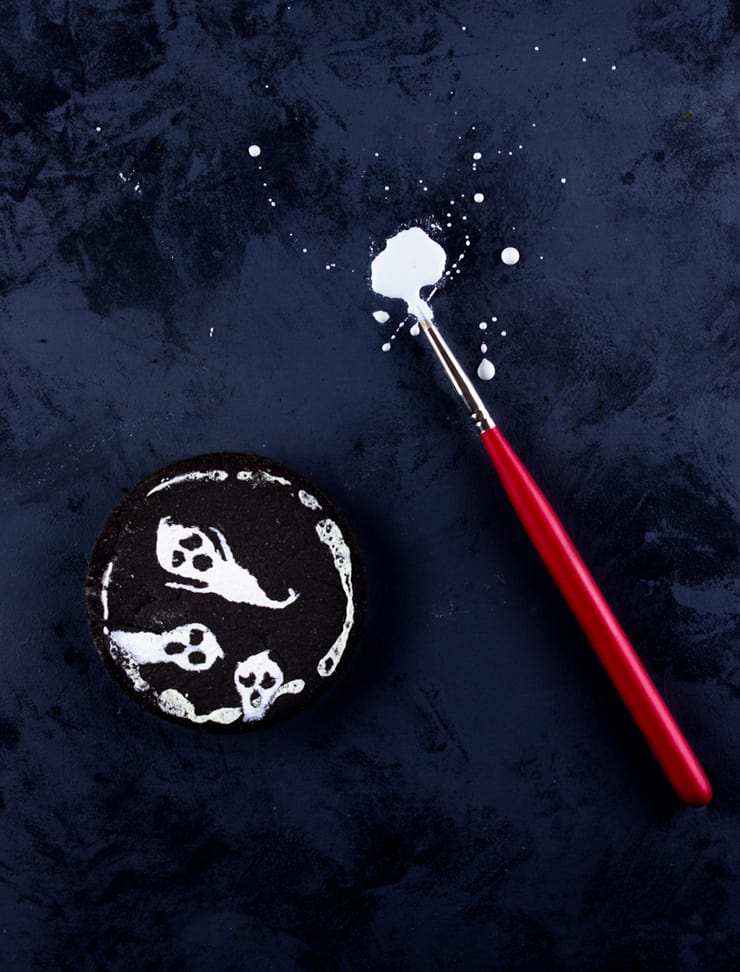
- Using a small, food-only brush, paint some ghosts directly onto the whole cookies. If you need a guideline for where the see-through part of the top cookies is, paint a few lines of white onto the back of one of the cookies around the isomalt and gently press it against the cookie you'll be painting on. Allow the ghosts to dry completely before assembling.
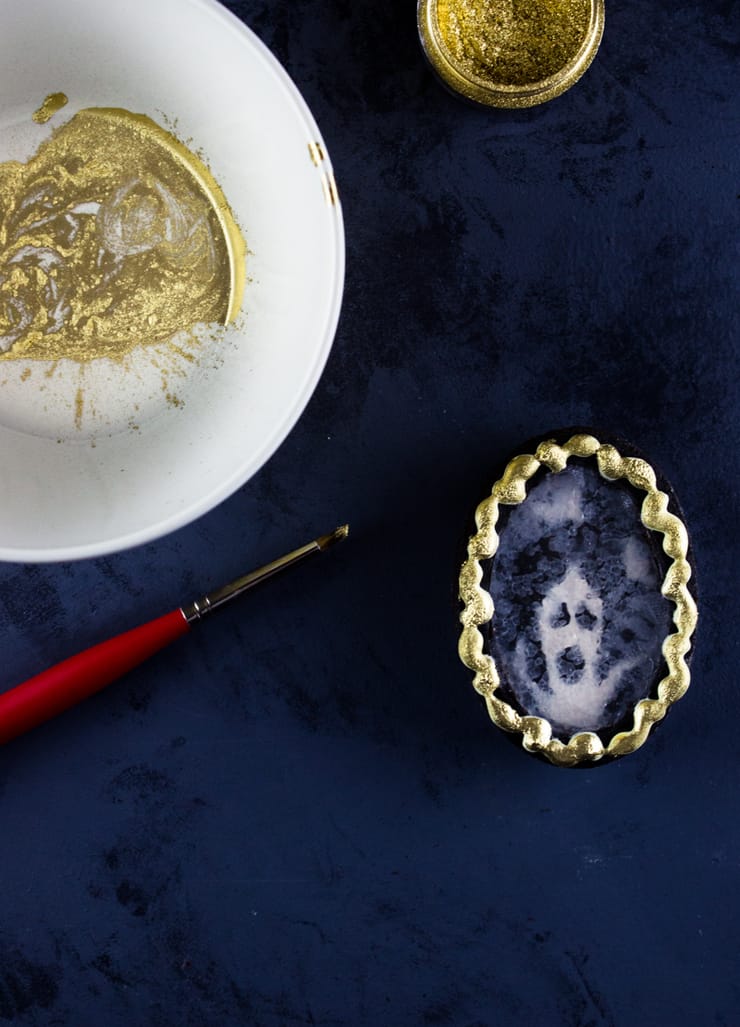
- To assemble your cookies, use a little royal icing to glue the cookies with isomalt over the cookies you've painted with ghosts. Tint your remaining royal icing light yellow and pipe a border around the isomalt. Let harden completely (3-4 hours). Once the royal icing is dry, paint it with a mixture of gold powdered food coloring and a few drops of vodka.
Sue says
I love these and the technique! How creative you are and a great storyteller too 🙂
Lauren Becker says
OOh these are so cool! I love Halloween but there are still aspects that I'm not too brave about. That includes Bloody Mary which freaked me out SO much as a child.
-Lauren
http://www.shootingstarsmag.net