
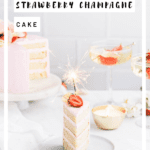
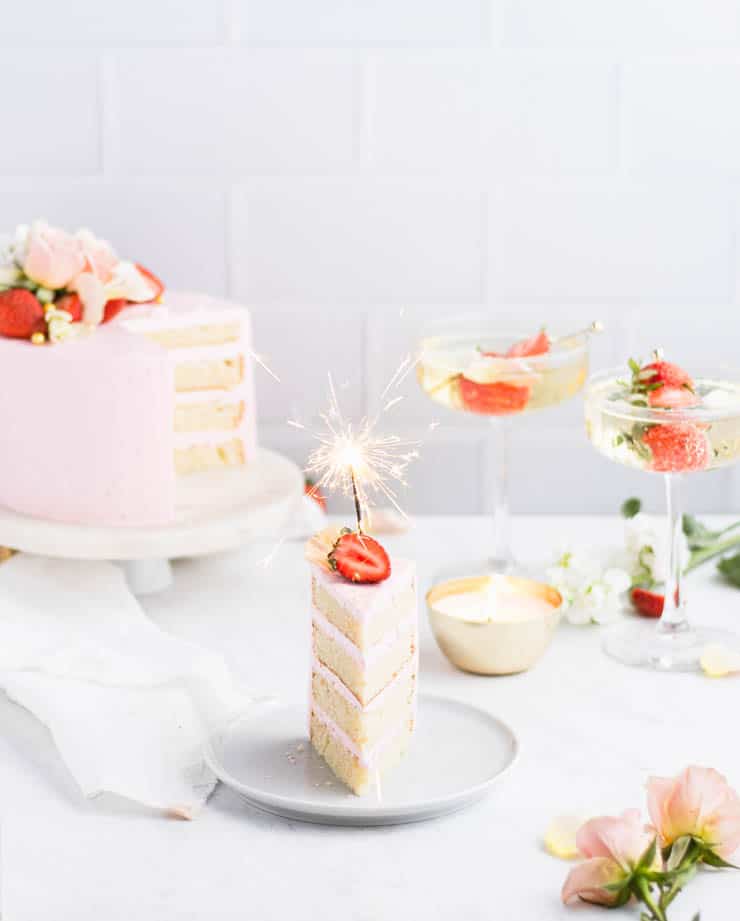
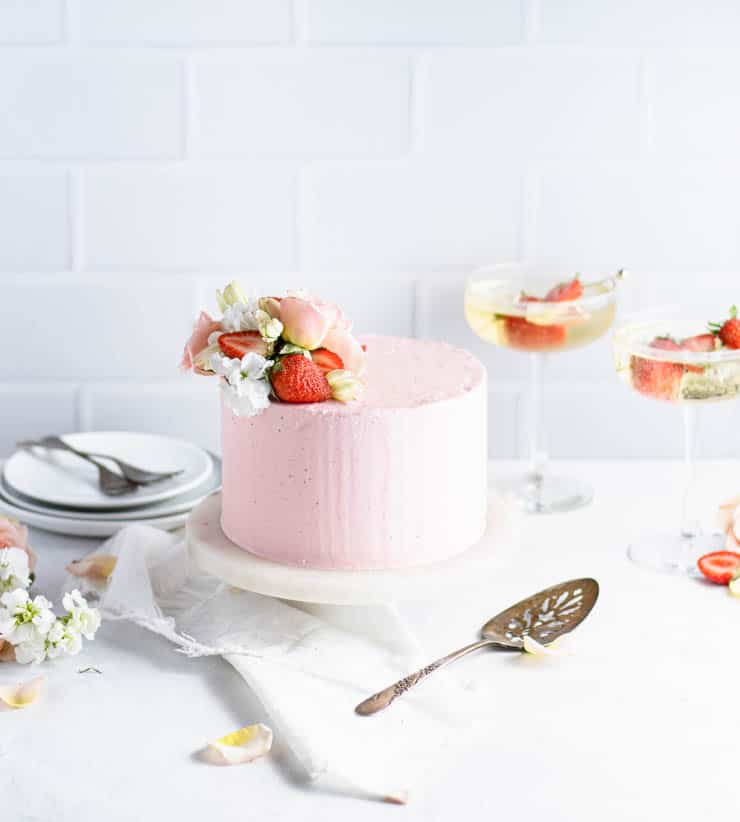
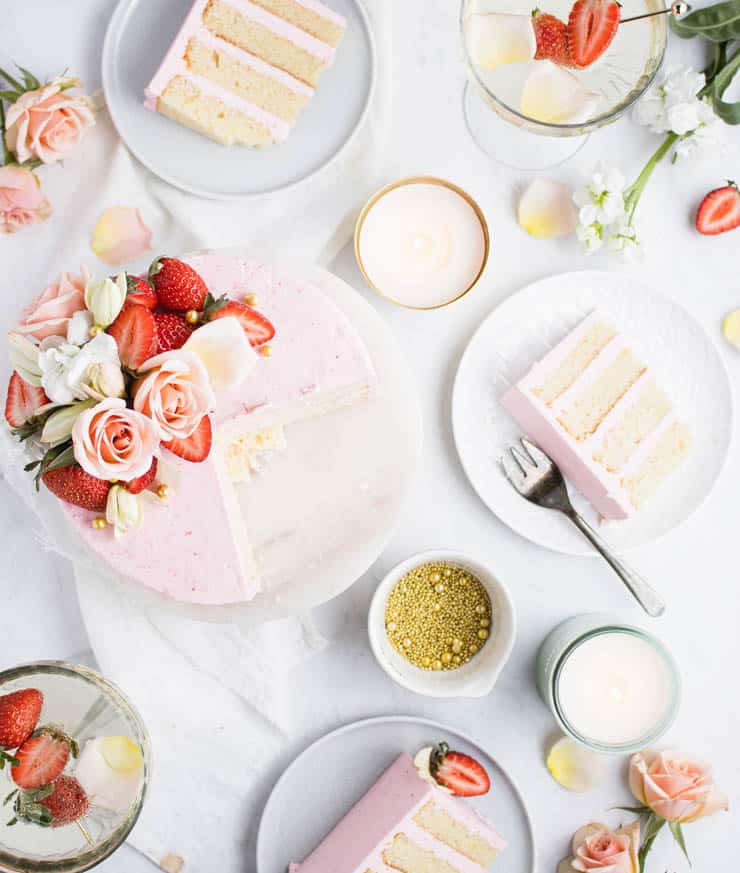
Whatever the celebration, this strawberry champagne cake is sure to take it to the next level. With four layers of moist champagne cake and a fresh strawberry puree-based Swiss meringue buttercream, this cake is equal parts delicate, beautiful and delicious. Read all the way to the bottom for tips on creating a perfect frosting finish and decorating with flowers.
Anybody that knows me well (or has read this blog long enough) knows that have culinary obsessions from time to time. For a while it was baked doughnuts (see here, and here for proof) then it was s'mores (as evidenced here and here) and these days, it's cakes.
In particular, buttercream-based cakes. Something show-stopping but easy. Something every bit as beautiful and delicate as delicious.
How to make this strawberry champagne cake
First, make the champagne cake.
Whip the eggs and sugar until light and fluffy. In one bowl, whisk together the dry ingredients, and in another, the wet.
Alternating between wet and dry ingredients, add them to the egg mixture, mixing until just combined. Divide the batter between two 6" cake pans and bake at 350F for 35-40 minutes.

Second, make the frosting.
Whisk together the egg whites and sugar over a double boiler until hot and the sugar has dissolved. Transfer the bowl to a stand mixer and whip on high until the mixture cools to room temperature.
Switch to the paddle attachment. On low, add the butter in cubes. Increase the speed and beat until smooth.
Add the strawberry puree, pink or red food coloring until desired shade and beat until incorporated.
Finally, assemble the cake.
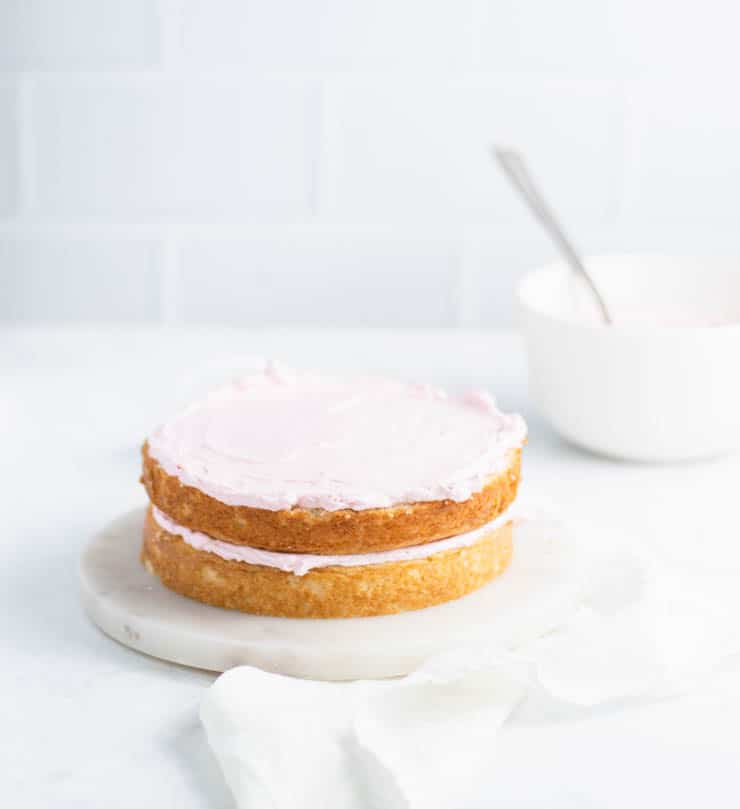
Cut the two layers of cake in half. Spread a little frosting over each of the four layers and stack. Crumb coat the stacked cake and refrigerate until frosting crusts.
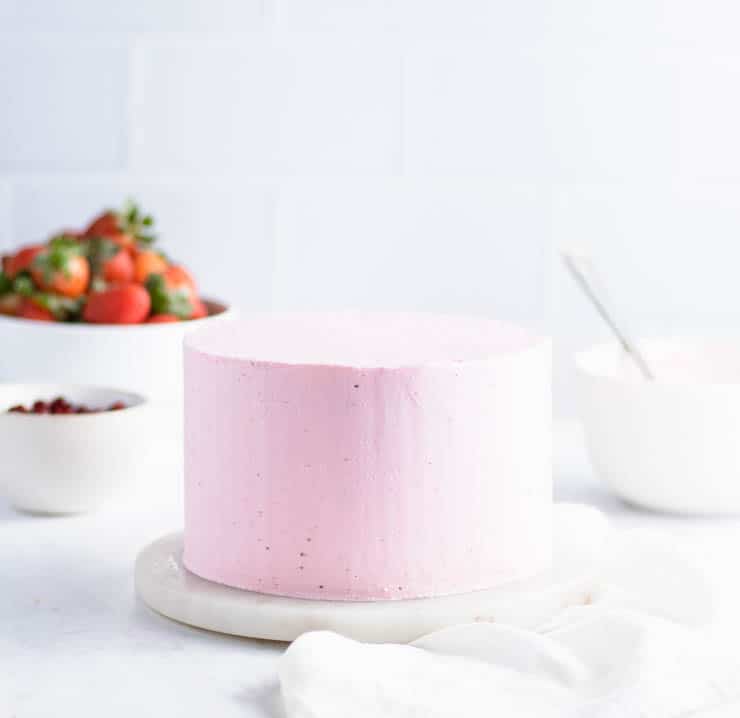
Use the remaining frosting to coat the top and sides of the cake.
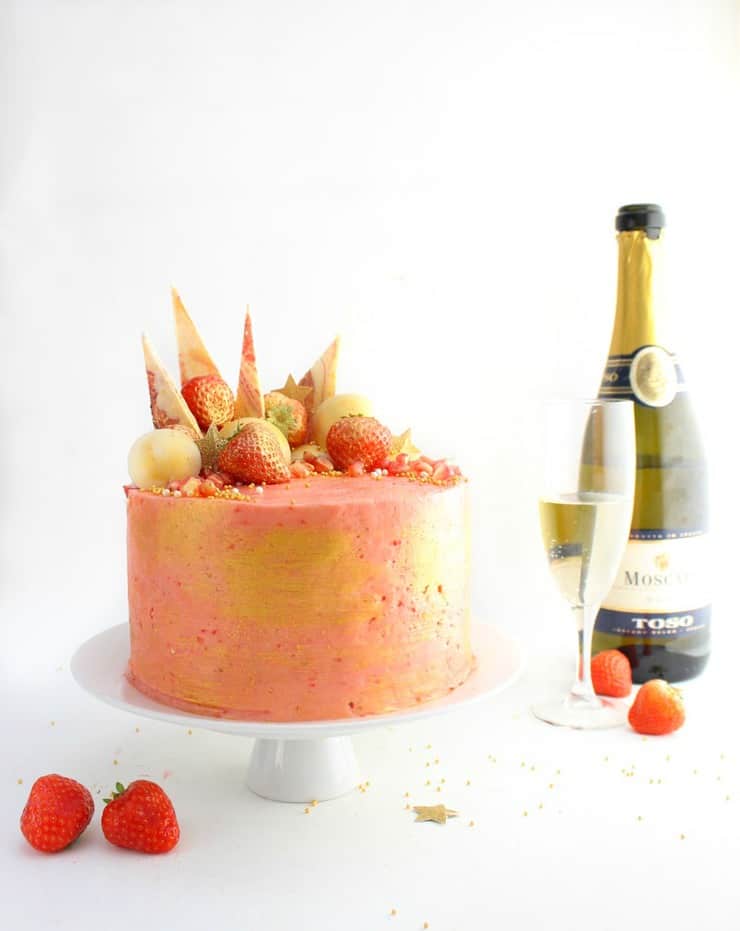
Garnish with fruit, flowers, candies or any other garnishes you wish.
A quick note on decorating cakes with flowers: Not all flowers are edible, and even those that are may not have been grown with human consumption in mind. For a full run-down, check out my post on how to safely use fresh flowers on cakes.
Tips for making the perfect champagne cake
- How many strawberries to buy: The puree for the frosting will take about 7 ounces of strawberries.
- Measure your batter: Making even layers of cake start with measuring your batter. For this recipe, that means about roughly 13oz of batter per pan.
- Chill your cake: Cool cake is easier to cut and handle, so chilling your cake for a short while before use will make this process easier.
- Air bubble-free frosting: If the frosting has a lot of air bubbles, reduce the speed on your stand mixer to low and beat for 3-5 minutes, or until smooth.
- Crumb coating: Crumb coating a cake means spreading a thin amount of frosting over the sides and top of an otherwise unfrosted cake in order to lock in the crumbs so they don't get into the outer layers of the frosting. I recommend doing that for this cake.
- The trick for smooth frosting: You’ll need a rotating cake stand and a bench scraper. Place the small end of the bench scraper on the cake stand, long end against the frosting and turn the table. Once excess frosting is removed, heat the scraper in hot water, wipe and drag around the outside of the cake.
- Storage: This cake will keep in the refrigerator, uncut, for 2-3 days.
- Storing cut cake: Once your cake is cut, you’ll want to protect the exposed cake area. The easiest way to do this is with a piece of plastic wrap or two.
Did you make this recipe? I’d love to hear how it went in the comments below. Better still, snap a photo and tag it on Instagram with #thesimplesweetlife. I love seeing your creations!
PrintRecipe
Strawberry Champagne Cake

Whatever the celebration, this strawberry champagne cake is sure to take it to the next level. With four layers of moist champagne cake and a fresh strawberry puree-based Swiss meringue buttercream, this cake is equal parts delicate, beautiful and delicious.
- Prep Time: 1 hour
- Cook Time: 40 minutes
- Total Time: 1 hour 40 minutes
- Yield: One 6" Cake - 16 slices
- Category: Dessert
- Method: Baking
- Cuisine: American
Ingredients
For the champagne cake:
- ¾ cup granulated sugar
- 1 ⅓ cup all purpose flour
- 1 tsp baking powder
- ⅓ tsp baking soda
- ¼ tsp salt
- 2 eggs
- ½ cup vegetable oil
- 3 tbsp sour cream
- 3 tbsp milk
- 1 tsp vanilla extract
- ½ cup champagne
For the strawberry frosting:
- 5 egg whites
- 10 oz granulated sugar
- 15 oz butter, cold
- ½ cup strawberry puree (about 7 oz whole strawberries)
- Red or pink food gel coloring
For garnishing (optional):
- White and gold sprinkles
- Strawberries
- Pomegranate seeds
- Fresh flowers
Instructions
- Whip the eggs and sugar until light and fluffy (about 2-3 minutes).
- In a bowl, gently whisk together the wet ingredients (oil, milk, sour cream, vanilla, champagne).
- In another bowl, stir together the dry ingredients (flour, baking powder, baking soda, salt).
- Add half of the dry ingredients to the egg/sugar mixture and mix on low until just incorporated.
- Add the wet ingredients, again mixing on low until just incorporated.
- Add the remaining dry ingredients, mixing until just combined.
- Divide the batter between two lined 6" cake pans and bake at 350F for 35-40 minutes.
- Once the pans are cool enough to handle, remove the cakes from the pans, wrap in plastic wrap, and refrigerate until cold.
- When you're ready to begin assembling your cake, remove the cakes from the refrigerator and divide each into two.
- To make the frosting, whisk together the egg whites and granulated sugar in the bowl of a stand mixer over a pot of boiling water (a double boiler) until the sugar has dissolved and the mixture is hot.
- Transfer the bowl to your stand mixer and whisk on high until the bowl has cooled to room temperature and the meringue holds stiff peaks (about 10 minutes).
- Cut the cold butter into cubes, switch to the paddle attachment on your stand mixer, and begin adding the butter piece by piece on medium/low speed.
- Once all the butter is in, turn the mixer up to high and beat until a smooth frosting forms (5-10 minutes).
- Add the strawberry puree and a little red or pink food coloring to darken the frosting, and mix until just incorporated.
- Assemble your cake by frosting in between each layer with your strawberry buttercream and applying a crumb coat. Refrigerate for 5-10 minutes, or until the frosting has crusted.
- Apply frosting to the top and sides of the cake.
- You can garnish this cake with just about anything you want (or anything that seems fitting), or you can use my list above for some inspiration.
Notes
- How many strawberries to buy: The puree for the frosting will take about 7 ounces of strawberries.
- Measure your batter: Making even layers of cake start with measuring your batter. For this recipe, that means about roughly 13oz of batter per pan.
- Chill your cake: Cool cake is easier to cut and handle, so chilling your cake for a short while before use will make this process easier.
- Air bubble-free frosting: If the frosting has a lot of air bubbles, reduce the speed on your stand mixer to low and beat for 3-5 minutes, or until smooth.
- Crumb coating: Crumb coating a cake means spreading a thin amount of frosting over the sides and top of an otherwise unfrosted cake in order to lock in the crumbs so they don't get into the outer layers of the frosting. I recommend doing that for this cake.
- The trick for smooth frosting: You’ll need a rotating cake stand and a bench scraper. Place the small end of the bench scraper on the cake stand, long end against the frosting and turn the table. Once excess frosting is removed, heat the scraper in hot water, wipe and drag around the outside of the cake.
- Storage: This cake will keep in the refrigerator, uncut, for 2-3 days.
- Storing cut cake: Once your cake is cut, you’ll want to protect the exposed cake area. The easiest way to do this is with a piece of plastic wrap or two.
- Not all flowers are edible, and even those that are may not have been grown with human consumption in mind. For a full run-down, check out my post on how to safely use fresh flowers on cakes.
Nutrition
- Serving Size: 1 slice
- Calories: 417
- Sugar: 29.8g
- Sodium: 237mg
- Fat: 29.6g
- Saturated Fat: 15.5g
- Carbohydrates: 37.2g
- Fiber: 0.4g
- Protein: 3.3g
- Cholesterol: 79mg
If you liked this recipe, you might also like...
- Anything but basic cake (with 6 variations)
- Small batch strawberry champagne jam
- Strawberry champagne charlotte
Update Notes: This post was originally published in December of 2015 but was republished with updated photos, directions and tips in December of 2021.
Oh, why, hello there! Looks like you've made it to the bottom of another updated post, and if you've spent much time around this blog, you'll know what that means: Time for another throwback photo.
Why throw it back to the photos this posted was originally shared with? Because while I think it's so important to improve old content, I don't want to lose sight of the journey.
Whether you're new to blogging, food photography or cake decorating, I think it's important for you to see that we all started somewhere, and that somewhere sure isn't where we're at today. If you're frustrated with where your skills are currently at, just know that with some patience and practice, it gets better.


June @ How to Philosophize with Cake says
Wow that is one stunning cake! Wish I could've seen the inside. Heck, wish I could've had a slice, because it sounds delish--strawberry + champagne is a great combo! I can totally see the Katherine Sabbath inspiration in here 🙂
The Simple, Sweet Life says
Thank you June! I'm so glad you can see my inner Katherine Sabbath shining through. 😉
Sue says
I agree, this is stunning! I love the colors and beautiful details.
The Simple, Sweet Life says
Thank you! 😀
Tracey says
Hi! Beautiful cake, I'm going to try making this for my friend's birthday. Can I clarify if the "1/2 champagne" in the ingredients list is 1/2 cup champagne?
The Simple, Sweet Life says
That's where late night editing will get you! Yes, I did mean half a cup, and have change the recipe to say such (as well as check that the rest of the units of measurement were there). 🙂 Hope your friend enjoys the cake!
TIffany @ Arrows & Awe says
This seriously looks too good to eat! I wish I had some baking talent!
The Simple, Sweet Life says
Thank you Tiffany! 😀 And I'm completely confident you could whip up a cake like this! 😉
Dee says
What kind of champagne is used? The picture shows Moscato which is not champagne. They range from sweet to dry. What is recommended?