
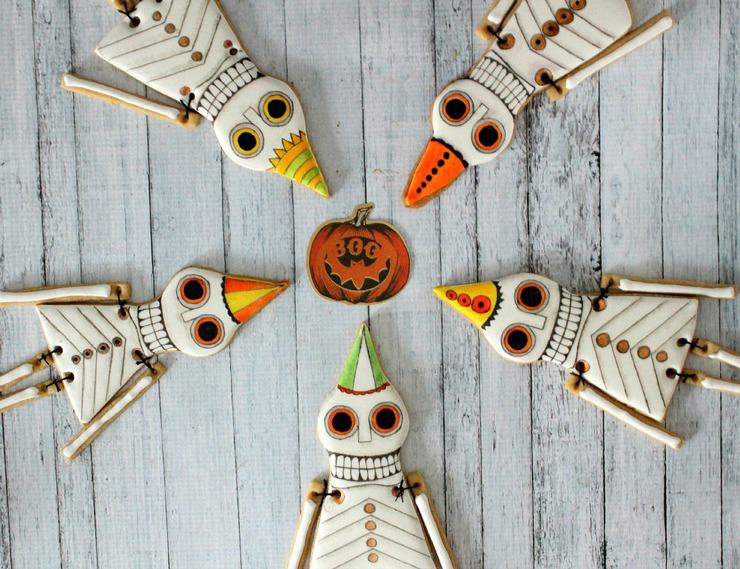
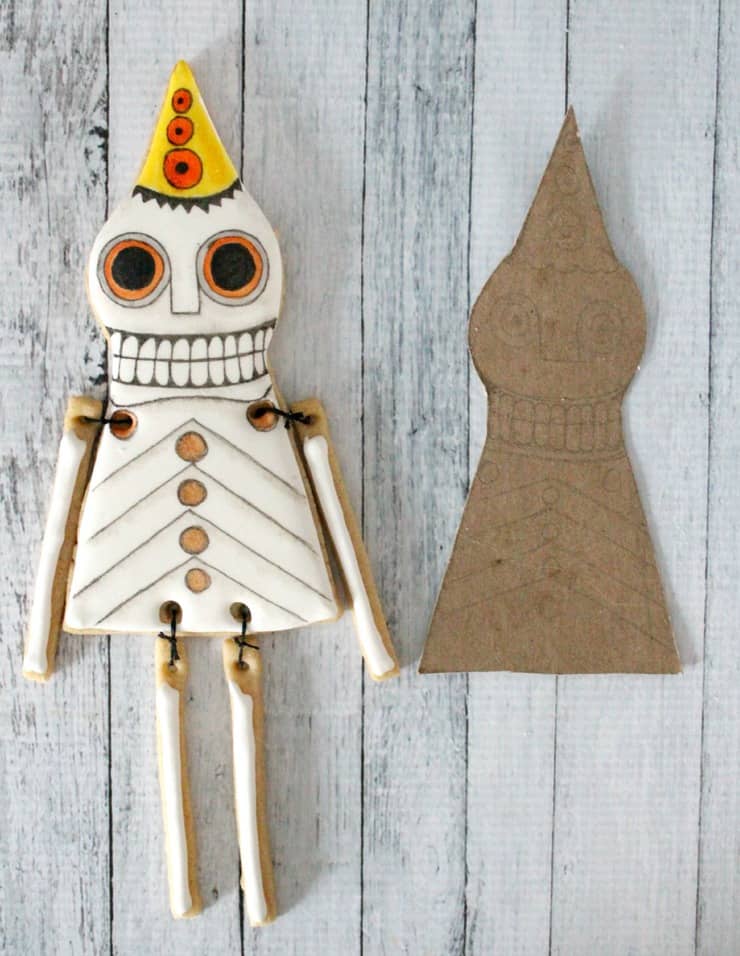
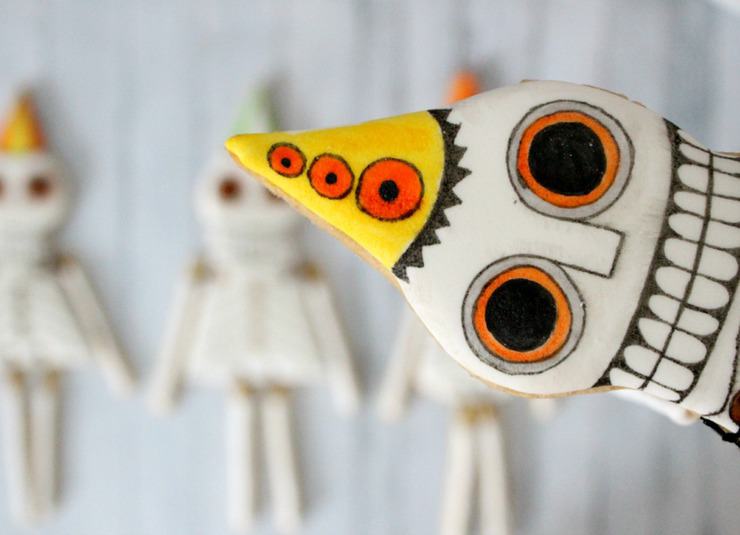
One of my favorite things about cookie making and baking is that inspiration can come from anywhere. I've made cookies inspired by cards, books, other cookie artists... really, the possibilities for inspiration are endless! The only downside is that cookie inspiration can mean a need for custom cookie shapes. Recently, I absolutely fell in love with these Day of the Dead ornaments by Jo of The Cart Before the Horse (be sure to check out her Facebook too!). Seriously, how can you not want to cookie these?!
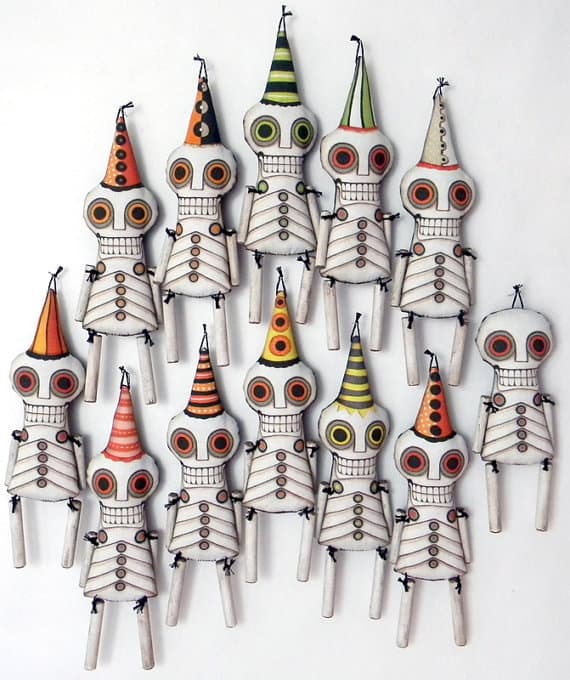
It just needs to be done. But believe it or not, I don't exactly have a Day of the Dead skeleton ornament cookie cutter lying around. I know, shocking right? (Since I have yet to find a sarcasm font, I'm just going to note here that that was, in fact, sarcasm) Luckily, there are lots of options for making custom cookie shapes without sending away for a custom cookie cutter or buying anything extra. Jo was gracious enough to agree to let me use her designs, so using that as inspiration, I'm going to talk about 3 of my favorite ways to create custom cookie shapes!
Method #1: Using cookie cutters you already have
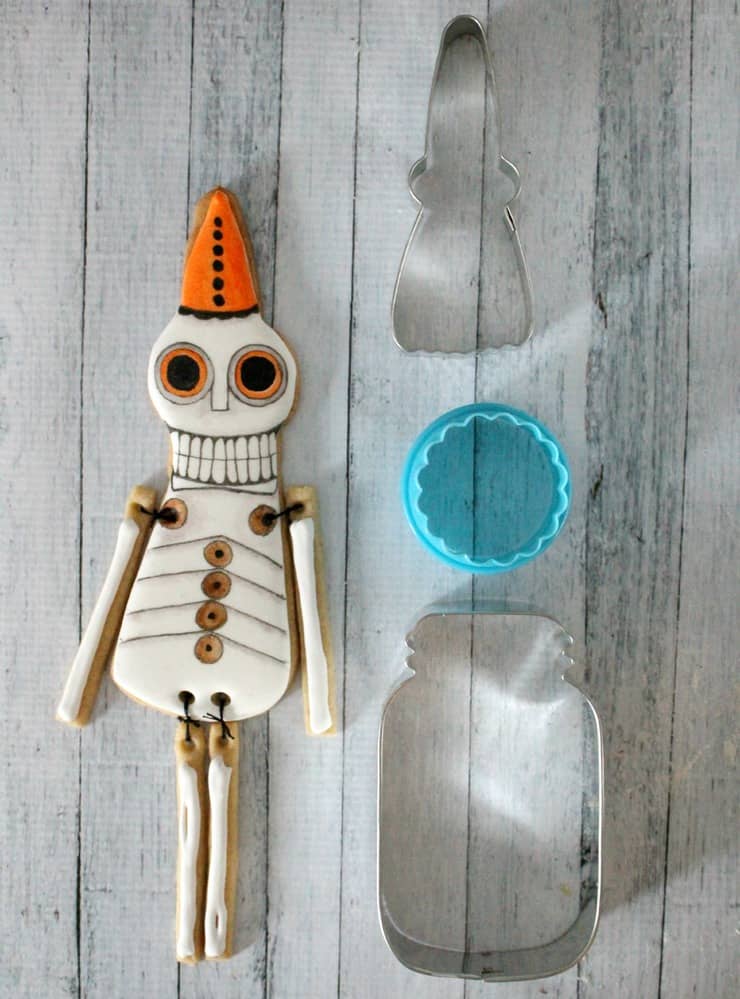
If you've heard of Sugarbelle (who am I kidding, who hasn't heard of Sugarbelle?), you might be familiar with her term "cookie think." Cookie think encompasses many things, including the idea of piecing together a custom cookie shape using cookie cutters you already have.
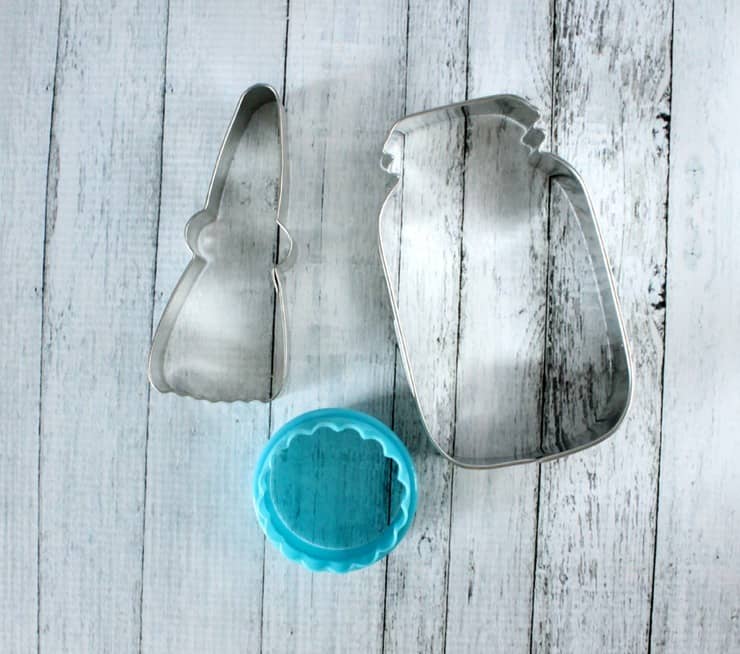
For this particular project, the closest shapes I had were a broom cookie cutter (using the handle for the hat), a small circular cutter (for the head), and a mason jar cookie cutter (using the jar for the body). The jar part of the cookie was obviously a little too big for the design, so I cut it down with a small, sharp knife.

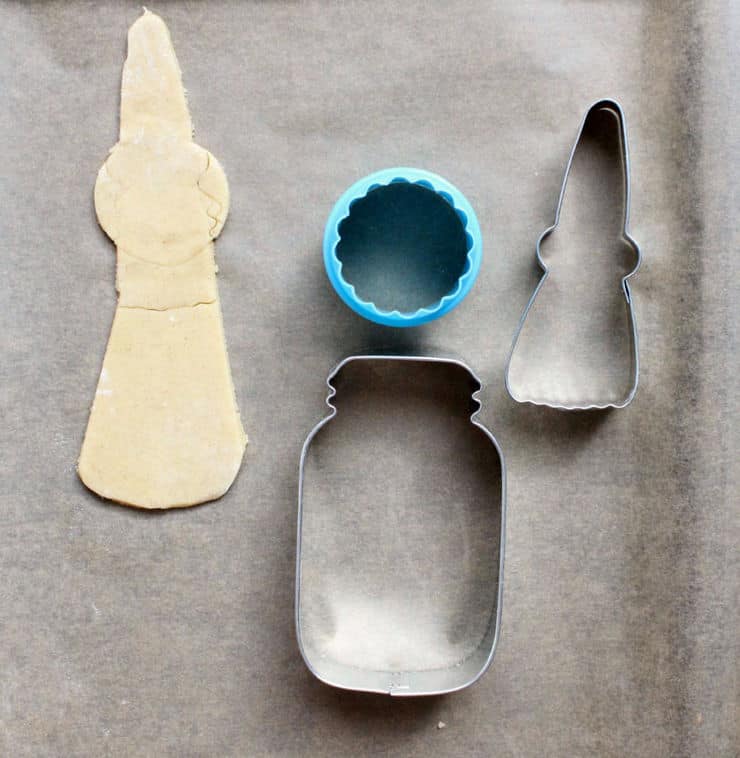
This is the easiest and least expensive method of the bunch, but it also depends on the cookie cutters you already own. For this design, given the collection of cookie cutter I currently have, this wasn't the best option (as you can probably see).
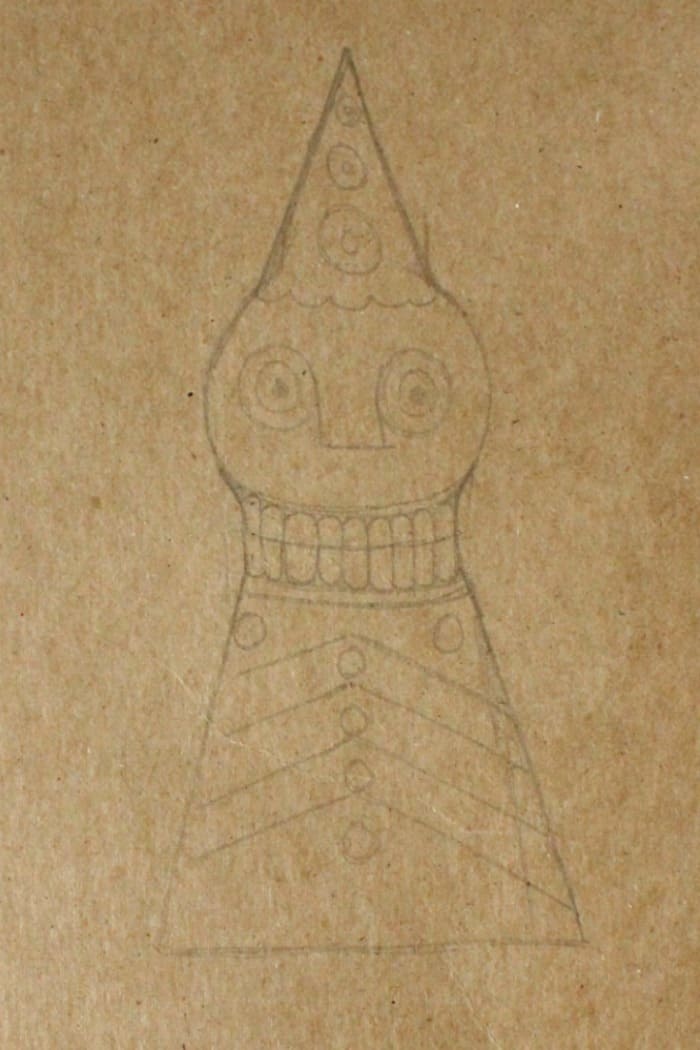
Method #2: Creating a stencil
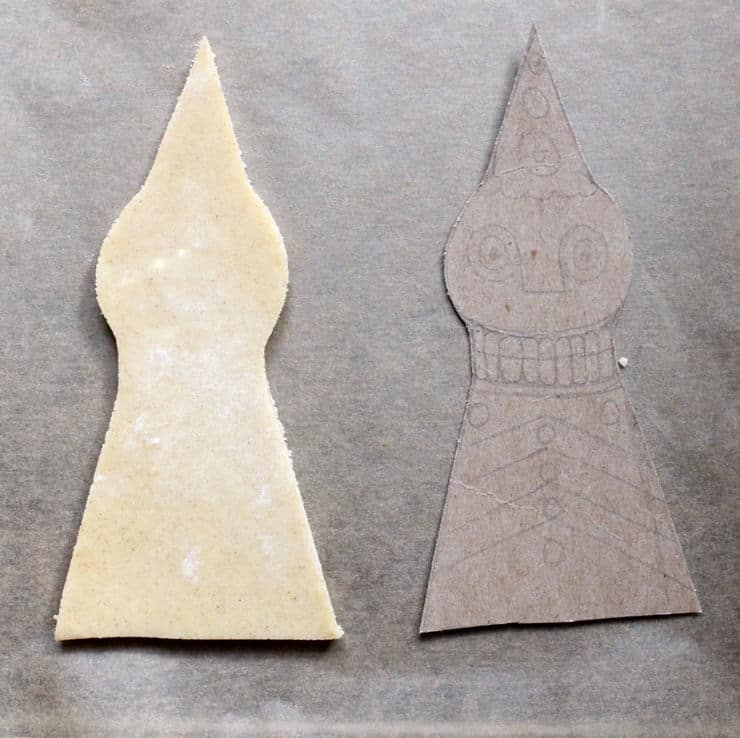
This second option is my favorite and the one I use the most (and ultimately what I used to cut out the majority of the cookies for this project). For this method, you'll need some basic supplies like a pencil, eraser, ruler, and some really heavy duty card stock (you can use cardboard in a pinch, too). Start by drawing the basic outline of your design. I usually freehand this part, occasionally using cookie cutters and rulers to help me get perfect circles or straight lines. To make sure your outline will work for your cookies, I recommend penciling the details onto your card stock outline just to make sure everything fits and looks right. Once you're happy with your design, cut out your shape using the outline you created.
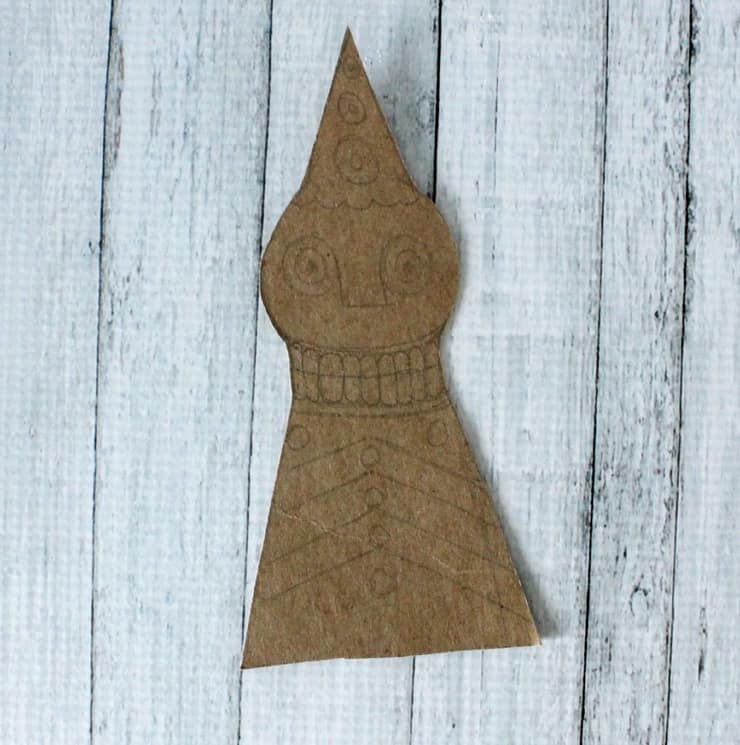
Gently press you card stock design onto your cookie dough, and cut around it using a small, sharp knife. This method is a great option for creating a custom cookie shape that you might use a few times, but won't need to use on a regular basis.
Method #3: Creating a simple cookie cutter
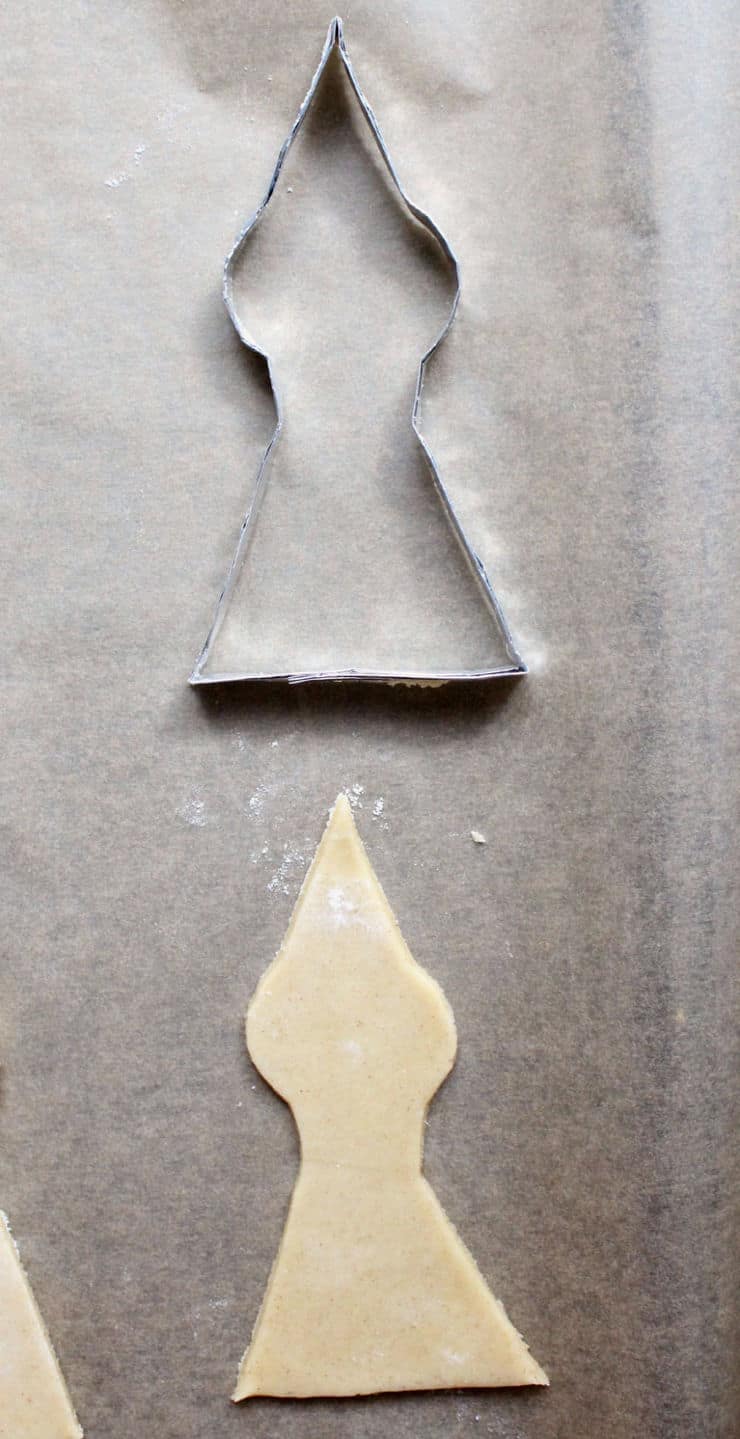
This method is great if you want to create a more permanent custom cookie shape solution. For this method, you'll need some tin foil and a hot glue gun. Start by drawing a basic outline for your design (much like for the previous method). Once you're pleased with the size and shape of your design, take a long piece of tin foil (if you're unsure how long to make it, go for longer rather than shorter) and fold it in half lengthwise. Keep folding it in half, over and over again, until you're left with a long piece of tin foil that's only about ¼"-⅓" wide.

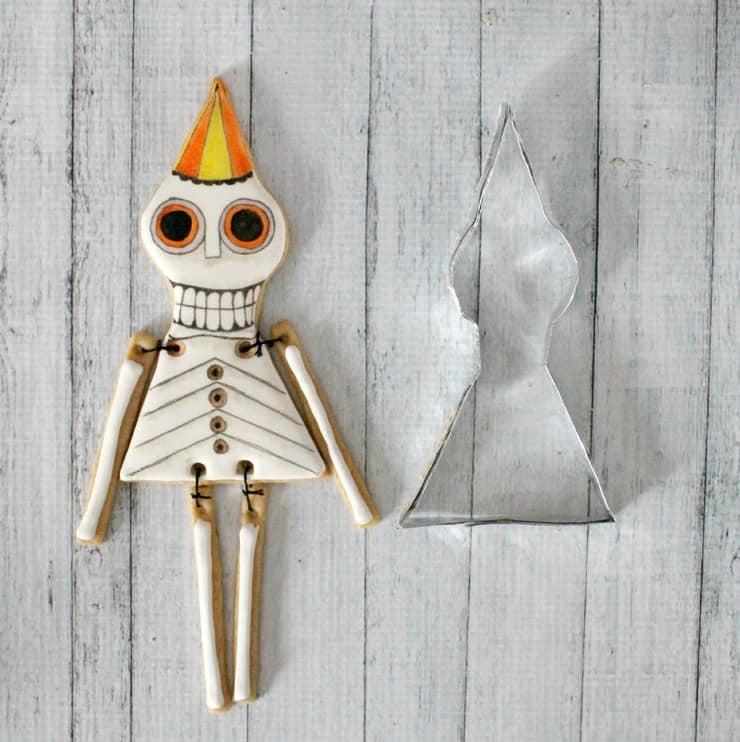
Using your outline as a guide, begin bending your thin piece of tin foil (edge facing down) around it to create a cookie cutter. Trim off any excess tin foil, and hot glue the slightly overlapping ends together. To cut out your cookies, simply press your homemade cookie cutter into the dough like you would any other cookie cutter (although perhaps a little more gently).
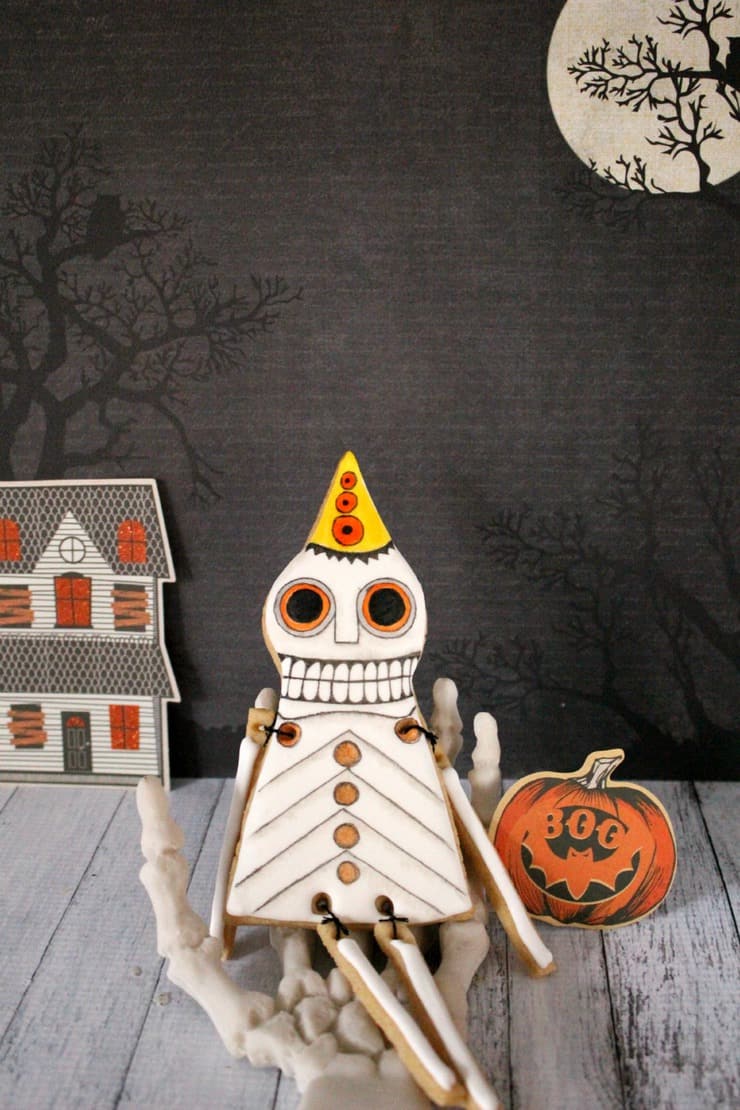
Now you can bake and decorate your custom cookie shapes! For these cookies I used my pumpkin spice cookie cutout recipe, and all the designs were hand painted or drawn on. For basic information about making and using royal icing, check out this post.

Have you seen something that you just had to make into a cookie (or other dessert)? Share it with us in the comments below!
Happy baking!
Method #3 adapted from My Paper Crane


Sue says
Love, love, love these!
The Simple, Sweet Life says
Thank you! 😀
liztiptopshape says
These are so cool looking!!!
The Simple, Sweet Life says
I'm so glad you think so! 🙂
melissajoycookies says
These are so fabulous! LOVE THEM!
The Simple, Sweet Life says
I'm so glad!! 😀
Angela says
These are awesome! So creative!
The Simple, Sweet Life says
I'm so glad you like them! 🙂
Jolenaa @TheRubyKitchen says
These are absolutely gorgeous Claire! Beautiful post.
The Simple, Sweet Life says
Awww thank you so much! 😀
Audrey@That Recipe says
found this on Wine'd Down Wednesdays.
Great tips. I am usually lazy, if we don't have the cookie cutter I want I make something else. Guess I should start being more creative.
The Simple, Sweet Life says
I was exactly that same myself (if I don't have the cutter, I'm not going to make it), but once I figured out how to make my own custom shapes, I realized it really wasn't that much extra work. If you try out any of the methods in this post, you'll have to let me know what you thought of them! 🙂
elizabeth @LocalSavour says
Claire! These are so amazing ~ well done! #FoodieFridays
The Simple, Sweet Life says
Thank you so much! 😀
Jo James says
Yay!
The Simple, Sweet Life says
Super yay! 😀
adrian@lifewithgarnish.com says
Thank you for sharing this! I've wanted to make custom cookies in the past but didn't want to go out a buy a special cookie cutter for a one time use. Now I don't have to and I can still make my custom cookies:)
The Simple, Sweet Life says
Yay! I'm so glad you'll be able to make your custom cookies now! 😀
Karen @ Karen's up on the Hill says
Hi Claire, I am stopping by from the Tatertots & jello link party, and I am so impressed by these! They are beautiful and the photos are amazing! What great little gifts they would be for the holiday!
The Simple, Sweet Life says
Thanks for stopping by! I'm so glad you liked these little characters! 😀
Lolly Jane says
Holy heck this is the cuuuuuuuutest!!! Love those cookies- the mouth especially is SO fun! Great tutorial- thanks for sharing! XO
The Simple, Sweet Life says
So glad you like these little guys! I can't help but crack a smile every time I see them sitting in my office! 😀
Judith says
I had to take a second look. I though they were little sewn dolls until I realized they were cookies. Sweet awesomeness!
The Simple, Sweet Life says
If you thought they were sewn dolls that's great because that's exactly what I was going for!! 😀
Steph @ Crafting in the Rain says
Those are so fun! And so many possibilities!
The Simple, Sweet Life says
I'm so glad you like them! And once you know how to create your own custom cookie shapes, the possibilities are endless! 🙂
katjeter says
OMG, these cookies are absolutely amazing. How beautiful!
The Simple, Sweet Life says
Thank you! 🙂
Kim~madeinaday says
Wow what a great cookie!! I would love it if you would link them up at my Halloween Linky {link is in my sidebar} So cute!
The Simple, Sweet Life says
Thank you! I'll definitely stop by and have a look at your party. Thanks for the invitation! 🙂
Baking In Pyjamas says
These are brilliant and so creative. This has been featured as the most view recipe on Sweet and Savoury Sunday. Stop by, grab a button and link up again with us this weekend. Have a great day! Laura@Baking in Pyjamas
The Simple, Sweet Life says
Thanks so much for the sweet feature! 😀
Stephanie says
These look adorable!! Thank you so much for linking up at Tasty Tuesday! Your recipe has been pinned to the Tasty Tuesday Pinterest board! Please join us again this week!
dishofdailylife says
I absolutely love these -- they are so creative! I just wanted to let you know that I decided to do a Halloween roundup from the past few weeks of Foodie Fridays, and you are featured tonight!
The Simple, Sweet Life says
Thank you so much for the sweet feature! 😀 I'll stop by later this evening and check it out!
Teri@The Freshman Cook says
These are adorable, and you are amazingly talented! So cute! Every once in a while I want to make a cookie that I don't have a cutter for, so I am going to try each of your processes and see which one I like best for me! I would love if you would stop by and share this at my blog party, Celebrate It! It’s all about celebrating what we do in our everyday lives!
http://thefreshmancook.blogspot.com/2014/10/celebrate-it-blog-party-14.html
The Simple, Sweet Life says
I'm so glad you enjoyed the post! You'll have to let me know which method you like best. 🙂 It's always interesting to see what works for others. Thanks for the invitation. I'll definitely stop by later this evening and check it out! 🙂
Eden Passante says
This is one of the most interesting cookies I've ever seen. It's so cool!! How you managed to tie those little cookie legs to the body is unreal, I would've cracked them forsure! Love this idea!
The Simple, Sweet Life says
Not gonna lie, I broke more than one cookie leg in the process of making, baking, icing, and attaching them! Side note: cookie legs are delicious. 😉
Amaya says
Hello, I’ve been baking since I was 6 years old and never thought to try customizing my very own cookie cutters.🥰