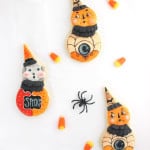
Creating Dimension with Royal Icing
- Category: Tutorial
Ingredients
- Cookies (here are a few basic sugar cookie recipes)
- Royal icing
- A piping bag
- Wilton #2 tip
- A toothpick, skewer, or scribe tool (for moving around the icing)
- Assorted food-only brushes (for painting)
- Assorted food gel colors (for painting)
- Black powdered food coloring
- Q-tips
Instructions
- The easiest way to go about these cookies, in my opinion, is to use uncolored royal icing for the base, and to paint over it with food gel colors once it hardens. Start with a batch of royal icing with a 20 second consistency. Pipe the base layer of icing, using your toothpick/skewer/scribe tool to work the icing around and fill in any areas that seem to have more or less icing than others. For these cookies, because I was planning on creating a ruffled collar and border around the hat, the face, hat, and round base were the areas I filled in with icing.
- Wait 2-4 minutes until a slight crust begins to form over the icing (or about the time it takes you to put down another base layer of icing on another cookie). Now for the fun part! Stick the end of your piping tip directly into the base layer of icing you created 2-4 minutes ago. Yes, you will be breaking the surface of the icing with your tip. Gently squeeze your piping bag, piping icing under the surface of the initial layer of icing. This will create a bubble of new icing under the surface of the old. Be sure to pipe a little extra icing into the bubble as it will naturally shrink a little before it settles. Use this method to create the cheeks.
- You can use the same principal to create dimension in other areas of the face, like the brow or chin. If you're working with a larger area, simply work in small areas, piping icing under the surface, removing the tip, and placing it a little farther along to inject more icing.
- To create even MORE depth in your cookies, you can apply shading, like in the skeleton cookies above. To do this, use a small, completely dry, food-only brush to gently rub the black powdered food coloring into the dry royal icing. For this part, it helps to think about where shadows would naturally fall on your cookie were it upright, or use a picture for reference. If for some reason you shade it darker than you'd like, you can easily remove the black food coloring with a slightly damp Q-tip. Just moisten it with the Q-tip, and dab it dry with the corner of a paper towel. Note: it's best to do the shading BEFORE you paint the cookie. You'll have a harder time correcting mistakes later if you don't.
- And that's it! Now it's just up to you to paint and add all your finishing touches!
Notes
Decorating technique adapted from McGoo U
