
Delight ghouls big and small with these easy Halloween cake pops! Keep scrolling to learn how to make these cake pops from scratch or how to speed up the process with a few store bought ingredients.
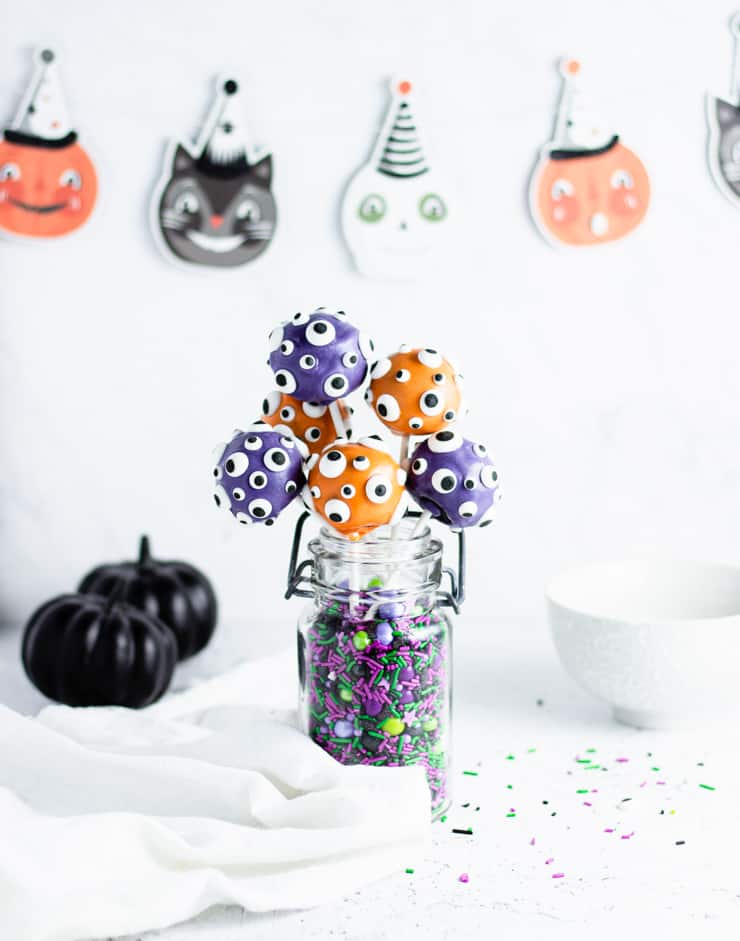
The other day as I was scouring Pinterest and Foodgawker for some Halloween baking inspiration, I came across The Decorated Cookie's googly-eyed monster cupcakes. I loved the simplicity of the design and the fact that they were just kind of cute in a silly sort of way. But I decided to go a different route with the googly-eyes and instead whipped up a batch of monster cake pops!
How to make these Halloween cake pops
First, make your cake base.
If you want to work ahead, you can make your cake the night before or up to three days in advance if you store it in the fridge. Either way, you'll want to make sure you're working with a completely cooled cake.
To make the cake, preheat your oven to 350F and line a 9" pan with parchment paper.
Combine the boiling water and chocolate, stirring until smooth. Whip the eggs until light and fluffy and add the vegetable oil, continuing to whip until combined.
Add the sugar, milk and water/chocolate mixer, whipping until just combined. Pour into your prepared 9" cake pan and bake for 25-30 minutes, or until a toothpick inserted in the center comes out clean.
Pro tip: If you'd like to skip making the cake altogether, you can substitute 12 store bought cupcakes for the cake. Simply remove the frosting and save it for the next step.
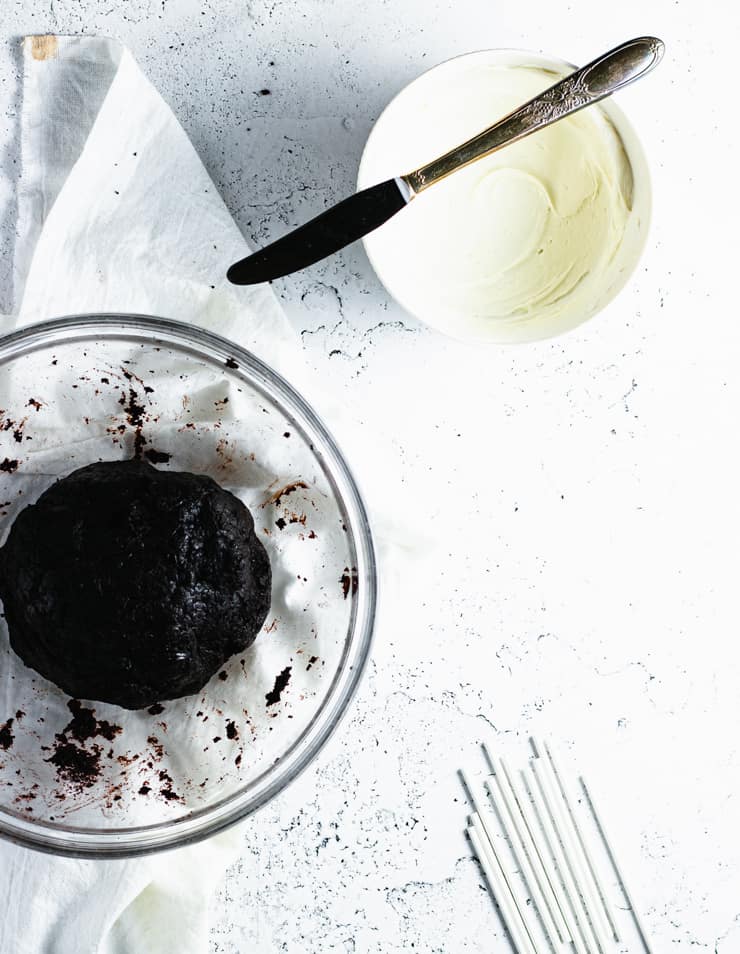
Second, make the cake pop filling.
In a large bowl, crumble the cake. Add a few scoops of frosting and begin mixing, adding more frosting as needed until the cake begins to clump, but isn't sticky to the touch.
Note: This recipe makes a very moist cake so I typically need just one heaping tablespoon of frosting.
Roll your cake mix into quarter size balls and place them on a cookie sheet lined with parchment.
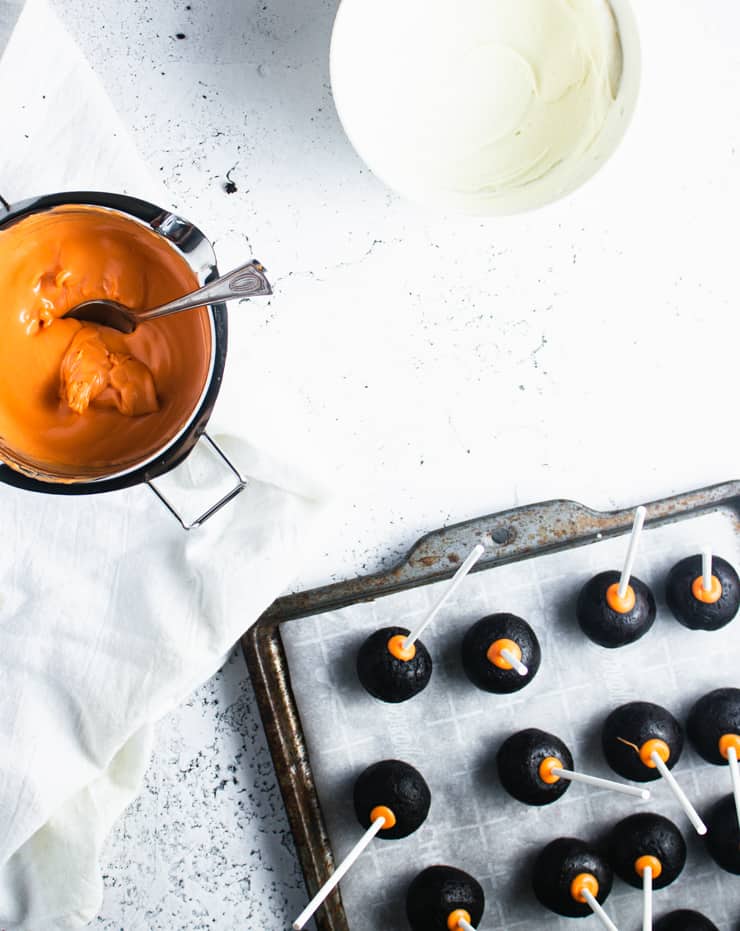
Third, melt your candy melts.
In a double boiler, melt 15 oz of dark chocolate, stirring until completely smooth.
If you’re not already familiar with it, a double boiler can be made by setting a bowl over a pot of boiling water. You can use any glass, ceramic, or stainless steel bowl.
The advantage to using a double boiler instead of microwaving the chocolate is that it’s harder (although not impossible) to over-cook the chocolate. It’s also great for keeping the chocolate warm, which can be tricky when you're dunking cold cake pops into it.
Once the chocolate is melted, dip the end of each lollipop stick into the melted chocolate and insert it half way into each cake ball. Set the cookie sheet with the cake pops into the freezer to firm up for a few minutes.
Pro tip: Be sure you don't freeze the cake pops for more than 5-10 minutes max. Cold cake pops can lead to a cracked outer shell.
Finally, coat the cake pops.
Once the chocolate gluing the sticks to the cake has hardened, remove the cake pops from the freezer.
To coat the cake pops, dip the cake pop into the chocolate, turn to coat all the way around, and gently pull it back out. Allow any excess chocolate to drain off of the pops before setting them aside (I like to use a piece of styrofoam or cardboard with holes in it to stand my cake pops up while they dry).
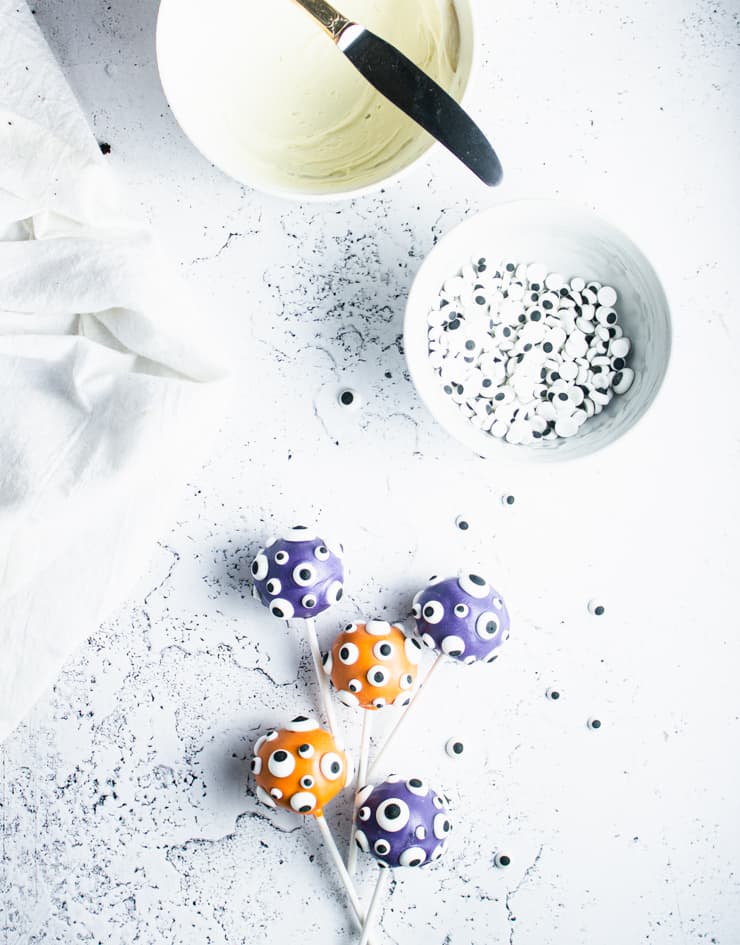
Before the chocolate dries, drop your royal icing eyes onto the cake pops using a pair of tweezers (if you need them) to position the eyes.
If you don't have royal icing eyes available, or don't want to buy them, you can easily whip up a batch of your own the night before using white and black royal icing with a 20 second consistency. For more information about royal icing, check out this post.
Let the cake pops dry completely before packaging them. To speed up the process, you can set them in the freezer or refrigerator for a few minutes. I packaged mine with little cellophane bags, and black and orange ribbon.
Tips for making these Halloween cake pops
- Keep your kitchen equipment/utensils free of water when melting the chocolate. Getting water in the melting/melted chocolate will cause it to seize.
- Using white chocolate in place of the candy melts: If you don't have access to candy melts or would prefer to use white chocolate, you can tint the white chocolate using food gel color and substitute it using a 1:1 ratio (1lb candy melts = 1lb white chocolate).
- If the chocolate is too thick: You can thin it by adding a little bit of vegetable shortening. Stir a little bit in, stirring until it’s completely melted and test to see if it’s the consistency you want. A little bit goes a long way.
- Don’t have a double boiler? You can melt your chocolate in the microwave using 10 second increments. Just be careful, it’s very easy to over-cook chocolate this way.
- Preventing cracking: Cake pops often crack because the filling was too cold prior to being coated and it shrunk as it warmed back up. To prevent this, make sure you don't freeze your cake pops any longer than you need to during any of the steps that call for freezing.
- Storage: Cake pops can be stored at room temperature for 2 days or up to 7 days in the fridge in an air tight container.

Did you make this recipe? I’d love to hear how it went in the comments below. Better still, snap a photo and tag it on Instagram with #thesimplesweetlife. I love seeing your creations!
PrintRecipe
Monster Cake Pops

Delight ghouls big and small with these easy Halloween cake pops!
- Prep Time: 1 hour
- Cook Time: 30 minutes
- Total Time: 1 hour 30 minutes
- Yield: 24
- Category: Dessert
- Method: Baking
- Cuisine: American
Ingredients
For the cake pop filling:
- ½ cup water
- 1 oz semi-sweet chocolate chips
- 1 egg
- ¼ cup vegetable oil
- 1 cup granulated sugar
- ½ cup milk
- 2 oz baking cocoa
- ¾ cup flour
- 1 tsp baking soda
- 1-3 tablespoon frosting
For the coating:
- 1lb candy melts in assorted colors
- Royal icing eyes (store bought or homemade)
Instructions
- Preheat your oven to 350F and line a 9" round cake pan with parchment.
- In a small bowl, combine the semi-sweet chocolate and boiling water. Stir until the chocolate has melted.
- In a large bowl, beat the egg until light and frothy.
- Add the oil and continue beating until the two have completely combined.
- Whisk in the sugar, flour, cocoa, baking soda and powder, and the chocolate/milk mixture.
- Pour the batter into your lined cake pan and bake for 25-30 minutes, or until a toothpick inserted in the center of the cake comes out clean.
- To make the cake pops, crumble the cake into a large bowl.
- Add a few scoops of frosting and begin mixing, adding more frosting as needed until the cake begins to clump, but isn't overly sticky to the touch.
- Roll your cake mix into quarter size balls and place them on a cookie sheet lined with parchment.
- In a double boiler, melt your first color of candy melts.
- Dip the end of your lollipop sticks into the melted chocolate and insert it half way into each cake ball.
- Set the cookie sheet with the cake pops into the freezer to firm up for a few minutes.
- Once the chocolate has hardened, remove the cake pops from the freezer.
- Dip the cake pops into the chocolate, turn to coat all the way around.
- Allow any excess chocolate to drip off of the pops before setting them aside.
- Before the chocolate dries, drop your royal icing eyes onto the cake pops using a pair of tweezers (if you need them) to position the eyes.
- Repeat with each additional color of candy melts.
Notes
- Keep your kitchen equipment/utensils free of water when melting the chocolate. Getting water in the melting/melted chocolate will cause it to seize.
- Using white chocolate in place of the candy melts: If you don't have access to candy melts or would prefer to use white chocolate, you can tint the white chocolate using food gel color and substitute it using a 1:1 ratio (1lb candy melts = 1lb white chocolate).
- If the chocolate is too thick: You can thin it by adding a little bit of vegetable shortening. Stir a little bit in, stirring until it’s completely melted and test to see if it’s the consistency you want. A little bit goes a long way.
- Don’t have a double boiler? You can melt your chocolate in the microwave using 10 second increments. Just be careful, it’s very easy to over-cook chocolate this way.
- Preventing cracking: Cake pops often crack because the filling was too cold prior to being coated and it shrunk as it warmed back up. To prevent this, make sure you don't freeze your cake pops any longer than you need to during any of the steps that call for freezing.
- Storage: Cake pops can be stored at room temperature for 2 days or up to 7 days in the fridge in an air tight container.
Sources:
Cake recipe from Miette (2011), pg. 55
Cake pop making technique adapted from Bakerella
Nutrition
- Serving Size: 1 cake pop
- Calories: 182
- Sugar: 21.4g
- Sodium: 77mg
- Fat: 9.5g
- Saturated Fat: 4.2g
- Carbohydrates: 23.7g
- Fiber: .6g
- Protein: 2.2g
- Cholesterol: 12mg
If you liked this, you might also like...
Update Notes: This post was originally published in October of 2013 but was republished with updated photos and tips in October of 2021.


Sue says
I love these! So fun....