
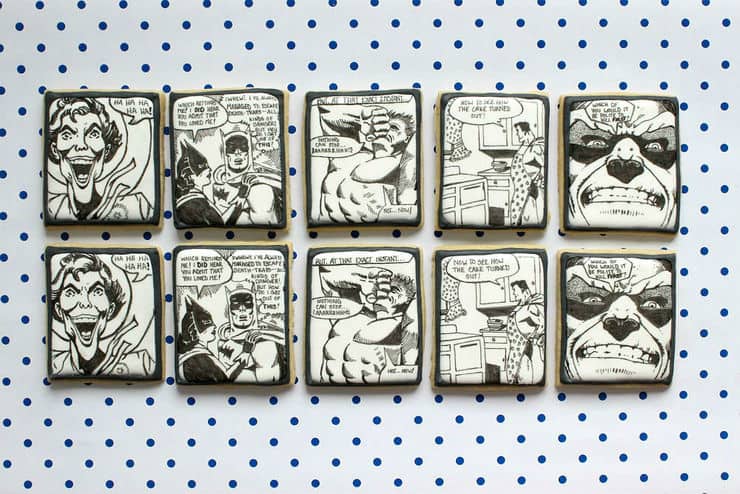
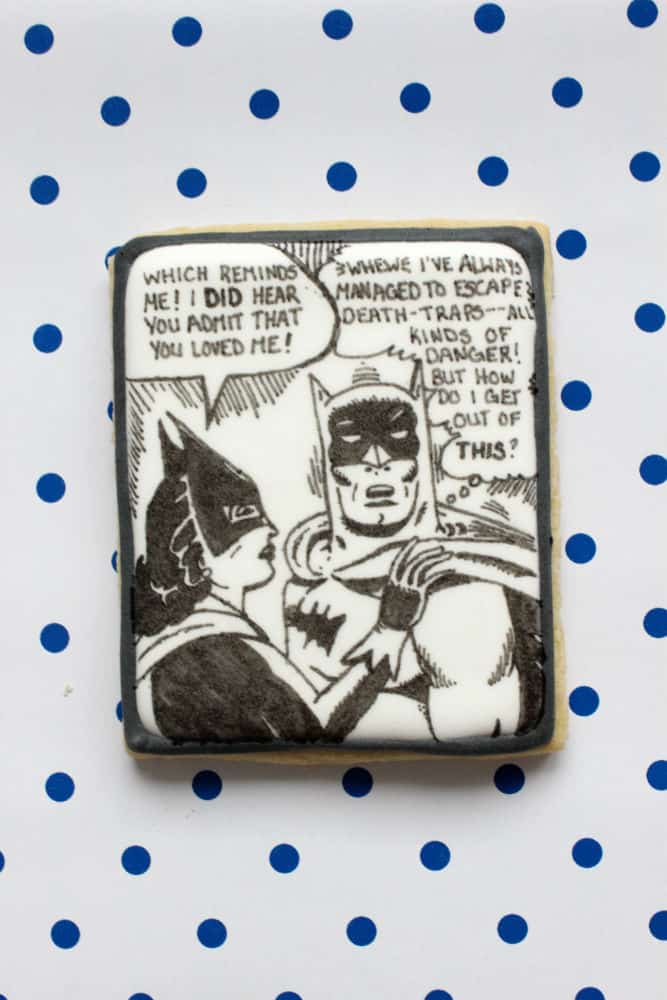
For my husband's birthday this year, I threw him a superhero themed party. But I didn't want to throw just any ol' superhero party, I wanted to make it an old school comic book superhero party. I decided way in advance that I was going to make cookies that looked like comic panels, and I picked out a few images that I liked and thought would look good on the cookies. However, all of the images were fairly detailed and I didn't have a ton of time or cookies to get the images right. I tried multiple methods to transfer my images onto the cookies, everything from Sweet Ambs' method of tracing over tissue paper versions of the images with an edible pen (I couldn't seem to get it to bleed through) to trying to building my own projector out of boxes and a flashlight (I was getting a little desperate... can you tell?). Nothing seemed to work! In a final attempt to transfer my images, I tried pricking one of my tissue paper designs onto one of the cookies (something I picked up from Sweet Sugarbelle's lace tutorial), but I couldn't see the tiny holes. Then it hit me! I'd created little holes in my tissue paper images, and now the edible marker would bleed through! And suddenly, I had my transfer method!
Comic Cookies
Yields a set of 10
10 rectangular cookies (Mine measured about 7cm x 8cm)
A batch royal icing
Black food coloring gel
A black edible marker with a fine tip
White tissue paper
A pencil
A pin/needle
A small piece of cardboard
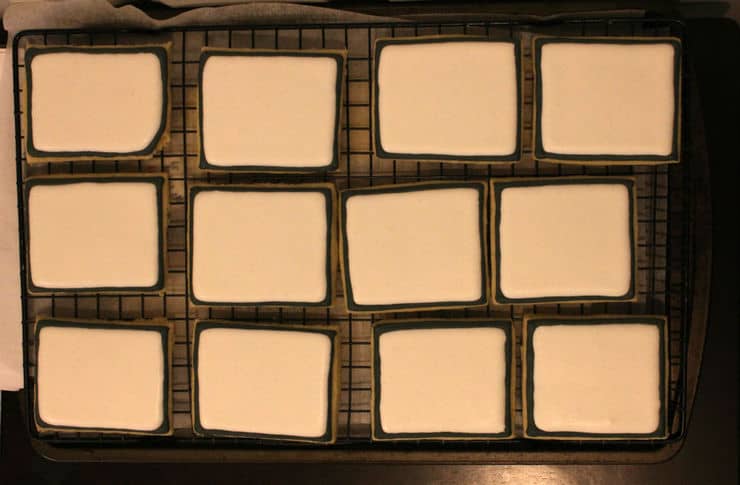
Start by making your cookies. You can really make them whatever size you'd like as long as they're rectangular since you can resize the images to fit the cookies. I wanted mine to be big enough that I could get some fine detail on them, but not too big, so I went with 7cm wide by 8 cm long. Once you've made your cookies, you can mix up some black piping icing and white flood icing. Pipe the black icing first and let it dry for at least a few hours before flooding with the white icing. You could also draw the border on later, but I found it easier to just pipe it from the start.
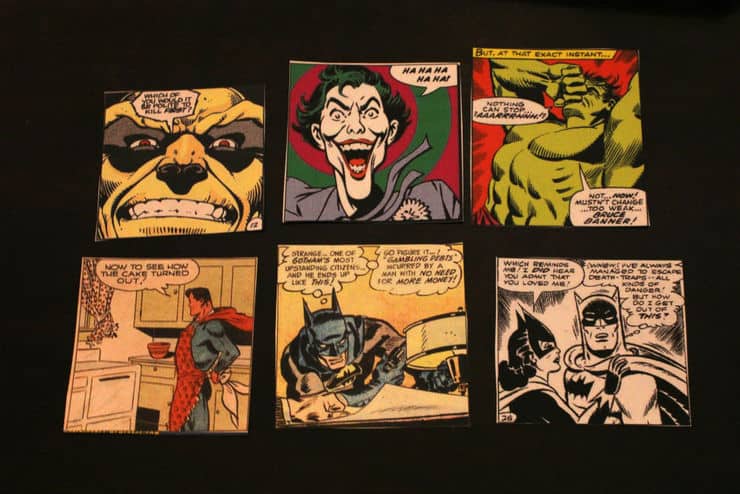
While the icing dries, you can make your stencils. This method will create a sort of connect-the-dot stencil that's ideal for giving you a basic outline to work with. Unfortunately, this method doesn't work very well for transferring fine detail. Cut out squares of your tissue paper that are larger than your images and large enough to cover your cookies and go over the edges. You want it bigger than your cookies because you're going to be taping it to your work surface on either side (tape doesn't stick very well cookies). Tape down your image, and tape your piece of tissue paper over it so neither move while you're tracing. Trace the major lines with a pencil. Once you're done tracing, remove the image and replace it with a small piece of cardboard. This will keep you from scratching your work surface while your poking holes in your tissue paper (in case you work at your dining room table like I do). Using a pin or needle, poke small holes along the lines you traced. Repeat this process for all the images you plan on using.

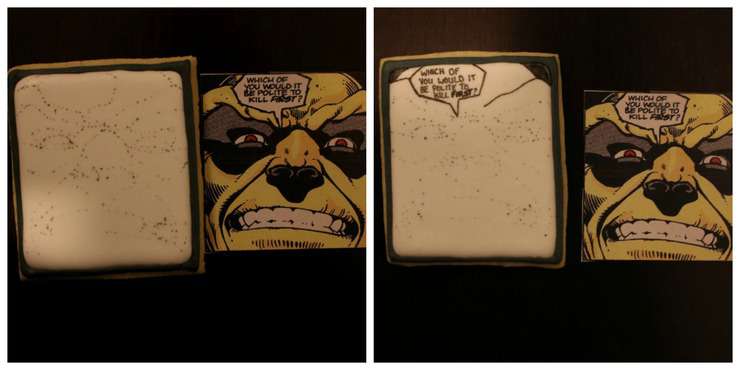
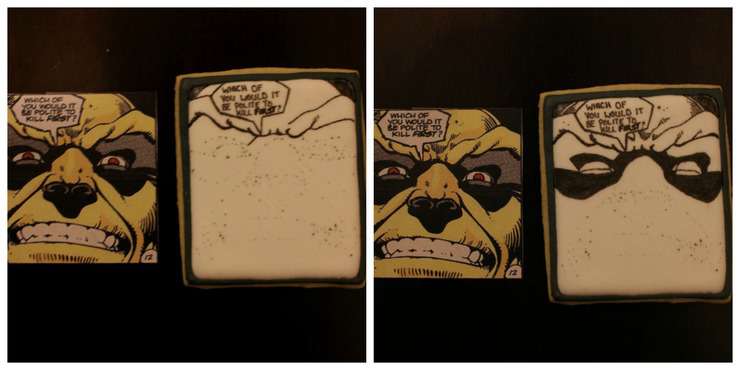
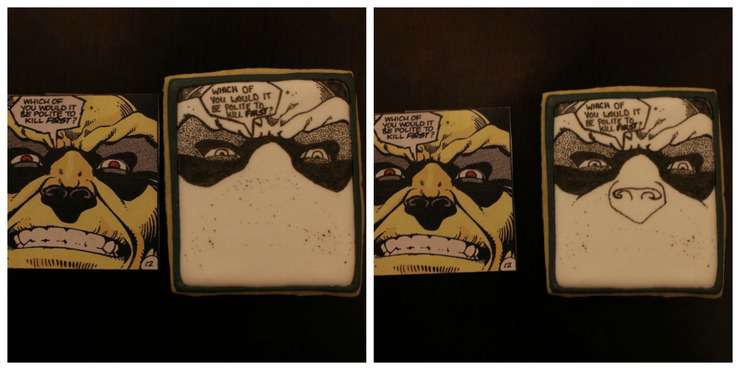
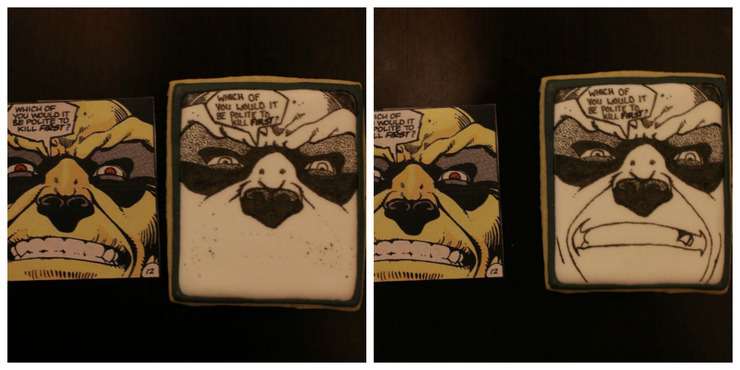
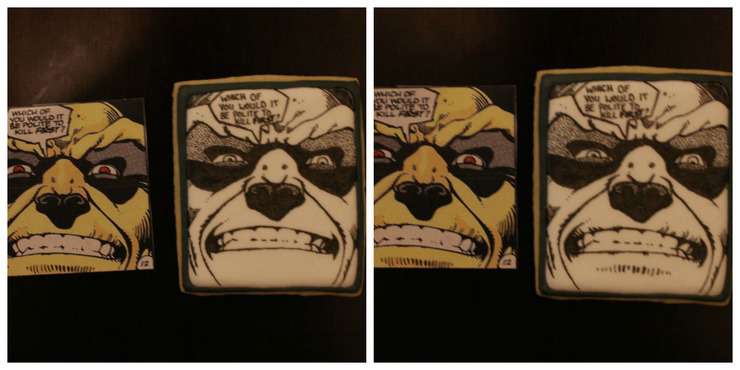
Once your icing has completely dried (preferably overnight just to be on the safe side), you can start transferring your designs. Lay your tissue paper stencil over your cookie and, once you have it where you want it, tape it down on at least two sides to keep it from moving. Trace over the design with your black edible pen. Now that you have all those little dots to guide you, you can start connecting them and making your image. To minimize smearing, start at the top of your cookie and work your way down. I also used a piece of tissue paper taped over the part of the cookie that I wasn't working on so that I could rest my hand there without smearing the dots. Be sure to completely finish the top part of the cookie, details and all, before moving down. Food coloring smears very easily while it's wet! And that's it! Your dots will give you a good, basic outline to work with and help keep your designs consistent (particularly important if you're doing the same design more than once). In the pictures below, you can see how much of an outline the dots give me (the pictures on the right, except for the last one), and how much detail I fill in freehand (pictures on the left and the last picture on the right).
Let the images dry at least a few hours (or overnight to be safe) before packing or stacking.


Happy baking!


liztiptopshape says
These are ridiculously cool!
The Simple, Sweet Life says
Awww thank you! 😀
Robin Wegener says
Beyond Genius! This is such a great method. However, I know there were still hours and hours of work in these FANTASTIC cookie works of art! You ROCK!!!!
The Simple, Sweet Life says
Thank you for the sweet words! Unfortunately this technique doesn't reduce the amount of time/work (I think I spent about 30-40 minutes drawing and shading on each cookie), but it does increase consistency. These cookies would not have been nearly so similar looking without some sort of guide! 🙂 I'm seriously terrible at eyeballing that sort of thing. 😛
tracey says
Amazing! I love these. Please could you tell me the brand of marker yoy used? My edible pens don't produce anywhere near this quality of finish! Thanks 🙂
The Simple, Sweet Life says
I used Rainbow Dust's double end pen in Jet Black. This is the first edible ink pen I've used, and I have several colors from this same brand/line, and I absolutely love them! I particularly love the fact that these pens have two tips: a fine tip and a thicker, marker tip. For these cookies, I used the fine tip only.
Michelle @ MakeMeCake.Me says
Wow! Such attention to detail and cool idea with the holes in the transfer!
The Simple, Sweet Life says
Thank you! I'm just so glad I finally found a method that worked for me, and I'm definitely glad it wasn't the giant cardboard box Kopykake I tried to build! 😛 That would not have packed down well...
yankeegirlyummies says
Fantastic!! Love the method and the cookies!
The Simple, Sweet Life says
Thank you so much! 😀
Mike @ Semi Sweet says
These are insanely incredible! Thanks so much for sharing your process!
The Simple, Sweet Life says
Thank you so much Mike! Love your Seahawk cookies, by the way! 😀
catjones says
**Psssshhhht** THAT'S the sound of my mind being completely blown!! These are crazy cool!
The Simple, Sweet Life says
Thank you! 😀
Bonnie Burton says
I'd love to interview you about your geektastic cookies for an article on CNET.com -- if you're interested, please email me at bonnie@grrl.com
The Simple, Sweet Life says
Just sent you an email! I'm so flattered! 🙂
Kathy says
Gorgeous cookies. I am going to try this method.
The Simple, Sweet Life says
Thank you! I hope the method works well for you! 🙂
Rian says
How long do these cookies stay good? I need to make about 50 cookies similar to this and need a good head-start. If wrapped right, could they stay good for a week or so?
The Simple, Sweet Life says
They could easily last a week in an airtight container or bag, especially if they're iced (the royal icing helps seal the side it's on). You can also make and freeze the un-iced cookies if you want to get an extra head start on things. They'll last for months in the refrigerator. 🙂
Darice Green says
Really need a video on this method!! 🙂
Kimberly Revis says
I just found your site and this article. I really appreciate all of the great information. I have been a bakery since I was 8 but decorated cookies have always terrified me. I taught myself how to do French macarons before I tried this lol. My questions are:
Do you have to worry with all those holes in the paper that it will rip after using it a few times?
Also do you use parchment paper for this or tissue paper like you put in gift bags?
Will printed edible images glue to dried royal icing?
What do you think about printing and cutting out the image with perforated lines with a cutter like the cricut and using that to trace the edible ink lines with?
Could you print the image and laminate it and then punch the hole through so you have a sturdier image to use for repeat transfers?