
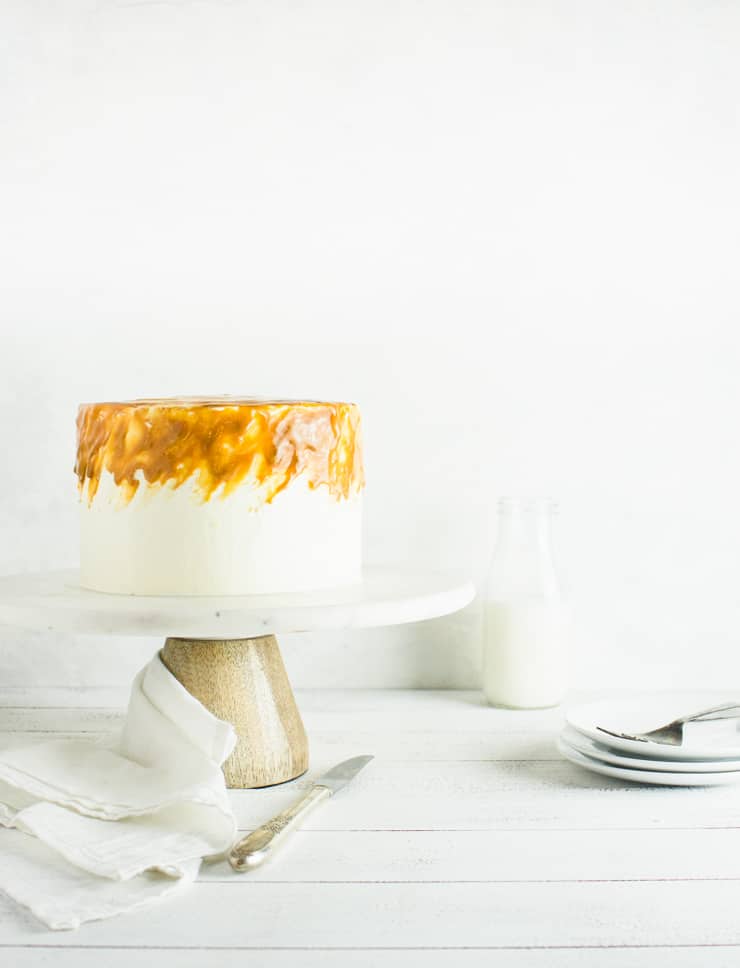
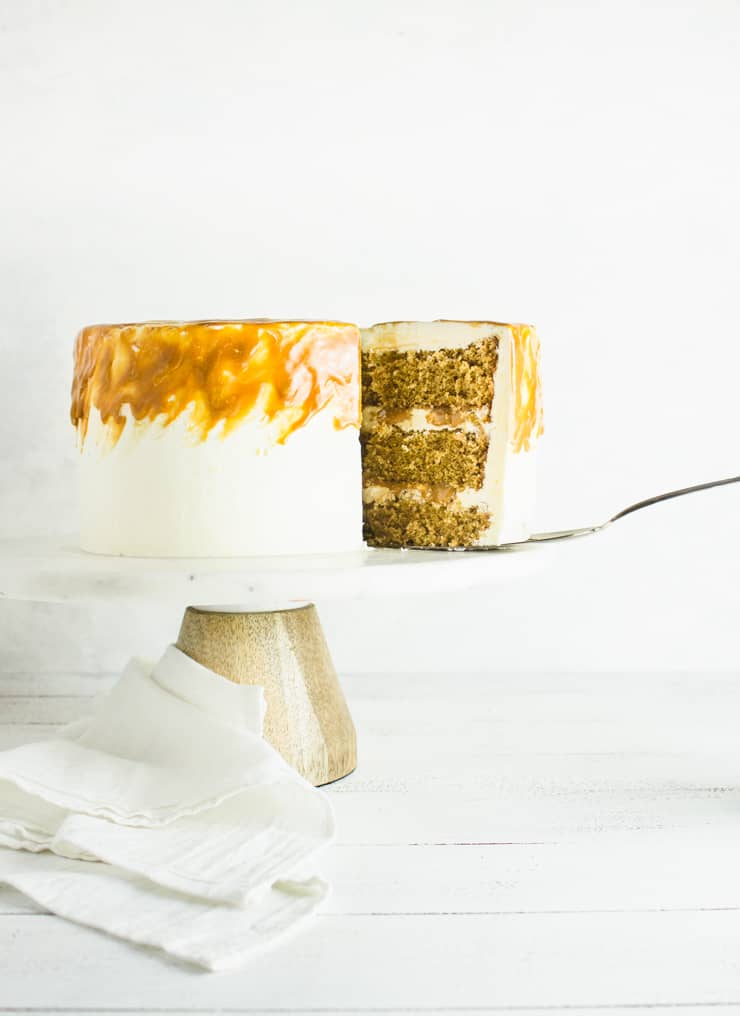
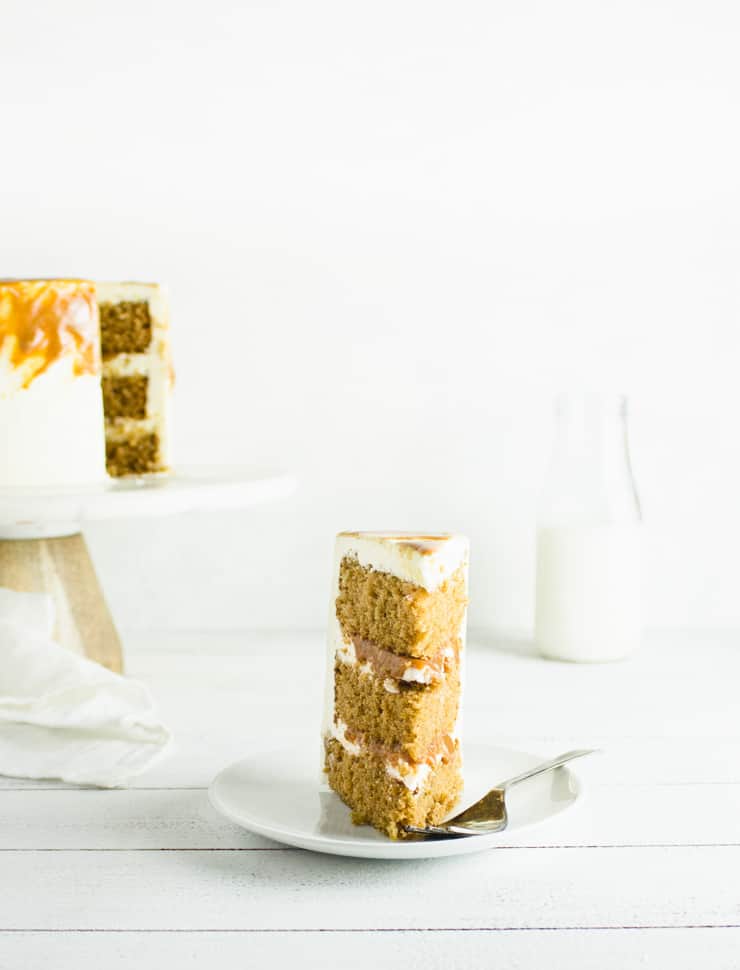
This caramel macchiato cake is everything you love about the classic Starbucks drink rolled up into a delicious homemade treat! We're talking layers of moist espresso cake, a delicate sweetened milk frosting and a decadent dulce de lech filling.
Guys, I have a confession to make: I drink a lot of coffee (ok, that's not the confession. Just wait for it...) and it's all... DECAF. I know. I feel like I'm going to be instantly booted out of the Pacific Northwest for this level of coffee blasphemy.
For a long time, I really thought I needed the caffeine to get me through the day. My "7am-4pm to 5pm to sometimes 6pm and OMG is it 7pm?!" job seemed like it necessitated a caffeine kick or two or sometimes even three. But what I actually discovered was that there's no such thing as building up a tolerance to caffeine for me.
I've always known that I'm sensitive to high amounts of caffeine but I thought that it was mostly because I wasn't used to it. If I built myself up, I reasoned, I would be free to partake in midday caffeine boosts, side effects-free.
NOPE.
So now I secretly carry decaf in my little thermos to work every day. Shhhhhhh don't tell anyone. I'm just not ready to give up my something warm and cozy first thing in the morning.
But that doesn't mean that I don't still love the taste of coffee. Because seriously, coffee is one of my all-time favorite flavors.
Which is exactly why I fell head-over-heels crushing on Hummingbird High's Vietnamese Iced Coffee Cake. Seriously, have you ever seen a prettier cake?! I knew I needed that cake in my life the instant I laid eyes on it. But then I started reading Michelle's post and she brought up caramel macchiatos and all I could think was "Girl, I need this cake but now I also need a caramel macchiato cake... Thanks Michelle..." <-- Meant in the most loving "now I need to make two cakes but I'm down with that" sort of way
So now I pass the need to make two cakes onto you: Hummingbird High's Vietnamese Iced Coffee Cake and my Hummingbird High inspired caramel machiatto cake.
You're welcome...
and/or I'm sorry (not sorry).
How to make this cake
First, make the dulce de leche if you plan to make your own.
Of course, you can save yourself a step here and buy the dulce de leche if it's available at your local store. If not, you can make your own by simply cooking a can of sweetened condensed milk in a pot of boiling water for about 3 hours.
As the can of sweetened condensed milk cooks, make sure it stays submerged. This may mean adding more water as it evaporates during cooking.
Make sure you let it cool completely before opening or using to fill your cake.
Second, make the espresso cake.
In the bowl of a stand mixer, combine the eggs and granulated sugar. Place the bowl over a pot of boiling water and cook until the egg/sugar mixture is hot (about 10 minutes).
While the mixture cooks, combine the milk and espresso powder. Microwave until the mixture is warm and then whisk the espresso powder in until it has completely dissolved.
Place the bowl with the sugar/egg back on the stand mixer and whip until the mixture has cooled to room temperature (about 10 minutes).
Add the dry ingredients and mix on low until just combined. Add the remaining ingredients (milk/espresso powder, vegetable oil and vanilla extract) and mix on low until just combined.
Grease and line three 6" cake pans and split the batter between them.
Pro tip: I like to weigh my batter to ensure that it's evenly distributed between each pan. For this recipe, you should have right around 9.3oz of batter in each pan.
Bake at 350F for 22-25 minutes, or until a toothpick inserted in the center comes out clean.
Third, make the frosting.
To make the frosting, combine the water and sugar in a small saucepan. Bring to a boil and cook until the syrup is completely clear.
While the syrup cooks, whip your egg whites in the bowl of a stand mixer until stiff peaks form.
On high, pour the hot syrup down the side of the bowl and into the egg whites. Continue to whip on high until the mixture has cooled to room temperature (about 15 minutes).
On low, begin adding small slices of the butter until all the butter has been added. Whip the frosting on high until it becomes a thick frosting (it'll look curdled at first, but don't worry. Just keep on whipping).
Turn the mixer down to low, add the sweetened condensed milk, and continue whipping until the frosting is completely smooth.
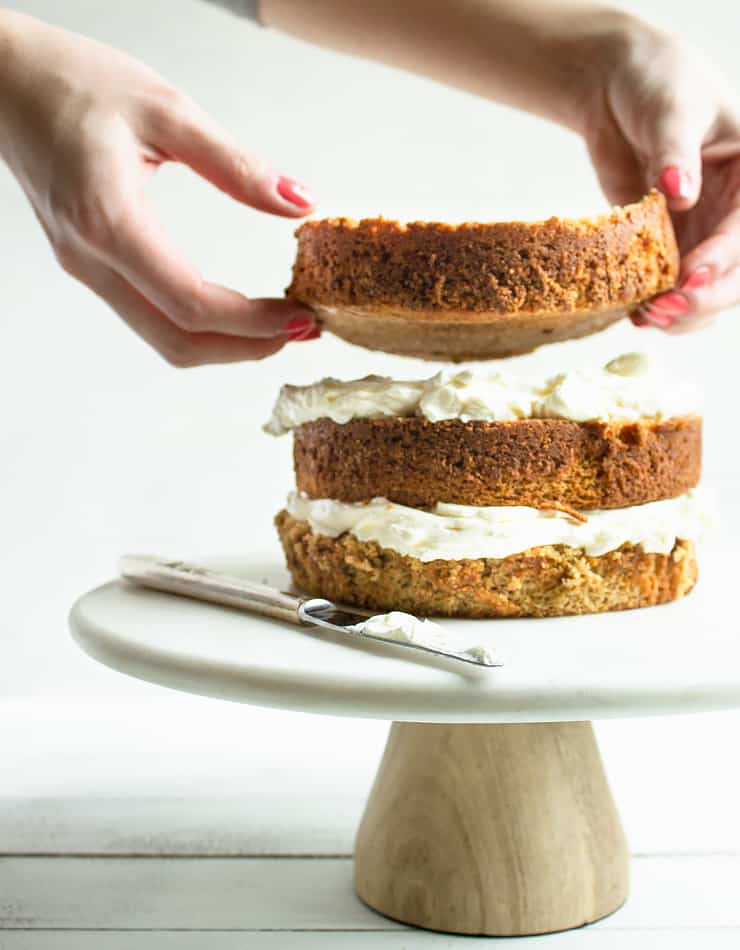
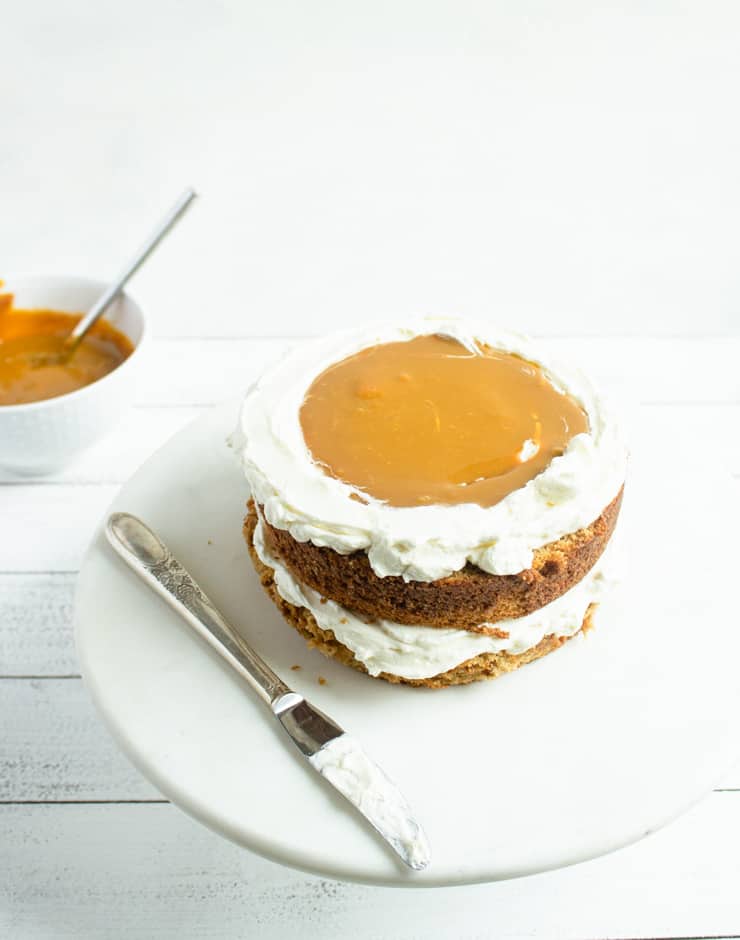
Finally, assemble the cake.
Level your layers of cake, spread a thick layer of frosting and use a spoon to carve out some of the frosting in the center. You want to create a shallow area in the center to hold the dulce de leche and keep it from running out over the sides.
Repeat for the second layer of cake.
Once all three layers are assembled, give the cake a crumb coat and allow to crust in the refrigerator (about 15 minutes).
Frost the rest of the cake with the remaining frosting.
To create the dulce de leche swirl, spoon 2-3 tablespoons onto the top. Use an offset spatula to work it out towards the edges.
Use an offset spatula to add dulce de leche to the sides of the cake, pulling it down diagonally. Repeat around the top edge of the cake until the whole cake is covered.
Tips for making this cake
- Making your own dulce de leche: If you can't find store-bought dulce de leche, you can make your own by cooking a can of sweetened condensed milk in a pot of boiling water for 3 hours. Make sure the can is always submerged during the cooking process.
- Measure your batter: Making even layers of cake start with measuring your batter. For this recipe, that means about roughly 9.3oz of batter per pan (for three pans).
- Chill your cake: Cool cake is easier to cut and handle, so chilling your cake for a short while before use will make this process easier.
- Crumb coat: Spreading a thin layer of frosting around the sides and top of the cake, and then refrigerating it will lock in any crumbs and keep them from reaching the surface of your frosted cake.
- Air bubble-free frosting: If the frosting has a lot of air bubbles, reduce the speed on your stand mixer to low and beat for 3-5 minutes, or until smooth.
- The trick for smooth frosting: You’ll need a rotating cake stand and a bench scraper. Place the small end of the bench scraper on the cake stand, long end against the frosting and turn the table. Once excess frosting is removed, heat the scraper in hot water, wipe and drag around the outside of the cake.
- Storage: This cake will keep at room temperature, uncut, for 3-4 days. For best results, cover it with a plastic lid, bowl or place it in a cardboard box. This is easiest if you don’t add the cookies until you’re ready to serve.
- Storing cut cake: Once your cake is cut, you’ll want to protect the exposed cake area. The easiest way to do this is with a piece of plastic wrap or two.
Did you make this recipe? I’d love to hear how it went in the comments below. Better still, snap a photo and tag it on Instagram with #thesimplesweetlife. I love seeing your creations!
PrintRecipe
Caramel Macchiato Cake

This caramel macchiato cake has everything you love about the classic Starbuck drink: 3 layers of rich espresso cake, sweetened milk frosting and dulce de leche filling.
- Prep Time: 1 hour
- Cook Time: 25 minutes
- Total Time: 1 hour 25 minutes
- Yield: One 6" Cake - 14 slices
- Category: Dessert
- Cuisine: American
Ingredients
For the espresso cake:
- 1 ⅓ cup all purpose flour
- 2 tsp baking powder
- 3 eggs
- 1 ½ cups granulated sugar
- ½ cup milk
- 2 tbsp espresso powder
- ⅓ cup vegetable oil
- ½ tsp vanilla extract
For the filling:
- 1 can (14 oz) dulce de leche
For the frosting:
- 6 egg whites
- 1 ⅓ cup granulated sugar
- 6 tbsp water
- 3 ½ sticks of unsalted butter, cold
- 3-4 tablespoon sweetened condensed milk
Instructions
- Sift together the flour and baking powder.
- In the bowl of a stand mixer, combine the eggs and granulated sugar.
- Place the bowl over a pot of boiling water and cook until the egg/sugar mixture is hot (about 10 minutes).
- While the mixture cooks, combine the milk and espresso powder. Microwave until the mixture is warm and then whisk the espresso powder in until it has completely dissolved.
- Place the bowl with the sugar/egg back on the stand mixer and whip until the mixture has cooled to room temperature (about 10 minutes).
- Add the dry ingredients and mix on low until just combined. Add the remaining ingredients (milk/espresso powder, vegetable oil and vanilla extract) and mix on low until just combined.
- Grease and line three 6" cake pans and split the batter between them (if you like to weigh out your batter like I do, you should have right around 9.3oz of batter in each pan).
- Bake at 350F for 22-25 minutes, or until a toothpick inserted in the center comes out clean.
- To make the frosting, combine the water and sugar in a small saucepan.
- Bring to a boil and cook until the syrup is completely clear.
- While the syrup cooks, whip your egg whites in the bowl of a stand mixer until stiff peaks form.
- On high, pour the hot syrup down the side of the bowl and into the egg whites. Continue to whip on high until the mixture has cooled to room temperature (about 15 minutes).
- On low, begin adding small slices of the butter until all the butter has been added.
- Whip the frosting on high until it becomes a thick frosting (it'll look curdled at first, but don't worry. Just keep on whipping).
- Turn the mixer down to low, add the sweetened condensed milk, and continue whipping until the frosting is completely smooth.
- To assemble the cake, level your layers of cake, spread a thick layer of frosting and use a spoon to carve out some of the frosting in the center. You want to create a shallow area in the center to hold the dulce de leche and keep it from running out over the sides.
- Repeat for the second layer of cake.
- Once all three layers are assembled, give the cake a crumb coat and allow to crust in the refrigerator (about 15 minutes).
- Frost the rest of the cake with the remaining frosting.
- To create the dulce de leche swirl, spoon 2-3 tablespoons onto the top. Use an offset spatula to work it out towards the edges.
- Use an offset spatula to add dulce de leche to the sides of the cake, pulling it down diagonally. Repeat around the top edge of the cake until the whole cake is covered.
Notes
- Making your own dulce de leche: If you can't find store-bought dulce de leche, you can make your own by cooking a can of sweetened condensed milk in a pot of boiling water for 3 hours. Make sure the can is always submerged during the cooking process.
- Measure your batter: Making even layers of cake start with measuring your batter. For this recipe, that means about roughly 9.3oz of batter per pan (for three pans).
- Chill your cake: Cool cake is easier to cut and handle, so chilling your cake for a short while before use will make this process easier.
- Crumb coat: Spreading a thin layer of frosting around the sides and top of the cake, and then refrigerating it will lock in any crumbs and keep them from reaching the surface of your frosted cake.
- Air bubble-free frosting: If the frosting has a lot of air bubbles, reduce the speed on your stand mixer to low and beat for 3-5 minutes, or until smooth.
- The trick for smooth frosting: You’ll need a rotating cake stand and a bench scraper. Place the small end of the bench scraper on the cake stand, long end against the frosting and turn the table. Once excess frosting is removed, heat the scraper in hot water, wipe and drag around the outside of the cake.
- Storage: This cake will keep at room temperature, uncut, for 3-4 days. For best results, cover it with a plastic lid, bowl or place it in a cardboard box. This is easiest if you don’t add the cookies until you’re ready to serve.
- Storing cut cake: Once your cake is cut, you’ll want to protect the exposed cake area. The easiest way to do this is with a piece of plastic wrap or two.
Cake recipe adapted from Miette (2011), pg. 26
Nutrition
- Serving Size: 1 slice
- Calories: 557
- Sugar: 54.9g
- Sodium: 236mg
- Fat: 30.9g
- Saturated Fat: 17g
- Carbohydrates: 67.5g
- Fiber: .3g
- Protein: 6.4g
- Cholesterol: 106mg
If you liked this recipe, you might also like...
Update Notes: This post was originally published in April of 2018 but was republished with an updated format and tips in December of 2019.


Gloria says
Well I know one person that would LOVE this cake...hubby! A Caramel Macchiato is his "go to" Starbucks treat. Totally love the glaze on top of that cake. Stunning presentation.
Sue says
This looks and sounds spectacular! I love the way you've added the dulce de leche on the top. Total class and very elegant.
Tamara Andersen says
Your Caramel Macchiato Cake is stunning! I would love to serve this as the final course at an elegant dinner party...
I have SVT (sinus ventricular tachycardia) that I know is party driven by my morning caffeine. We drink "half and half," but there's still too much caffeine in it. I think I need to heed your example, and quit caffeine entirely! Thanks!
Kathryn @ FoodieGirlChicago says
Oh my! Not only is this cake lovely but I bet it tastes amazing!
Kiki Johnson says
This cake is a real showstopper and the combination of flavours could not be any more perfect! I switched to decaf about half a year ago as well and now I get seriously jittery if I have the real thing! Cannot handle it straight anymore but mixed into a cake, it should be just fine!
Paige says
My mouth is watering about this lovely looking cake! I wish I had a piece right now, it looks super moist!
Jordan says
GIRL! I am in the same boat right now. I just quit caffeine earlier this week because – heart palpitations, weird sweatiness, and general panicky behavior. I didn't have any headaches... THANKFULLY. But I miss the routine and the flavor! This cake NEEDS to be in my life.
Amanda Mason says
Ok, yes to everything about this recipe! It's ok that you only drink decaf...I'm not judging you! And I'd love to eat a piece of this cake with a nice cup of coffee right now! Absolutely beautiful! I love how you stepped out each picture so I understand the cake making process!
Jennifer says
Um, this cake looks and sounds AMAZING! Seriously...its 8pm on a Sunday and all I'm thinking about is how I need to go to my kitchen right now and make this cake! I've pinned it for later!
Femi. O says
Add me to the decaf only coffee club, although I consider myself more of a tea person, there is always that gravitational pull to that strong aroma and flavor of coffee! Glad I now have another way to indulge and the caramel is just the perfect icing on the cake (pun only slightly intended)! Can't wait to try this!
Stacey says
This is seriously stunning! I would love a slice or three of this right now, it sounds so decadent!
Julie says
First off, I feel your caffeine-free lifestyle pain. It turns out that caffeine is one of my migraine triggers, so I have been 100% caffeine free for 10 years (I never really missed the caffeine rush until I had kids, but man those 4 hours of sleep a night days are brutal now!). Secondly, this cake is GORGEOUS and I love that cake stand!
Amy Nash says
Oh my goodness, this cake is styled so beautifully! And I just love the full, rich flavors! It sounds divine.
Lynette says
Caramel Macchiato is my favorite thing to order at any coffee shop! I am definitely going to say that these flavors would be amazing with a cake!
Dennis Q says
How would this recipe convert into cupcakes serving and baking wise?
The Simple, Sweet Life says
Hi Dennis! This recipe would probably make somewhere in the vicinity of about 2 dozen cupcakes. As far as baking time, I'd check them around 15-16 minutes but they could take as long as 18-20 depending on how deep your cupcake liners are.
Bekah says
Not sure what I did wrong. I have tried this recipe and it cooks for such a long time and is just liquid. I opened the oven to check them after 40mins and they fell and are still liquid. It's just burnt crisps.
Claire | The Simple, Sweet Life says
Hi Bekah! I'm sorry to hear this recipe didn't work out for you. A cake that's not baking through sounds like an oven issue or a pan size problem. Are you using three 6" round pans? Do you have an oven thermometer so you can ensure you're oven is heating up to and staying at the correct temperature?