
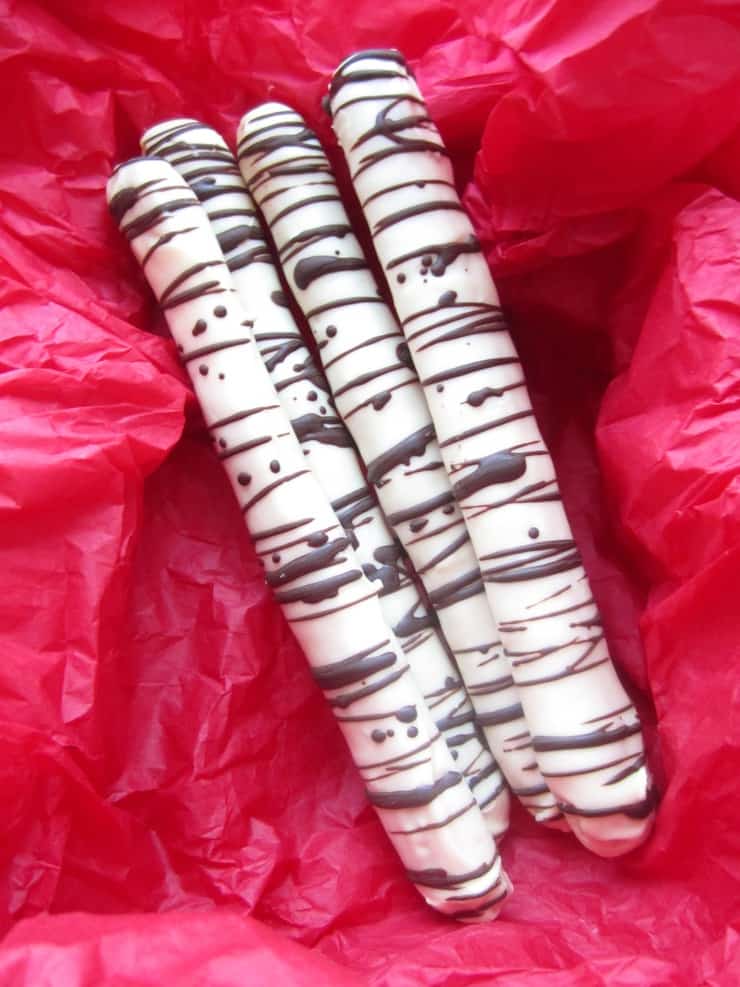
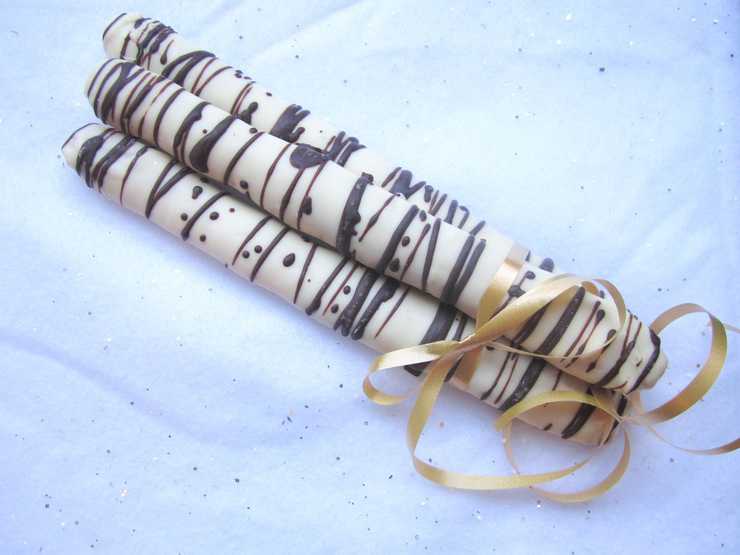
Another staple in our household for Christmas cookie baking is the birch bark cookie. My Mum came across this recipe years ago in one of those small Pillsbury booklets that you typically find at the check-out, and it's been a must-bake ever since. With a chewy cinnamon cookie base, and two kinds of chocolate coating, this cookie has always been a real crowd-pleaser at every Christmas even we've taken it to!
Birch Bark Cookies
Yields about 20 cookies
Ingredients:
For the cookies:
¾ cup granulated sugar
½ stick (57 grams) butter, room temperature
3-4 tbsp. whole milk (regular milk works too)
1 tsp. vanilla extract
1 egg
1 tsp. baking soda
1 tsp. cinnamon
2 cups all purpose flour
For the coating:
12 oz. (360 grams) white chocolate
3 oz. (90 grams) bittersweet chocolate
Start by preheating your oven to 400* Fahrenheit (205* Celsius). In a large bowl, cream the butter until smooth, and add the sugar, mixing until the butter appears grainy. Add the vanilla extract, baking soda, and cinnamon, and mix until all of the new ingredients are thoroughly incorporated into the butter mixture. Add the egg and mix until the dough is no longer lumpy, and there are no chunks of butter. One cup at a time, add the flour, mixing between each new addition. At this point the dough should be very dry and resemble course sand. Add the milk one tablespoon at a time, mixing between each new addition, until the dough starts to clump together in one ball. Be careful not to add too much milk at once as this dough can easily go from too dry to too wet in the space of a tablespoon. Once the dough is wet enough to form a ball, but not sticky, you can start forming the cookies. Beginning with a one inch ball of dough, roll it out into a 5-6 inch long "log" and place it on your baking sheet. Be careful not to roll the dough too thin, as it can easily cause cracking and broken cookies later on. Bake the cookies for 5-8 minutes until they are a light golden brown, and just beginning to brown on the bottoms.
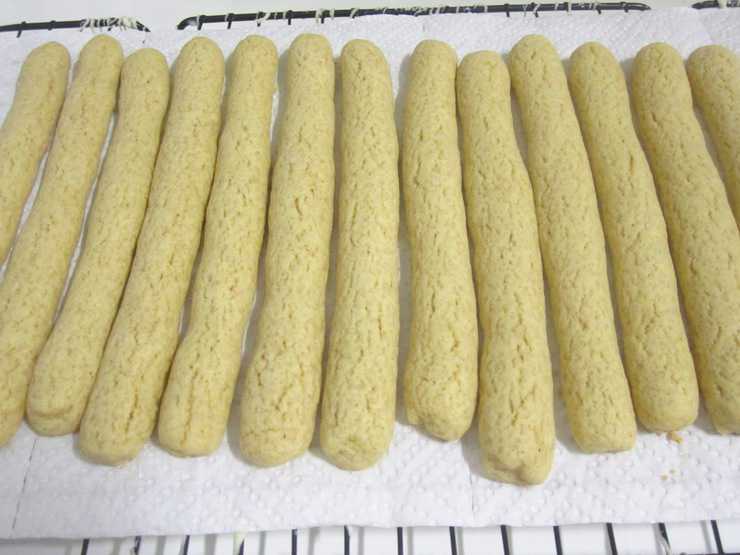
When you pull the cookies out of the oven, let them sit on the baking sheet for a minute or two to stiffen. Since these cookies are relatively thin, they can be prone to breaking if removed too early. Once the cookies have cooled a little, remove them to a cooling rack to finish cooling all the way. Make sure the cookies are thoroughly cooled before you attempt to coat them. I have broken so many cookies over the years by trying to coat them too early!
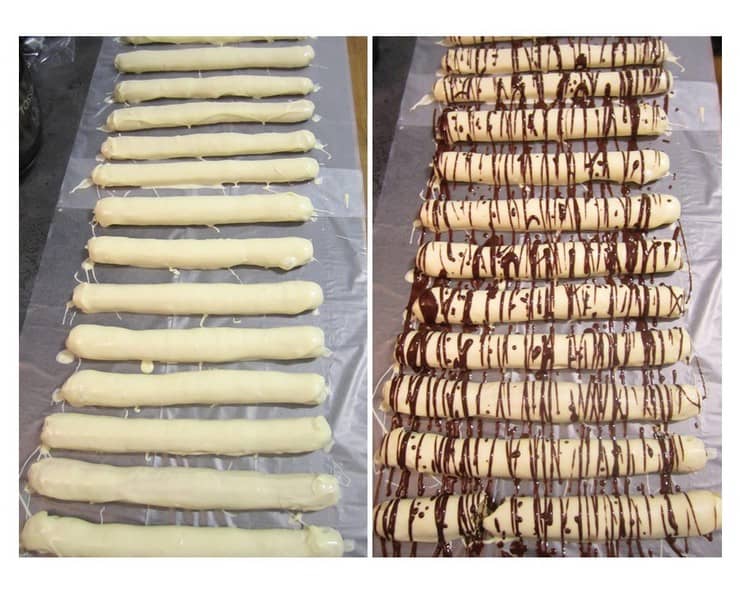
Once the cookies have cooled all the way, melt the white chocolate in a dish that is large enough to accommodate the cookies at their longest point. I typically use a casserole dish, but any other type of dish would work too. Roll the top side of the cookies in the white chocolate, and set on wax paper to dry. Once all of the cookies have been dipped in the white chocolate, you can melt the dark chocolate for drizzling. It's not important that the white chocolate be dry before applying the dark chocolate. Using a large spoon, drizzle the dark chocolate over the cookies. Be sure to let the chocolate harden (typically over night) before trying to pack them.
Happy baking!
Sources:
Recipe adapted from Pillsbury Christmas Baking, Nov. 1997, #201


elisebakes says
Adorable!!
Debbie Turner says
I am so thrilled to find this recipe! I bought the little pillsbury cookbook back in 1997 and have misplaced it after baking them for the last 21 years. Thank you!
Sherry says
One of the favorites in our home at christmas also...along with about 15 others.. but this one is on top of the list!!
Stephanie says
Mine are sticky before I even add milk & even when chilled flatten when I bake, what am I doing wrong?
Laura Mittlestadt says
I have made these for years for both my family and my SCA Chosen family. They are always a big hit no matter what. They work great for witchy fingers at Halloween as well.
Terri says
I got the recipe from the same book, which I have lost somehow! I’m so glad you posted it here because my family loves these cookies!
Cyndi Blue says
Thank you so much!!! This is a recipe that I made for my kids every year, but I had lost my recipe during a move. I am so grateful to be able to surprise them with these cookies again. It was always the first ones to disappear off my cookie platter